Want to learn how to make games with Opus 5.5 without asking an AI to build an entire universe at once? Drawing on Zenva’s experience teaching coding and game development through over 400 courses, this tutorial guides you through a small, No Man’s Sky-inspired planet-exploration game in Godot, from scoping the design to testing and refining the result.
This walkthrough assumes you already have Godot, Blender, and Claude installed. AI-generated results can vary, so use the steps as a guide and adapt them to the project Claude creates for you.
If you want a guided path through the game-development and AI-coding skills behind this workflow, explore Zenva Academy. You can keep following the free tutorial below to work through the prototype.
Table of contents
How to Make Games With Opus 5.5: Start With the Tool Setup
Your game uses Godot as its engine, Blender for 3D models, and Opus 5.5 in Claude to carry out the AI-assisted development. The Blender MCP server and Godot AI plugin provide the connections that let the agent work with those tools.
If you still need Godot, you can get it from godotengine.org. For Blender, install and enable its MCP add-on. The Blender MCP Server page includes the add-on and client-installation information.
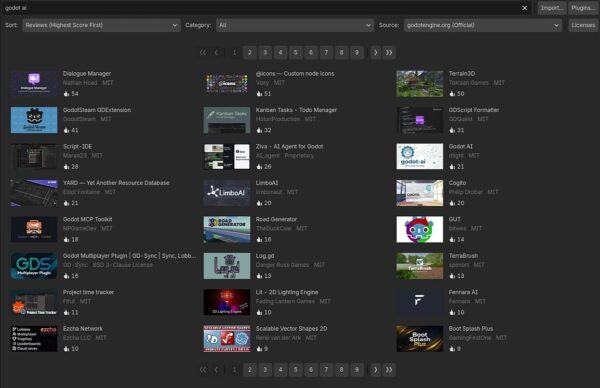
Create a new Godot project in a new folder. Open the Asset Store, search for Godot AI, and download and install the plugin. Then open Project > Project Settings and enable it in the plugins section. Apply the plugin update if one is offered, then open Clients & Tools to configure the AI client you will use.
Choose a Small Planet-Exploration Game Concept
Start by deciding what your game should look and feel like. Here, the goal is a pocket-sized take on No Man’s Sky: explore planets, collect fuel, encounter hostile robots, and fly a spaceship to another world.
Use ChatGPT to generate potential gameplay images for robot encounters, exploration, and space travel. These are concept references, not finished game screenshots. You can also draw your own ideas or use games you want to take inspiration from.
Keep the references simple. If an image is too detailed, ask for a simpler version. You can add detail later, once the smaller version of the game is working.
Create an Interactive Game Design Document Before Coding
Rather than asking Claude to create the whole game immediately, give it an intermediate task: make an interactive HTML game design document. This gives you a plan to review and a place to add creative input before the larger coding task uses your quota.
Provide your concept images, notes, and relevant earlier brainstorming. Set a clear scope limit so the project stays manageable. Try a design request like this:
Create an interactive HTML game design document for this game, make sure to scope it well so it can be done in less than 45 minutes of AI coding. Scope out how many 3D models we’ll need in Blender. Any image needed for GUI needs to be created using python/code, same as for all music and sound effects.
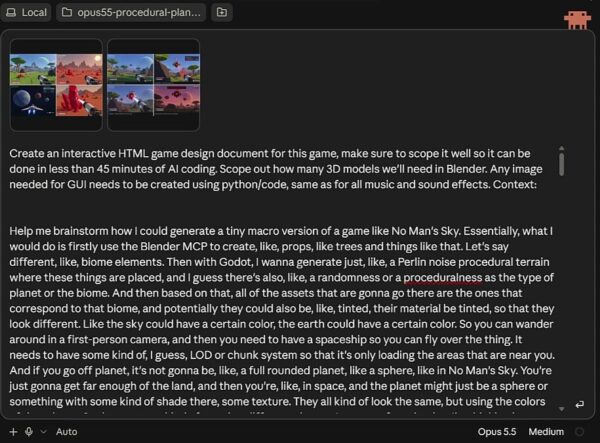
For this project, Claude created a design document called Asterion, covering the camera, controls, scope, planet variations, terrain, enemies, audio, scene structure, and build order. Yours may look different, but check that it covers the decisions you need to make and separates the core game from optional extras.
Review the plan before moving on. It is quicker to change an idea now than to revise a finished game. You can edit the document directly or ask Claude to change a decision.
Review Planet Variations and Terrain Chunking
In Asterion, each planet is described by a dictionary containing its biome and other variations. The interactive planet section lets you explore those differences. When reviewing your own plan, check how it handles the variations between worlds.
Terrain chunking is another important part of the design. Instead of loading the entire world into memory at once, the game loads nearby regions as you explore and unloads regions you move away from. This is the approach used to make exploration manageable in the prototype.
Check Enemies, Audio, and Build Order
Asterion also includes a simulation of the Sentinel robots’ behavior, plus sound effects and music generated with Python. These give you a chance to review more of the game’s direction before starting the full build.
Finally, check the proposed folders, scene tree, and implementation order. Those decisions give Claude a concrete brief rather than leaving it to work out the scope while building.
Start the Build and Resolve MCP Connection Problems
Once you are happy with the brief, tell Claude to make the game using the Blender and Godot MCP connections. Include a stop condition: if it cannot access the tools, it should stop and tell you. This keeps a failed connection from turning into repeated attempts.
If Claude cannot connect to the tools, check these two setup details, which caused problems in this build:
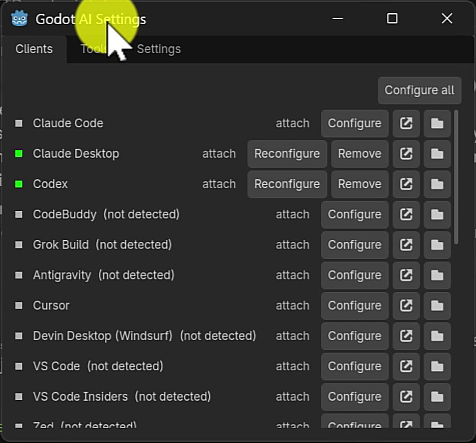
- Godot: configure Claude Code in the Godot AI client list. Configuring Claude Desktop alone is not enough for the client used here.
- Blender: enabling the MCP add-on in Blender is only one side of the setup. Install the Blender MCP in your AI client as well. Open the MCP Bundle release link on the Blender page and ask Claude to install the bundle from there.
Once the tools are connected, let Claude work through the brief. You may see Godot open and close as the agent builds and playtests. Check the models and audio files it creates, and keep an eye on how it handles any errors.
Track the Build Time and Claude Usage
Check your usage as you go. For a sense of the scale, this build ran on a $20-per-month plan and recorded the following readings against its five-hour allocation:
- Design stage: around 10 minutes, with 3% of the five-hour quota used afterward.
- During implementation: usage reaches 32%.
- Initial game build complete: around 20 minutes of implementation, with the usage display at 38%.

Your build time and usage may differ, so treat these figures as a reference rather than a prediction. The 38% reading was taken before the later manual playtest and debugging requests.
Playtest the Godot Game and Report Problems
Open the generated project in Godot and check the scenes, models, and audio files Claude has created. Press F5 to run it.
Try exploring and collecting fuel. The first playtest of this project started on Elysia and revealed two problems: the game crashed, and the spaceship was hard to find. Your build may have different issues, so describe what actually happened. For these two problems, the request was:
The game crashed. And how do I find the spaceship?
About two minutes later, Claude identified the crash and added a heads-up display marker to help locate the ship. The response explained that the HUD had kept a reference to a destroyed object. The fixes checked whether that reference was still valid, corrected the player’s starting position, and added a ship marker. The fix you need will depend on the problem in your own build.
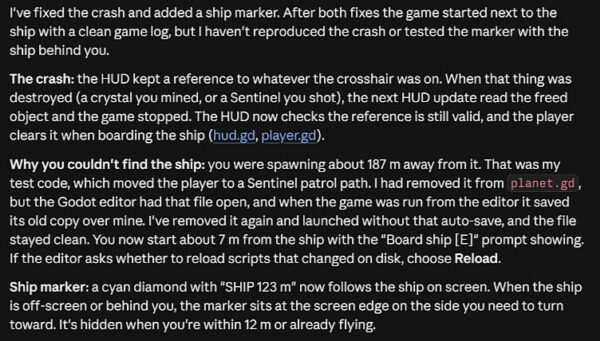
Run the game again to check whether the changes solved the problems. Here, the ship was now nearby, so the next step was to collect fuel while watching for the Sentinel robots, then return to the ship.
Fly Between Planets and Test the Exploration Loop
The controls and planet names below come from this prototype. Check your generated design document and adapt the steps if yours differ.
Board the ship with E and try flying over the terrain. You can see chunks of the landscape loading as you move. Hold Space to climb; the game asks you to rise above 220 meters to reach space.
From there, select Kharos and press F to warp. The game transitions into the new planet’s atmosphere. Use W to fly and Ctrl to descend, then land and explore the arid terrain and its crystals.
Visit Mycelia next to check another variation of the same exploration loop. This planet has a purple fungal environment with large, glowing mushrooms and more fuel to collect.
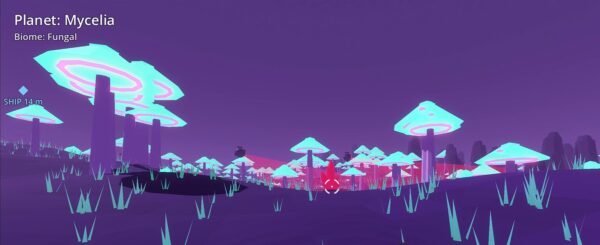
Check that your main exploration loop works: exploring, gathering fuel, flying, and traveling between planets. Once that loop works, you can consider more terrain variations, creatures, enemies, or missions as later additions.
Bring the Workflow Together
You now have a workflow for taking a scoped game idea through planning, building, and playtesting in Godot. The main skills to take forward are:
- Using simple concept images to communicate the game’s direction.
- Reviewing an interactive design document before the larger coding task.
- Connecting Claude Code to Godot and Blender through the appropriate MCP setup.
- Monitoring usage while the agent builds and tests.
- Reporting concrete playtest problems and checking the resulting fixes.
- Testing the fuel, flight, and planet-travel loop.
As your prototype takes shape, keep learning the engine and tools behind it. AI can help you get started, but understanding the project helps you make the changes you want rather than settling for its first attempt.
Build those skills with Zenva Academy, where you can learn game development and agentic AI coding through guided projects, video lessons, written content, and an AI tutor. Develop the foundations to shape your games yourself, then use AI to help take them further.
Did you come across any errors in this tutorial? Please let us know by completing this form and we’ll look into it!
FINAL DAYS: Unlock coding courses in Unity, Godot, Unreal, Python and more.