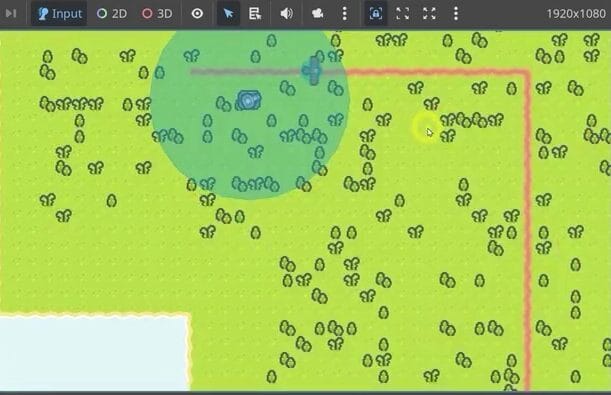
Getting enemies, towers, and projectiles working together is the foundation of a Godot tower defense level. Drawing on Zenva’s experience helping a community of over 1,000,000 learners and developers gain digital skills, this walkthrough breaks that project into connected steps: move airplanes along a path, make towers track and shoot at them, then build an island with a draggable camera.
This tutorial assumes you have Godot installed, know basic Godot and GDScript, and are using the supplied course project assets with the existing Data.Bullet enum.
Table of contents
Download Project Files
The project files and full project are available through the course included in the Godot 4 Game Development Mini-Degree. If you want the full guided path, you can follow it there, or continue with the free tutorial below.
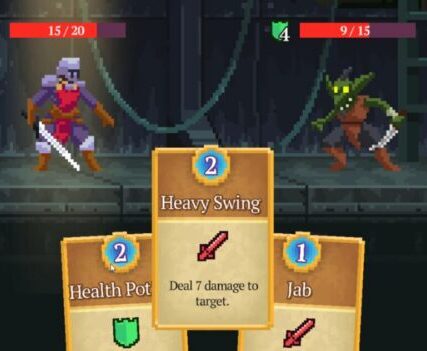
Create Enemies for Your Godot Tower Defense Level
Start with airplanes that follow a predefined route. A Path2D describes that route, a PathFollow2D moves along it, and an Area2D forms the root of the enemy scene.
Creating the Level Scene
Create a new 2D scene with a Node2D root named Level. Make a scenes folder with a levels subfolder, then save the scene there as level.tscn.
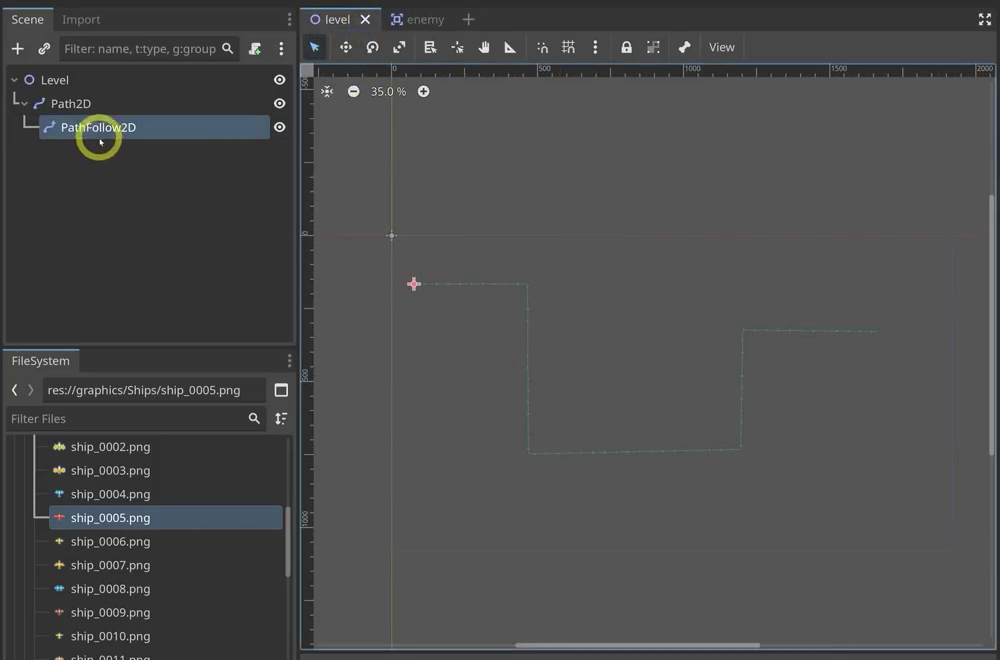
Add a Path2D child to Level. With it selected, choose the Add Point tool, identified by its green plus icon, at the top of the 2D viewport. Click around the viewport to draw a curve across the screen.
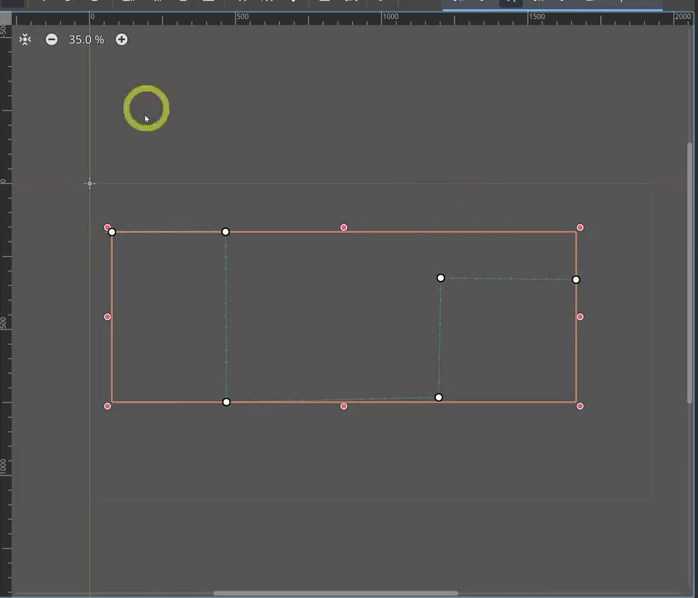
Next, add a PathFollow2D as a child of Path2D. This helper follows its parent path. Its Inspector exposes two useful properties:
Progressmeasures distance along the path in pixels.Progress Ratioranges from 0 at the start to 1 at the end.
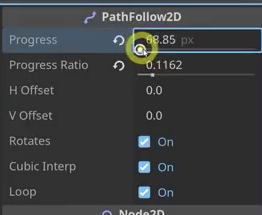
A short path can make Progress feel coarse because it contains relatively few pixels. Drawing a curve across more of the screen gives you finer control.
Building the Enemy Scene
Create another scene with an Area2D root named Enemy. Save it as enemy.tscn in a new scenes/enemies folder, then add two children:
- A
Sprite2Dusing a ship texture from the project’s ships graphics folder. - A
CollisionShape2Dwith a newCircleShape2D, sized to roughly match the ship.
Fixing the Airplane’s Orientation
Temporarily place the enemy under PathFollow2D in the level scene and increase Progress. The airplane moves and rotates through corners, but it may face sideways.
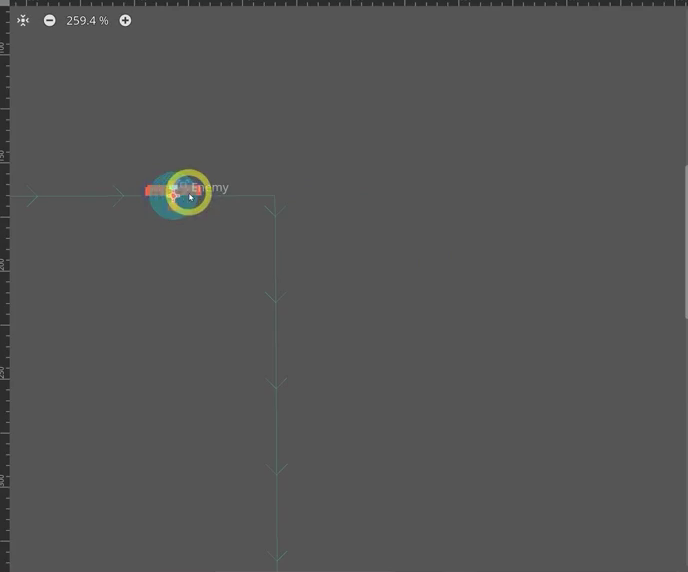
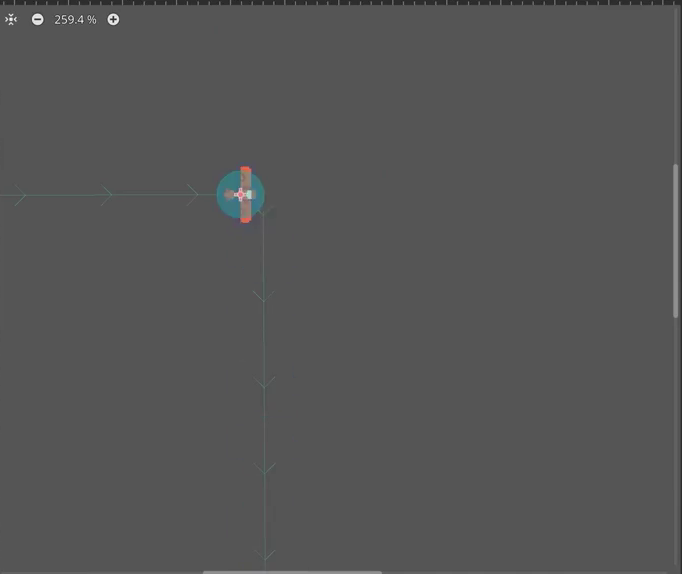
Godot’s forward direction for 2D nodes is the positive X-axis, or right. Rotate the Sprite2D inside the enemy scene until its nose points right, then save. The airplane now faces along the path.
Spawning the Enemy From Code
With the orientation checked, remove the temporary PathFollow2D and enemy instance from level.tscn. You should have Level and its Path2D again.
Attach a script to Level, accept the defaults, and save it as level.gd. Preload the enemy scene, create a path follower and an enemy in _ready, then put the enemy under the follower and the follower under the path:
extends Node2D

var enemy_scene = preload("res://scenes/enemies/enemy.tscn")

func _ready():
    var path_follow = PathFollow2D.new()
    var enemy = enemy_scene.instantiate()

    path_follow.add_child(enemy)
    $Path2D.add_child(path_follow)
Run the level. An airplane appears at the start of the path. It is correctly parented, but it does not move yet.
Adding Movement Through the Enemy Script
Attach a script named enemy.gd to the enemy’s root, keeping the defaults. The enemy will handle its own movement through a reference to its PathFollow2D. A setup function receives that reference, and _process advances its progress each frame:
extends Area2D

var path_follow: PathFollow2D

func setup(new_path_follow: PathFollow2D):
    path_follow = new_path_follow

func _process(delta: float):
    path_follow.progress += 200 * delta
In level.gd, call setup immediately after instantiating the enemy:
extends Node2D

var enemy_scene = preload("res://scenes/enemies/enemy.tscn")

func _ready():
    var path_follow = PathFollow2D.new()
    var enemy = enemy_scene.instantiate()

    enemy.setup(path_follow)

    path_follow.add_child(enemy)
    $Path2D.add_child(path_follow)
The airplane now travels along the curve. A movement value such as 20 makes it slow and easy to follow, while 200 covers the path much faster.
Reaching the End of the Path
For now, reaching the end should print a message and remove the enemy. This gives you a place to add player damage later, without implementing that system here.
Update enemy.gd to check whether progress_ratio has reached 0.99:
extends Area2D

var path_follow: PathFollow2D

func setup(new_path_follow: PathFollow2D):
    path_follow = new_path_follow

func _process(delta: float):
    path_follow.progress += 200 * delta

    if path_follow.progress_ratio >= 0.99:
        print("damage")
        queue_free()
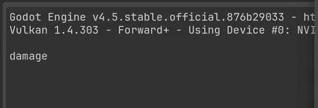
Run the level again. When the airplane reaches the end, the console prints damage and queue_free removes the enemy.
Build a Tower That Detects and Tracks Enemies
Next, build a tower that can detect those enemies as they pass. A parent tower scene and script will hold shared behavior, while an inherited basic tower handles its own visuals and aiming.
Creating the Base Tower Scene
Create a scene with a Node2D root named Tower. Save it as tower.tscn in a new towers folder. This will be the common foundation for your tower types.
Inheritance for Tower Variations
Right-click tower.tscn in the FileSystem and choose New Inherited Scene. Using tower.tscn as the parent, rename the new root to TowerBasic and save it as tower_basic.tscn in the same folder.
Inheritance lets tower types share behavior while using different sprites or attack patterns.
Adding the Tower Sprites
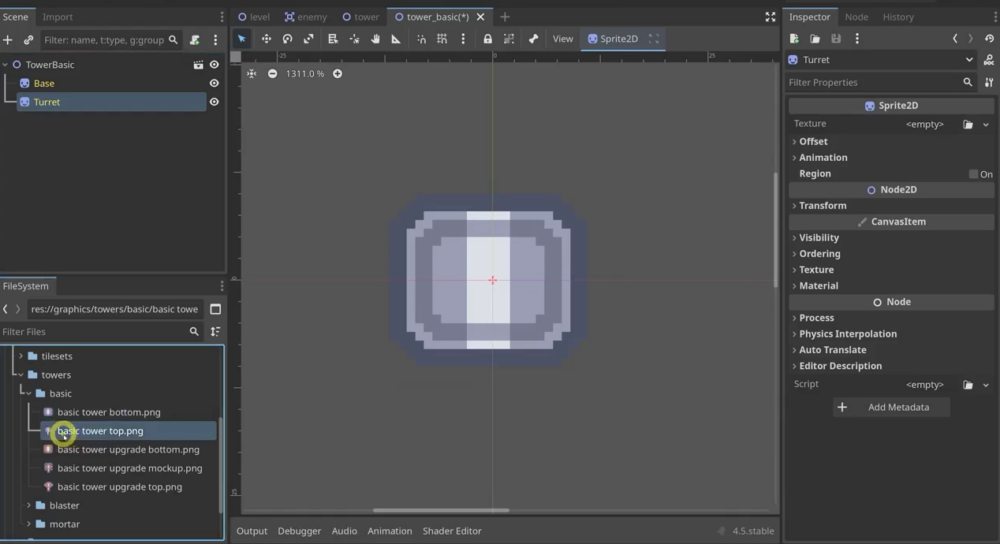
In the parent tower.tscn, add two Sprite2D children named Base and Turret. Separating them lets the turret rotate without moving the base.
Open tower_basic.tscn and assign textures from the project’s towers graphics folder: basic tower bottom.png for Base and basic tower top.png for Turret. Assigning textures in the inherited scene keeps the parent structure reusable.
Scripting the Towers
Attach a script to the parent tower’s root. Declare the global Tower class and an array for enemies in range:
class_name Tower extends Node2D

var enemies: Array
The inherited scene initially uses this same script. In tower_basic.tscn, detach it from the root and attach a new script, tower_basic.gd. Make it extend Tower:
extends Tower
The basic tower can now use the variables and functions defined in tower.gd, then add its own behavior.
Enemy Detection Area
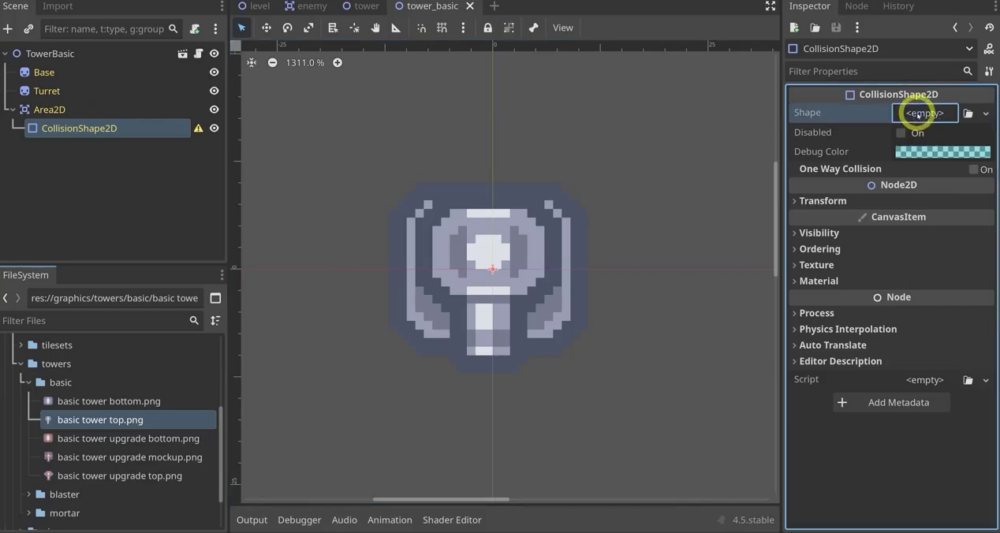
Add an Area2D to the parent tower, with a CollisionShape2D child. Leave the shape empty in the parent so individual tower types can choose their own range.
In tower_basic.tscn, assign a new CircleShape2D to that collision shape and set its radius to roughly 100 pixels. Back in the level, add a Node2D named Towers. Place an instance of TowerBasic under it, close enough to the path for enemies to enter its range.
Configuring Collision Layers
The detection area needs to see enemies, and enemies need to detect the bullets you will add shortly. Set their collision properties as follows:
- Enemy: collision layer 1, mask 2. Enemies occupy layer 1 and detect bullets on layer 2.
- Tower detection Area2D: clear all collision layers and set the mask to 1. The tower’s area detects enemies without needing its own layer.
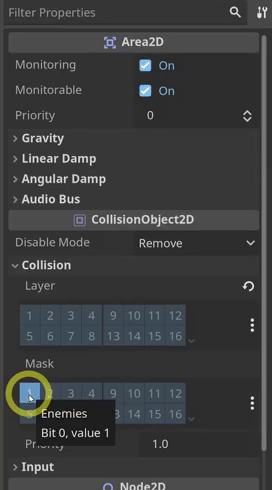
Rename the tower’s Area2D to EnemyDetectionArea. Select it, open the Node panel, and connect its area_entered and area_exited signals to the Tower script.
Tracking Enemies Entering and Exiting
Append enemies when they enter the detection area and erase them when they leave. Checking membership avoids adding duplicates or removing an area that is not present:
func _on_enemy_detection_area_area_entered(area: Area2D) -> void:
	if area not in enemies:
		enemies.append(area)


func _on_enemy_detection_area_area_exited(area: Area2D) -> void:
	if area in enemies:
		enemies.erase(area)
Testing the Detection
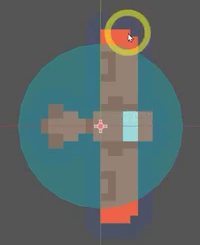
To check the result, print the enemies array from the tower script’s _process function while the game runs. Enable Debug > Visible Collision Shapes to see the detection circle.
An enemy’s Area2D should appear in the printed array when it enters the circle and disappear when it leaves.
Rotating the Turret
With detection working, add aiming to tower_basic.gd. If the array contains an enemy, point the turret toward the first enemy’s global position:
func _process(_delta: float) -> void:
	if enemies.size() > 0:
		$Turret.look_at(enemies[0].global_position)
Use global_position here, not position. The enemy’s local position stays at (0, 0) because its parent PathFollow2D moves along the curve. The global position gives the turret the enemy’s world-space location.
Correcting the Rotation Offset
Run the game. The turret tracks the enemy, but it points 90 degrees off target. To see this more clearly, add a Camera2D to the level and set its zoom to around 3.
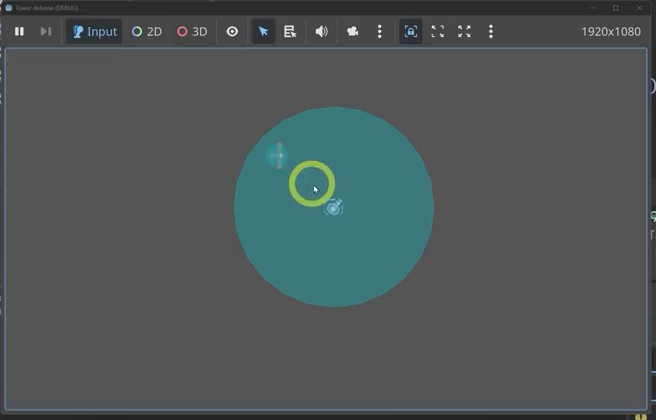
The turret texture points down, while look_at expects the node’s forward direction to be right along the positive X-axis. Subtract 90 degrees after calling look_at. Rotations use radians, so a quarter of a full 2 * PI circle is PI / 2:
func _process(_delta: float) -> void:
	if enemies.size() > 0:
		$Turret.look_at(enemies[0].global_position)
		$Turret.rotation -= PI/2
The turret now points at the enemy as it moves through the detection area. Next, you can use that rotation to direct its shots.
Connect Towers and Enemies With Bullets
Build bullets as a separate Area2D scene. A timer controls when the tower fires, and signals connect the tower to the level, which creates each bullet.
Fixing the Unused Delta Warning
The tower’s aiming function does not use its frame-time argument. Keep the underscore in _delta to tell Godot that this is intentional and avoid an unused-parameter warning:
# tower_basic.gd
func _process(_delta: float) -> void:
    if enemies.size() > 0:
        $Turret.look_at(enemies[0].global_position)
        $Turret.rotation -= PI/2
Creating the Bullet Scene
Create a scene with an Area2D root named Bullet. Save it as bullet.tscn under scenes/bullets.
Add a Sprite2D and a CollisionShape2D as children. Assign a texture from graphics/bullets, such as default.png. Give the collision shape a new RectangleShape2D and size it to roughly match the sprite.
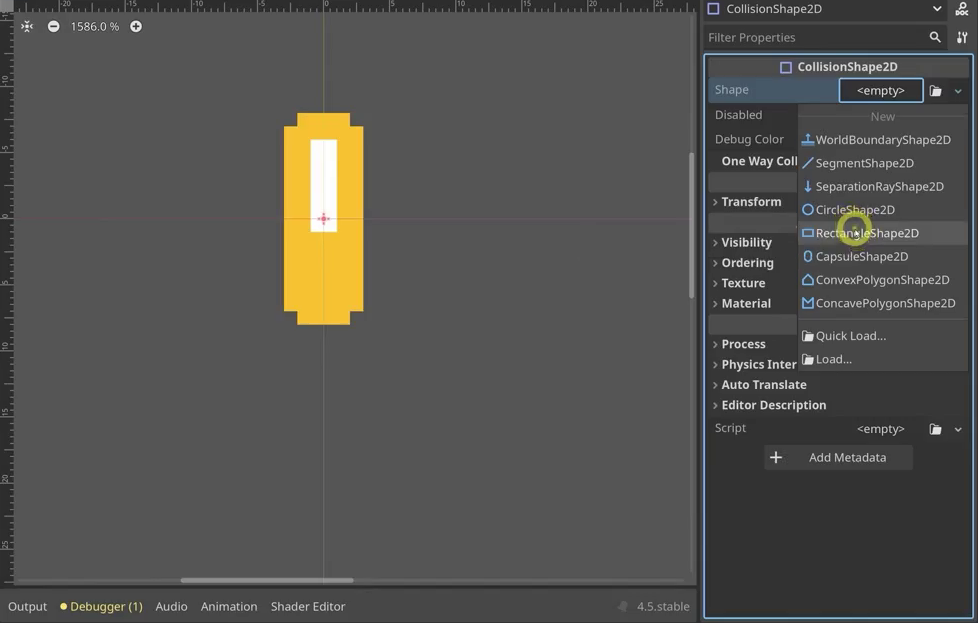
Select the bullet’s root and set its collision layer to 2 and mask to 1. Bullets now occupy their own layer and detect enemies on layer 1.
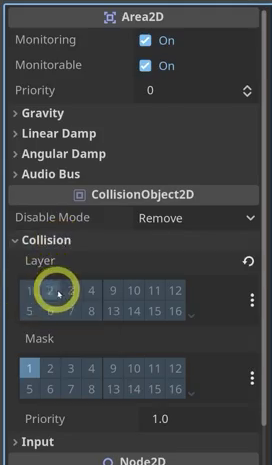
In the level scene, add a Node2D named Bullets. Spawned bullets will become its children.
Adding a Reload Timer to the Tower
Open the basic tower scene and add a Timer named ReloadTimer. Enable Autostart and leave One Shot disabled so it runs continuously.
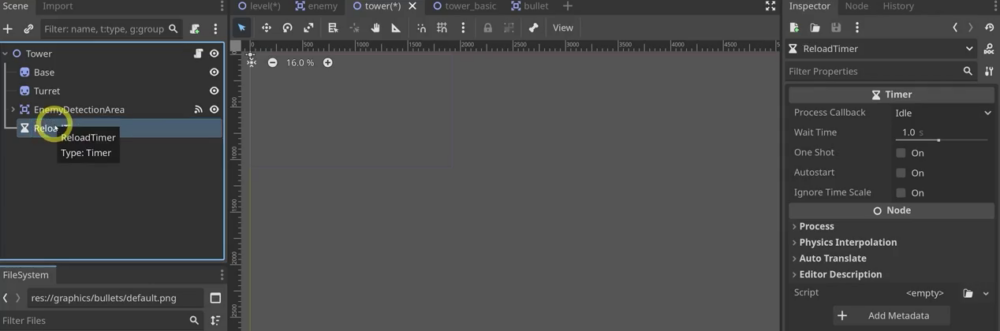
Defining a Reusable Shoot Signal
In the parent tower.gd script, define a shoot signal that all tower types can use. It carries a position, an angle, and a Data.Bullet enum identifying the bullet type. The warning annotation prevents a warning when the parent class does not emit the signal itself:
# tower.gd
class_name Tower extends Node2D

var enemies: Array
@warning_ignore("unused_signal")
signal shoot(pos: Vector2, direction: float, bullet_enum: Data.Bullet)
Emitting the Signal From the Basic Tower
Select ReloadTimer, open the Node tab, and connect its timeout signal to tower_basic.gd. Begin by emitting shoot with the tower’s position, an angle of 0, and Data.Bullet.SINGLE:
# tower_basic.gd
func _on_reload_timer_timeout() -> void:
    shoot.emit(position, 0, Data.Bullet.SINGLE)
Spawning Bullets in the Level
In level.gd, preload the bullet scene and add the tower’s shoot connection to _ready. The new create_bullet function creates an instance, passes its setup values, and adds it to Bullets:
# level.gd
var bullet_scene = preload("res://scenes/bullets/bullet.tscn")

func _ready() -> void:
    $Towers/TowerBasic.connect("shoot", create_bullet)

func create_bullet(pos: Vector2, angle: float, bullet_enum: Data.Bullet):
    var bullet = bullet_scene.instantiate()
    bullet.setup(pos, angle, bullet_enum)
    $Bullets.add_child(bullet)
The explicit parameter types help catch mistakes when a signal passes the wrong kind of value. You will define the bullet’s setup method next.
Writing the Bullet Script
Attach a script to the root of bullet.tscn with the default template. Start by giving setup the job of placing the bullet:
# bullet.gd
extends Area2D

func setup(pos, angle, _bullet_enum):
    position = pos
At this stage, running the game spawns bullets at the tower’s position whenever the timer fires. They stack up because they cannot move yet.
Giving Bullets Movement
Add a direction and speed, then move the bullet in _process. Convert the incoming angle to a Vector2 by rotating Vector2.DOWN, and set the sprite’s rotation to the same angle:
# bullet.gd
extends Area2D

var direction: Vector2
var speed := 200

func setup(pos, angle, _bullet_enum):
    position = pos
    direction = Vector2.DOWN.rotated(angle)
    rotation = angle

func _process(delta: float) -> void:
    position += direction * speed * delta
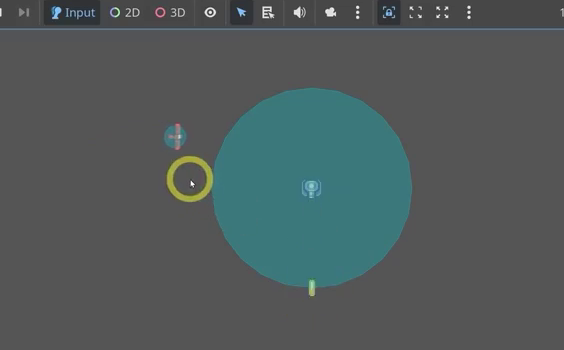
Because the tower still supplies an angle of 0, the bullets fly straight down, even when an enemy is in range.
Refining the Shooting Logic
Update the timer handler to fire only when the enemies array is not empty, using the turret’s current rotation. An empty array evaluates to false, so if enemies: provides that check.
Also offset the starting position so bullets appear at the turret’s nozzle instead of the tower’s center. The normalized direction multiplied by 16 supplies an offset suited to this sprite:
# tower_basic.gd
func _on_reload_timer_timeout() -> void:
    if enemies:
        var dir = Vector2.DOWN.rotated($Turret.rotation).normalized()
        shoot.emit(position + dir * 16, $Turret.rotation, Data.Bullet.SINGLE)
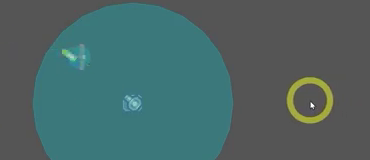
The tower now aims at an enemy and fires in that direction.
Handling Bullet Collisions
In the enemy scene, select the root Area2D and connect area_entered to enemy.gd through the Node tab. With the collision layers and masks configured, the detected area is a bullet. Remove it with queue_free:
# enemy.gd
func _on_area_entered(bullet: Area2D) -> void:
    bullet.queue_free()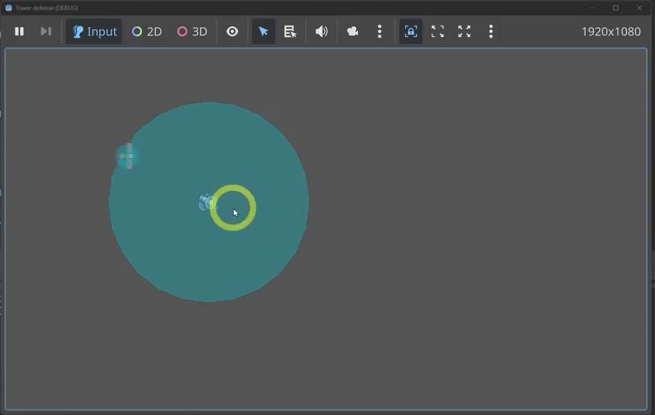
Bullets now disappear on contact with enemies. That completes the connection between tower firing, bullet creation, and collision handling.
Create the Tile-Based Island and Draggable Camera
With movement, aiming, and shooting connected, you can give the level a background. Use a TileMapLayer and terrains to paint an island and path, then add a camera you can drag around the level.
Adding the Background Node and a TileMapLayer
In the Level scene, add a Node2D named BG at the top of the scene tree so the background renders behind everything else.
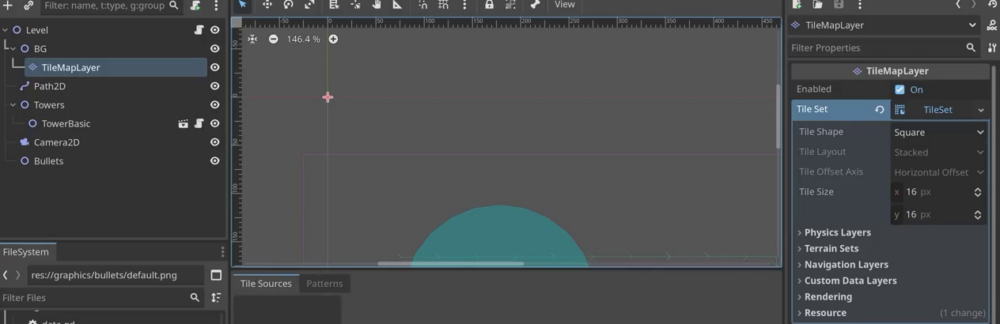
Add a TileMapLayer inside it. In the Inspector, create a new TileSet through the Tile Set property. Keep the Square tile shape and set the tile size to 16 by 16 pixels to match the art.
Open the TileSet editor at the bottom of the screen and drag rest_tile_bg.png into its sources panel. When Godot asks to create an atlas, choose Yes.
Setting Up an Autotile Terrain With Match Corners and Sides
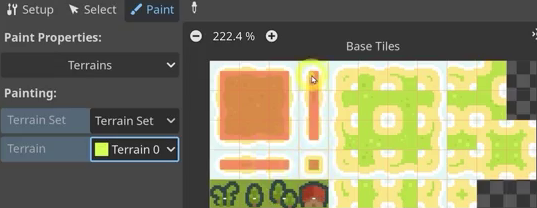
In the TileSet Inspector, add an element under Terrain Sets. Set its Mode to Match Corners and Sides, then add one terrain within it and give it a reddish color. This editor-only color marks which parts of each tile count as land.
In the TileSet editor’s Paint tab, select Terrain Set 0 and Terrain 0. Paint the land portions of each atlas tile red. Cover grassy center tiles completely, but mark only the land on edge tiles. These markings let Godot choose tiles that fit their neighbors.
Painting the Island
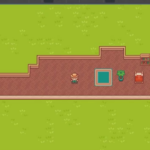
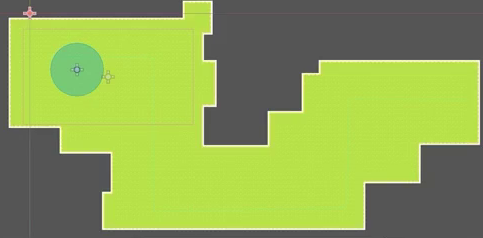
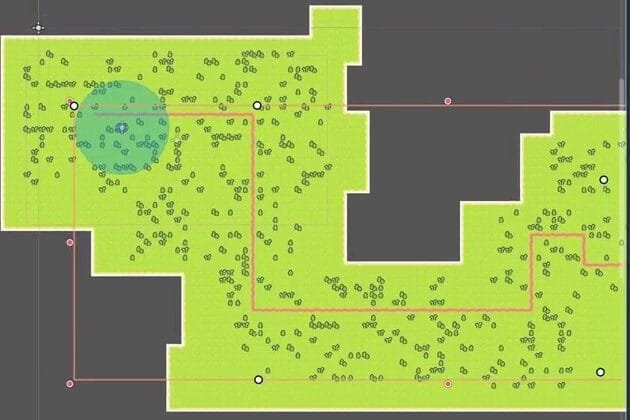
Select the TileMapLayer, open the TileMap editor’s Terrains tab, and choose Terrain 0. Paint directly in the scene, using the rectangle tool to block out the island if you like. Godot selects the border, corner, and interior tiles as you paint, and the live preview lets you adjust the shape.
Adding Variation With Tree Tiles
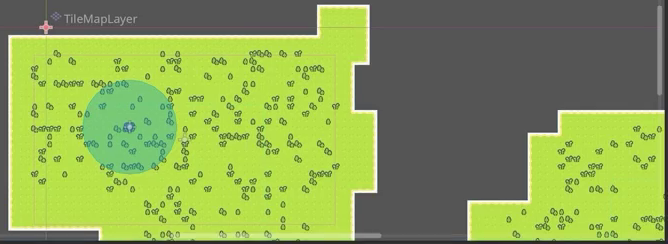
To mix trees into the grass, return to the TileSet editor’s Paint mode. Activate the tree variation tiles and cover them fully in red so they belong to the same land terrain.
With equal probabilities, painting this terrain produces a dense forest. Select the tree tiles and lower their Probability to a value such as 0.1. Repaint the island to scatter trees less frequently.
Creating the Path Terrain With Match Sides
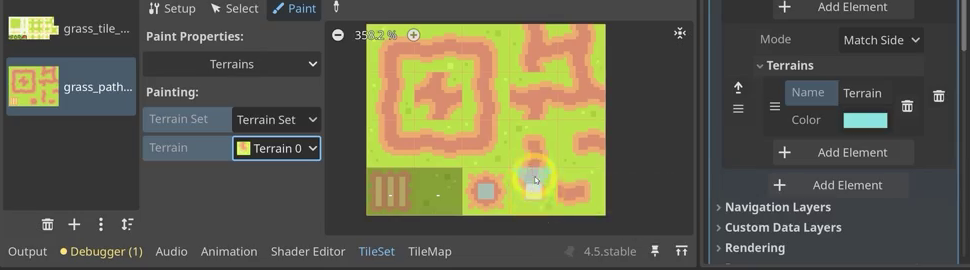
Add grass_paths.png as another atlas source. Create a new terrain set, not another terrain inside the existing set. Give it one terrain, set its Mode to Match Sides, and choose a contrasting color such as blue.
This mode suits a path that connects horizontally and vertically without corner variants. In Paint mode, mark the appropriate center and cardinal directions on each path tile. For example, a horizontal segment uses its center, left, and right; a T-junction uses its center and the three relevant directions.
Painting the Path and Updating Path2D
In the TileMap editor, choose the path terrain, such as Terrain Set 1 / Terrain 0, and paint the route across the island. Godot chooses the connecting tiles for you.
The painted route does not replace the gameplay path. Select Path2D and redraw its curve to follow the tiles. Clearing the old points and placing new ones can be easier than adjusting the old curve. Run the scene to see enemies follow the updated route.
Building a Draggable Camera
To look around a level larger than the viewport, create a new scene with a Camera2D root named PlayerCamera. Save it, for example in a ui folder, and attach a script.
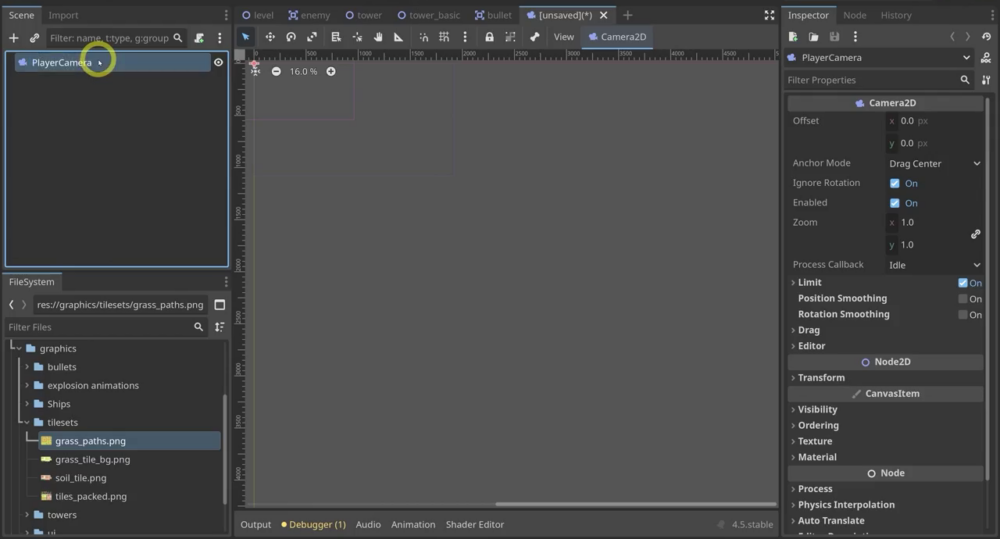
Add a boolean to track dragging and an exported float to control the response to mouse movement. Exporting the value lets you adjust it in the Inspector:
extends Camera2D

var drag: bool
@export var acceleration: float = 0.4
Handle mouse input in _input. For an InputEventMouseButton, check whether button_index is 3, the middle mouse button. Values 1 and 2 represent the left and right buttons.
A click produces a press event and a release event. Assigning event.pressed directly to drag sets it to true while pressed and false when released.
For an InputEventMouseMotion, move the camera only while dragging. Subtract the mouse movement in event.relative, multiplied by acceleration, to get the grab-and-drag feel:
func _input(event: InputEvent) -> void:
	if event is InputEventMouseButton and event.button_index == 3:
		drag = event.pressed
	if event is InputEventMouseMotion:
		if drag:
			position -= event.relative * acceleration
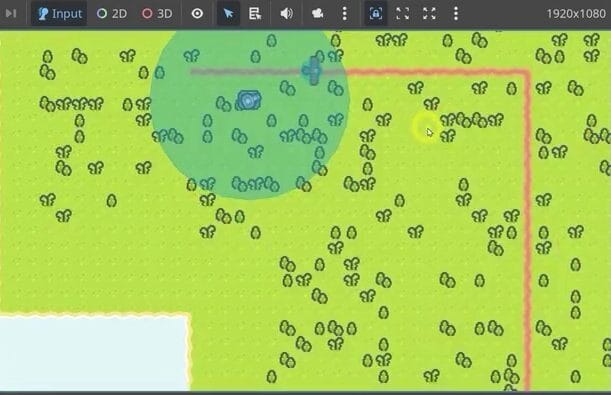
In Level, replace the old Camera2D with an instance of PlayerCamera. Hold the middle mouse button and drag to pan. Try Zoom at (3, 3) to bring the action closer, and adjust Acceleration, for example to 0.25, in the Inspector.
Setting the Background Clear Color
Areas outside the TileMap still show the default gray background. To give the island a light blue surround, add the following line to level.gd‘s _ready function:
func _ready() -> void:
	RenderingServer.set_default_clear_color('dff6f5')
The RenderingServer now clears the viewport with the soft blue hex color dff6f5 before rendering each frame. Run the game to see the island against that water-colored background, with enemies following the painted route and the camera ready to pan.
Review Your Tower Defense Level
You now have the core pieces of a Godot tower defense level connected, from moving enemies to towers that aim and fire. Along the way, you have:
- Created an enemy scene, spawned it under
PathFollow2D, and handled the end of its route. - Used tower inheritance, detection signals, and turret rotation to track enemies in range.
- Connected a reload timer and shooting signal to bullet movement and collision cleanup.
- Painted an island and path with terrains, then aligned the
Path2Dcurve with the tiles. - Added middle-mouse camera dragging and a background clear color.
Next, run the level and check how these pieces work together, from the airplane entering a tower’s range to bullets disappearing on contact. You can also revisit the tree probability and camera acceleration to adjust the level’s appearance and feel.
Build on this tower defense foundation with the Godot 4 Game Development Mini-Degree. Follow a structured learning path to strengthen your Godot skills and work toward games of your own.
Did you come across any errors in this tutorial? Please let us know by completing this form and we’ll look into it!
FINAL DAYS: Unlock coding courses in Unity, Godot, Unreal, Python and more.