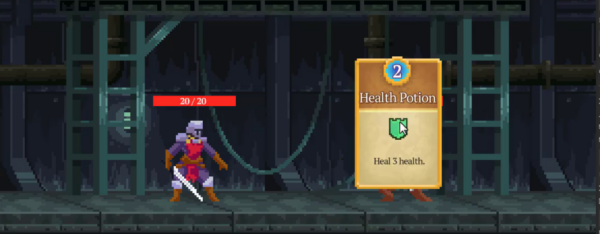
A flexible Godot card system needs more than a card image. It needs reusable data, a readable visual scene, and input logic that can identify, hover, and drag the correct card when several cards overlap. Drawing on Zenva’s catalog of more than 400 coding and game-development courses, this guide walks you through a practical implementation: creating attack and healing resources, connecting them to a visual card, and adding smooth hover-and-drag interaction.
This tutorial assumes you already have a Godot project with a battle scene, card artwork, font files, and the character scripts used by the card effects.
Download Project Files
The starter files and full project are available through the course included in the Godot 4 Game Development Mini-Degree. You can use them to follow the complete setup while continuing with this free tutorial.
Build the Godot Card System
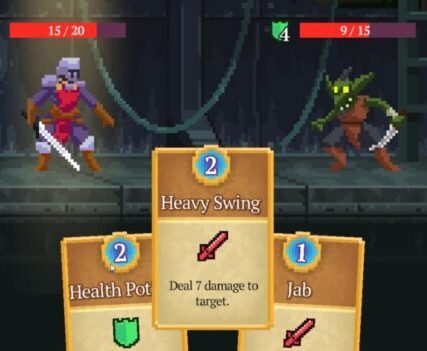
You will build the system in five connected stages. First, you will define reusable card data. Next, you will create the visual card scene and connect it to that data. Finally, you will add a card interactor that selects the topmost card and manages hovering and dragging.
Card Data
Cards drive the actions performed by both the player and the enemy. Each card that appears on screen is a node that references a separate data resource. This separation lets you define reusable card properties and behavior without tying them to a particular visual card instance.
Start by creating a shared CardData resource. You will then specialize it for attack and healing effects and configure one resource for each card type.
Create the Base Card Data Resource
Inside Scripts/Cards, create card_data.gd. Mark the class as abstract, give it the global name CardData, and extend Godot’s Resource type:
@abstract
class_name CardData
extends Resource
An abstract class provides the shared structure for its subclasses, but it cannot be instantiated directly. Instead of creating a plain CardData resource, you will create resources based on concrete subclasses such as AttackCardData and HealCardData.
Add three exported properties for the information every card needs:
@export var display_name : String
@export var cost : int = 1
@export var icon : Texture2D
display_nameis the name shown on the card.costis the mana required to cast the card, with a default value of1.iconis the texture displayed on the card.
Declare the Shared Card Behavior
Different card types need to describe and perform their effects in different ways. Enforce this shared interface by declaring abstract get_description() and cast() functions:
@abstract
func get_description () -> String

@abstract
func cast (data : CastData)
get_description() returns the text displayed on the card. For example, an attack card can describe how much damage it deals, while a healing card can state how much health it restores. The cast() function performs the card’s effect. Because both functions are abstract, every concrete card data subclass must implement them.
The resource also needs enough game context to perform an effect. Add a nested CastData class that stores the character casting the card and the opposing character:
class CastData:
	var caster : Character
	var opponent : Character
The player is the caster when a player card is used, while the enemy is the caster during an enemy action. Attack cards target the opponent, and healing cards act on the caster. Passing a CastData object to cast() supports both cases through the same interface.
Create Attack Card Data
Create attack_card_data.gd inside Scripts/Cards. This class extends CardData and exports an attack_damage value:
class_name AttackCardData
extends CardData

@export var attack_damage : int = 1
Implement get_description() by building a sentence from the configured damage value. Then implement cast() by making the caster attack the opponent:
func get_description () -> String:
	return str("Deal ", attack_damage, " damage to target.")

func cast (data : CastData):
	data.caster.attack(data.opponent, attack_damage)
The attack() call receives data.opponent as its target and attack_damage as the amount of damage to apply.
Configure the Jab Resource
Create a Cards/Player folder for the player’s card resources. Add an AttackCardData resource named jab.tres, then configure it with an attack damage of 3, the display name Jab, a mana cost of 1, and the red sword icon.
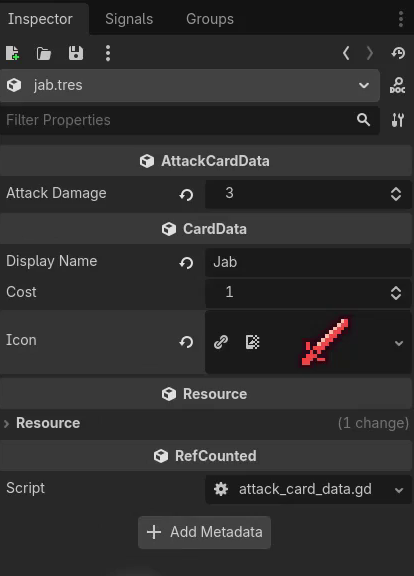
The exported properties let you create additional attack cards from the same script while assigning different damage, cost, name, and icon values to each resource.
Create Healing Card Data
Create heal_card_data.gd in Scripts/Cards. It also extends CardData, but exports a healing amount instead of attack damage:
class_name HealCardData
extends CardData

@export var heal_amount : int = 1
Its description reports the configured healing value. Its cast() implementation calls heal() on the caster because this effect restores the character using the card:
func get_description () -> String:
	return str("Heal ", heal_amount, " health.")

func cast (data : CastData):
	data.caster.heal(heal_amount)
This inheritance pattern also makes it straightforward to add more card types later. Each new subclass can define its own exported values, description, and casting behavior while retaining the common card fields.
Configure the Health Potion Resource
Inside Cards/Player, create a HealCardData resource named health_potion.tres. Set its heal amount to 3, display name to Health Potion, mana cost to 2, and icon to the green shield.
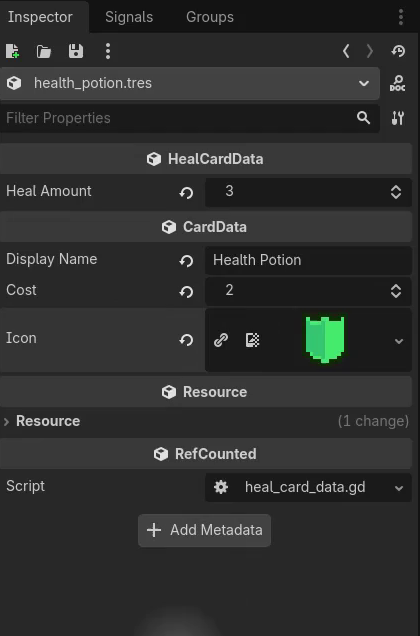
You now have a reusable card data architecture and two configured player cards: Jab for attacking and Health Potion for healing. These resources are ready to connect to visual card instances and the card interaction system.
Card Node
With the data resources ready, you can build the visual scene for an interactive card. The card will present the four values already defined by the card data: mana cost, display name, icon, and description. Prepare each visual element now, then connect the scene to its data with a script.
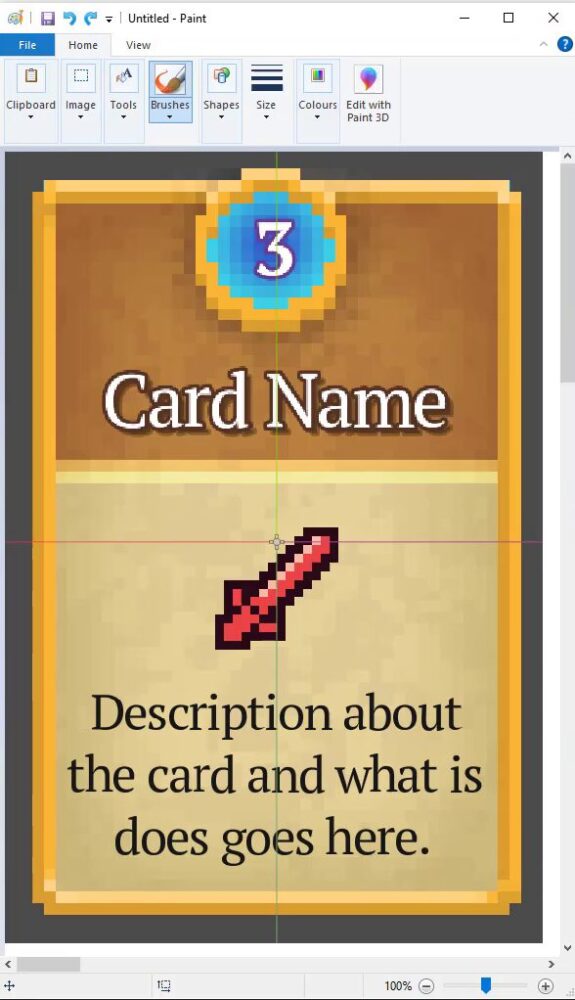
Create the Card Scene
Begin with an Area2D node and rename it Card. An Area2D is appropriate because the finished card must detect when the mouse hovers over it and when the player clicks it.
Next, drag card.png from the card sprites folder into the scene. Make it a child of Card, rename it CardSprite, and set its position to 0, 0. This centers the card background on the root node.
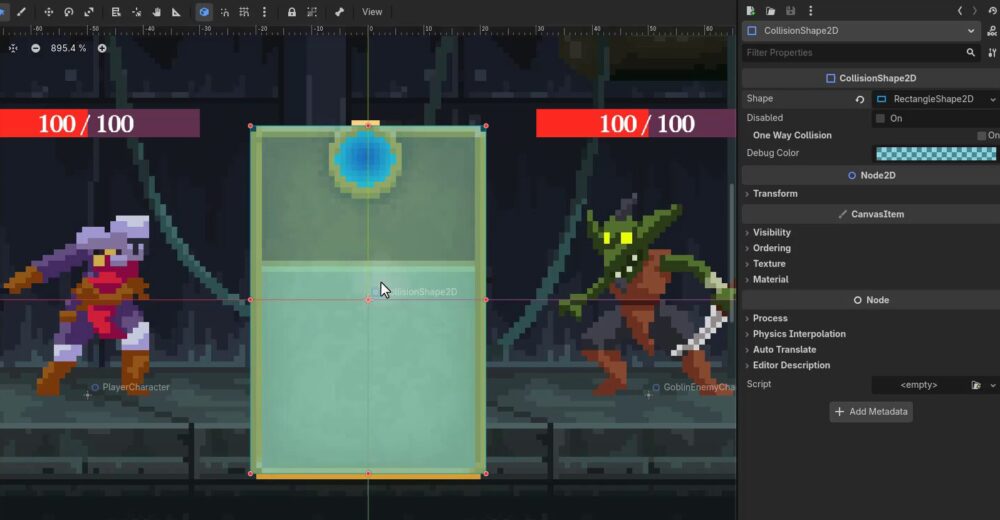
An Area2D also needs a collision shape. Add a CollisionShape2D child, assign a RectangleShape2D, and resize the rectangle so it matches the card bounds. While you edit the labels, the translucent collision overlay can cover the other elements. Move CollisionShape2D to the top of the child list so it renders behind the other editor overlays. Its position in the hierarchy does not change how the collision detection works.
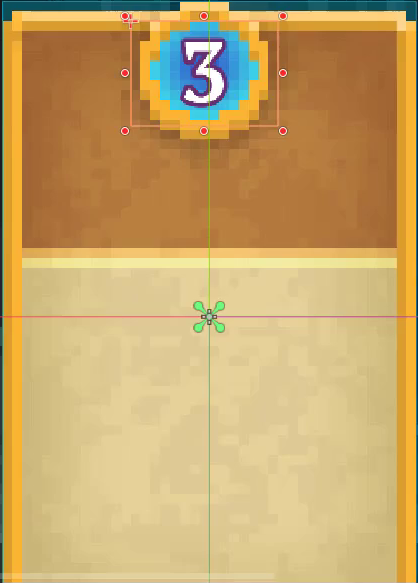
Add the Cost Label
Add a Label child named CostLabel, place it over the circle at the top of the card, and enter 3 as temporary text. Center the text horizontally and vertically, create a LabelSettings resource, assign the bold font, and set its font size to approximately 8.
White text alone can be difficult to read against the blue cost background, so add an outline of roughly 3 pixels and choose a dark purple outline color. Godot may warn that the outline is too large for the font. To resolve this, select the bold font file, open the Import dock, increase MSDF Pixel Range to approximately 12, and reimport the font. You can slightly reduce the outline size afterward while preserving the same clear appearance.
Add the Display Name
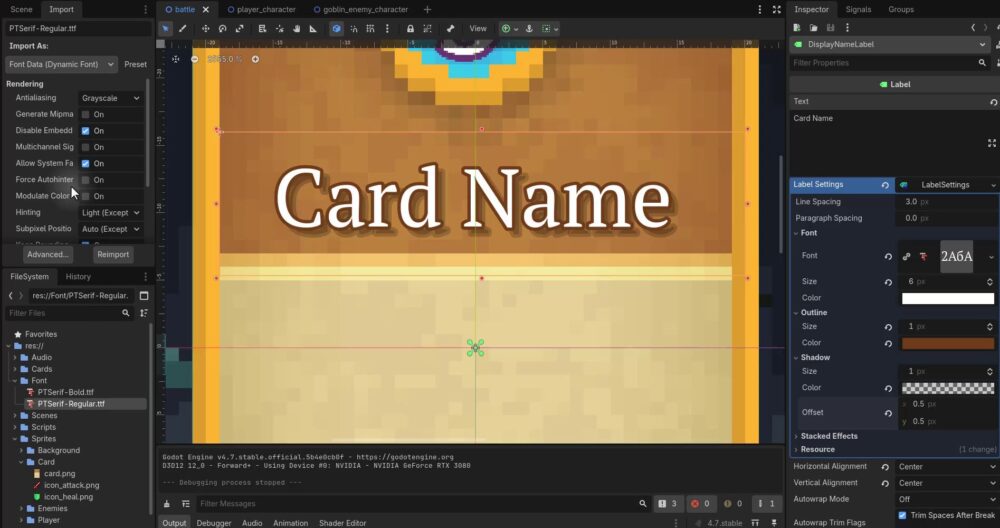
Create the card name efficiently by duplicating CostLabel. Rename the duplicate DisplayNameLabel, move it below the cost, and widen its control rectangle. Before changing its appearance, make its LabelSettings resource unique. Otherwise, any changes would also affect CostLabel.
For the display name, use the regular font at size 6 and enter Card Name as placeholder text. Use a smaller outline of approximately 1 pixel with a brown color, then add a subtle shadow with an offset of approximately 0.5 pixels. If the regular font looks blurry, select its file, enable Multichannel Signed Distance Field in the Import dock, and reimport it.
Handle Longer Card Names
A longer display name can extend beyond the card. Set Auto Wrap Mode to Word so the label moves complete words onto a new line. The default distance between wrapped lines is too large for this compact area, so reduce the line spacing to approximately 0.5.
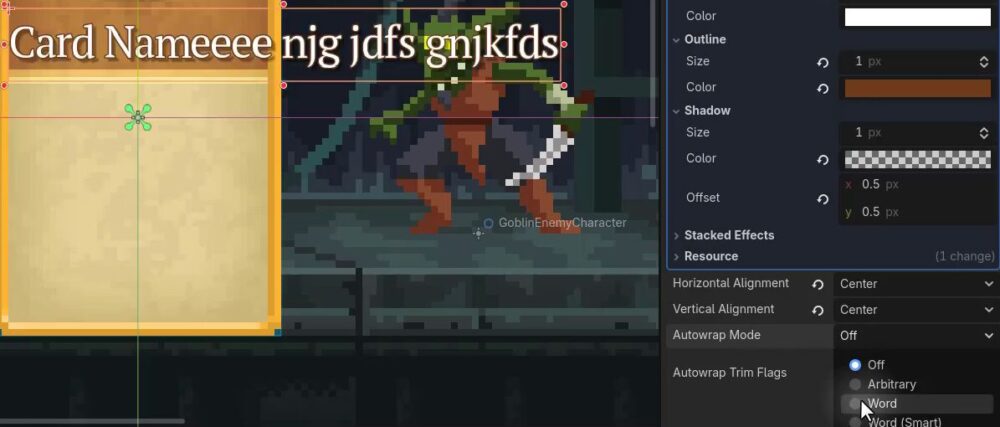
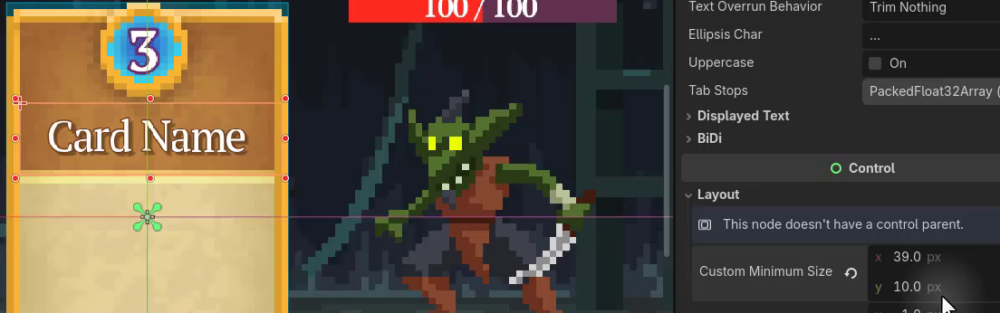
Godot displays another warning when automatic wrapping is enabled without a minimum label size. Under Layout, set Custom Minimum Size to 39 pixels wide and 10 pixels high, matching the label’s intended dimensions. Most card names will remain short, but these settings keep longer names contained within the card.
Add the Card Icon
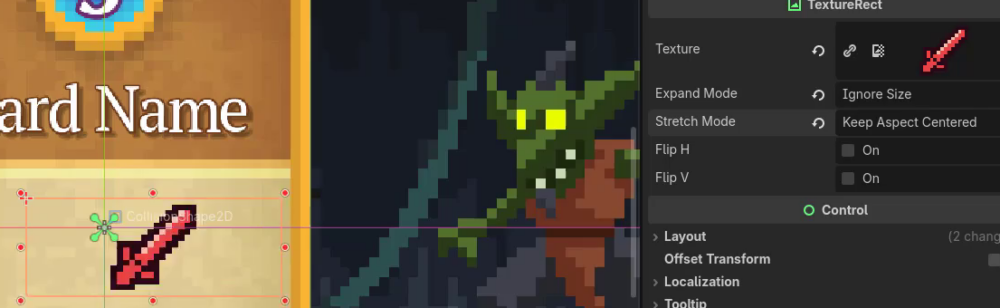
Add a TextureRect child named Icon and assign the sword texture as a placeholder. To let the control shrink below the texture’s original dimensions, set Expand Mode to Ignore Size. Then set Stretch Mode to Keep Aspect Centered, which preserves the icon’s proportions as you resize and position it in the center of the card.
Add the Description
Finally, duplicate DisplayNameLabel, rename it DescriptionLabel, move it below the icon, and enlarge its control rectangle. Enter temporary description text and make this label’s LabelSettings resource unique before changing its style.
The description should be less prominent than the name, so reduce its font size to approximately 4, remove the shadow and outline, and choose a very dark gray font color. With word wrapping retained, the description fits naturally within the lower portion of the card.
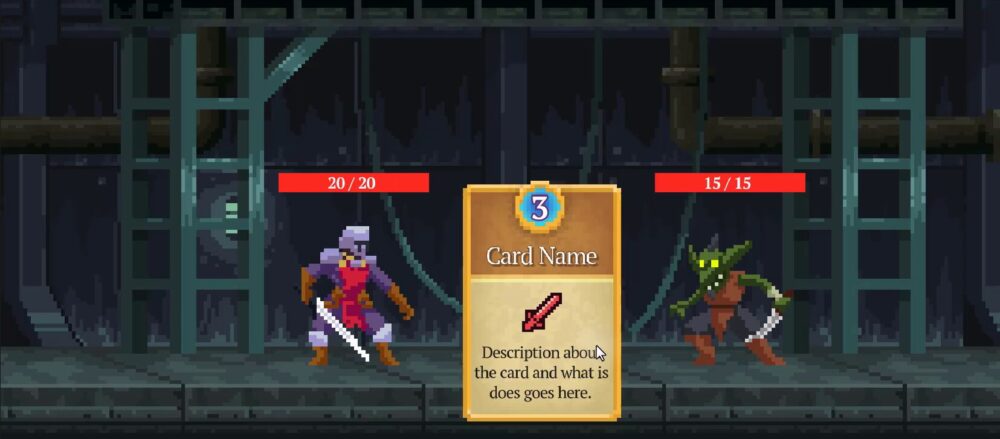
The card scene now contains its background, collision area, cost, name, icon, and description. Next, you will attach a script and assign the card data to these visual elements.
Card Script
The Card script connects a card’s data resource to its visible labels and icon. It also defines the interaction states and positions that the card interactor will use for hovering and dragging.
Create the Card Script
Select the Card Area2D node and attach a new script named card.gd. Save it in the Scripts/Cards folder. Give the script a global class name and keep Area2D as its base type:
class_name Card
extends Area2D
The scene already contains the four interface nodes that display a card’s information. Add an on-ready reference for each node so the script can update it after the scene enters the tree:
@onready var name_label : Label = $DisplayNameLabel
@onready var cost_label : Label = $CostLabel
@onready var description_label : Label = $DescriptionLabel
@onready var icon_rect : TextureRect = $Icon
You also need a reference to the CardData resource represented by this card. Export the variable for now so you can assign different resources through the Inspector while testing:
@export var data : CardData
Populate the Card Interface
Create _setup_visual() to copy each property from data into the corresponding interface node. The cost is an integer, so convert it to text with str(). The description comes from get_description(), which allows each card-data subtype to provide its own wording.
func _setup_visual ():
	name_label.text = data.display_name
	cost_label.text = str(data.cost)
	description_label.text = data.get_description()
	icon_rect.texture = data.icon
For this initial test, call the function when the card becomes ready:
func _ready ():
	_setup_visual()
Assign the Jab resource to data and run the scene. Its display name, one-mana cost, sword icon, and damage description should all appear on the card.
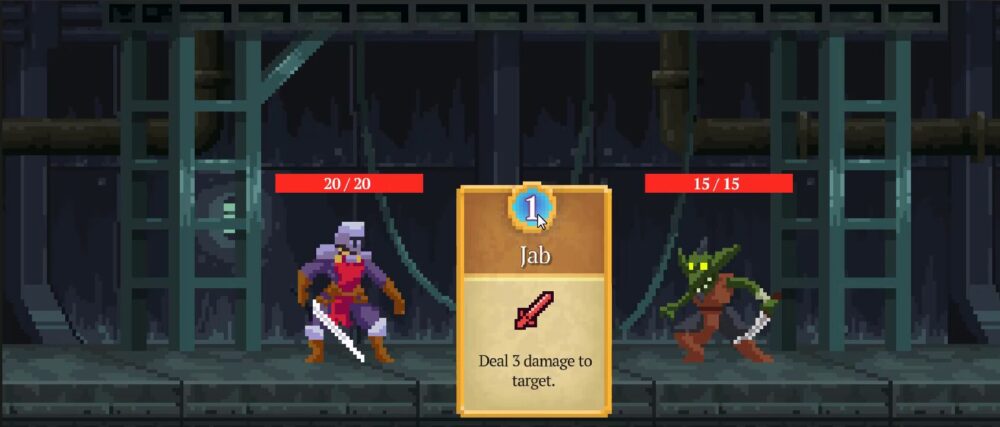
Repeat the test with the Health Potion resource. The same scene should now display the Health Potion name, a cost of two, its health icon, and the description Heal 3 health. This confirms that the card scene can render different resources without changing its node structure.
Improve the Title Outline
The card title can be difficult to read when its outline is too thin. Select DisplayNameLabel, open its Label Settings, and increase the outline size to approximately two or three pixels. If the outline does not render cleanly, select the regular font resource in the FileSystem dock, open its Import settings, and increase the MSDF pixel range before reimporting it.
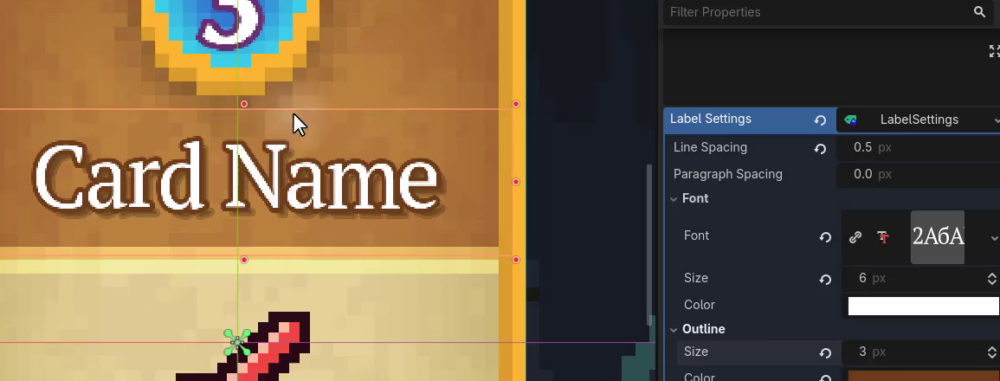
Run the scene again to confirm that the card title remains crisp and readable.
Define the Interaction States
A card can be resting in the hand, raised while the pointer is over it, or following the pointer while it is dragged. Represent these fixed possibilities with an enum:
enum State
{
	IDLE,
	HOVERED,
	DRAGGING
}

var state : State
Add one small function for each state transition. Keeping these transitions on the card gives the upcoming card interactor a simple interface to call when it detects pointer input.
func hover_enter ():
	state = State.HOVERED

func hover_exit ():
	state = State.IDLE

func begin_drag ():
	state = State.DRAGGING

func end_drag ():
	state = State.IDLE
The Card script does not detect the mouse directly. That responsibility belongs to the card interactor, which calls these functions at the appropriate times.
Prepare the Idle and Hover Positions
Each card needs an idle_pos that represents its resting position in the player’s hand. Its hover position should stay 30 pixels above that point. Define hover_pos with a getter so it is always calculated from the latest idle position:
var idle_pos : Vector2
var hover_pos : Vector2:
	get: return idle_pos + Vector2(0, -30)
Godot’s vertical coordinate decreases as an object moves upward, which is why the offset uses -30 for its y value. Because the hover position is computed rather than stored separately, changing idle_pos automatically changes both positions. The card now has its visual data, interaction states, and target positions ready for the card interactor.
Card Interactor – Part 1
Now you can begin building a card interaction manager for the Godot card system. The manager will detect which card is under the mouse, choose the topmost card when several cards overlap, and begin tracking hover state without repeatedly triggering the same hover event.
Create the CardInteractor Node and Script
In the battle scene, add a new Node2D named CardInteractor. Place it near the top of the scene tree because it acts as a manager rather than a visible part of the battle. You specifically need a Node2D, not a basic Node, because the script must access the world’s 2D physics space.
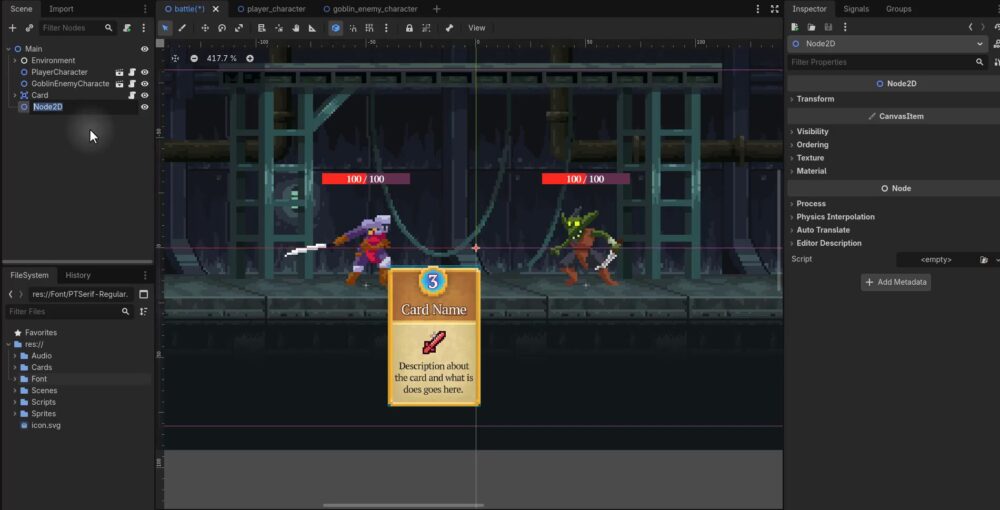
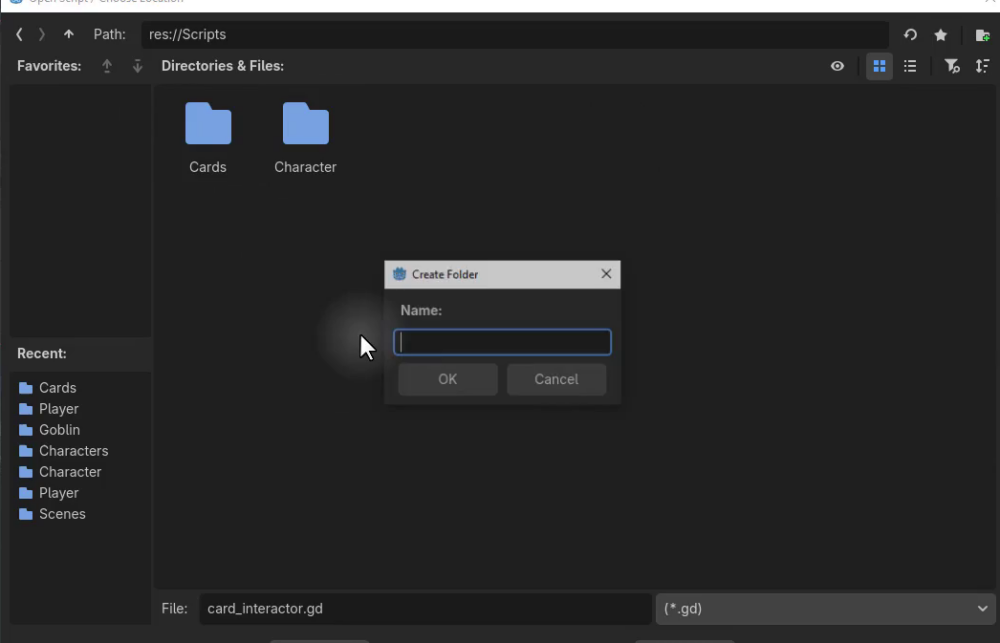
Attach a new script to this node. Inside the project’s Scripts directory, create a Managers folder and save the file as card_interactor.gd. The script begins by extending Node2D:
extends Node2D
Query the 2D Physics Space
Your first helper function is _get_selected_card(). It returns the Card currently under the mouse, or null when the pointer is not over a card.
First, record the mouse position and get the world’s direct 2D physics state:
func _get_selected_card () -> Card:
	var mouse_pos : Vector2 = get_global_mouse_position()
	var space_state = get_world_2d().direct_space_state
Next, create a PhysicsPointQueryParameters2D object. A point query describes where you want to test and which kinds of collision objects should be included. Set its position to the mouse position and enable area collisions because each card is an Area2D:
	var query = PhysicsPointQueryParameters2D.new()
	query.position = mouse_pos
	query.collide_with_areas = true

	var intersections = space_state.intersect_point(query)
The intersect_point() call checks which collision shapes contain the mouse position. It returns an array of dictionaries, and each dictionary describes one physics object that was hit. This matters because cards in the player’s hand can overlap, so the same point may intersect several cards.
Choose the Topmost Card
Godot uses the Z-index to control drawing order. Lower values render farther back, while higher values render in front. For example, the battle background has a Z-index of -100, which keeps it behind the characters and cards.
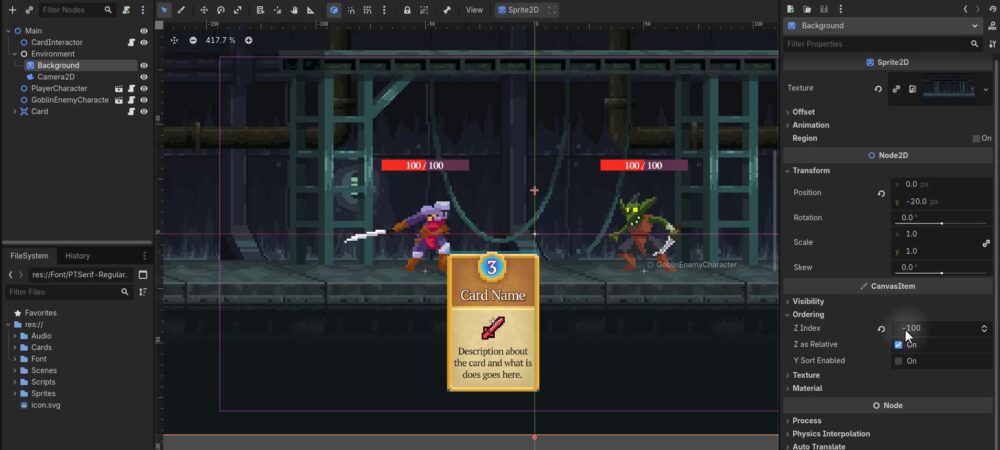
A card begins with a Z-index of 0. Later, cards in the hand can receive different Z-index values according to their order. When the mouse intersects several cards, you therefore need to return the card with the greatest Z-index.
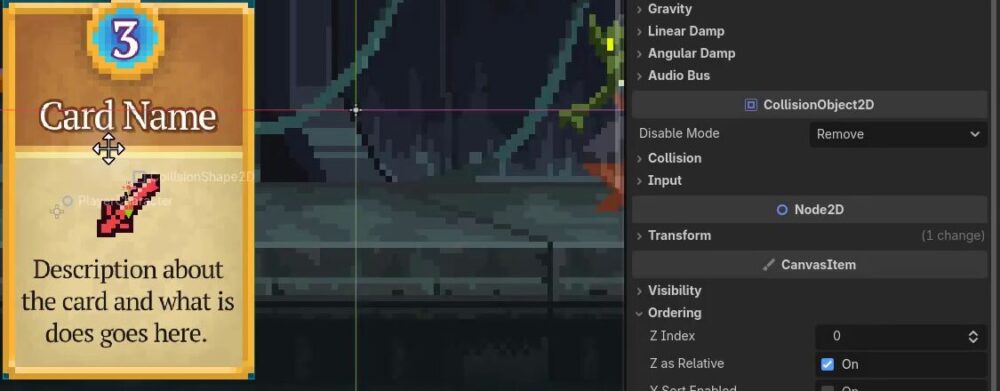
Start with no selected card and a cached Z-index of -1. Loop through every intersection, read its collider, and only accept it when it is a Card with a greater Z-index than the best card found so far. The complete helper function is:
func _get_selected_card () -> Card:
	var mouse_pos : Vector2 = get_global_mouse_position()
	var space_state = get_world_2d().direct_space_state

	var query = PhysicsPointQueryParameters2D.new()
	query.position = mouse_pos
	query.collide_with_areas = true

	var intersections = space_state.intersect_point(query)

	var card : Card = null
	var card_z_index : int = -1

	for result in intersections:
		var hit = result["collider"]

		if hit is Card and hit.z_index > card_z_index:
			card = hit
			card_z_index = hit.z_index

	return card
By replacing the cached values whenever you find a card with a greater Z-index, the function finishes with the frontmost card under the pointer.
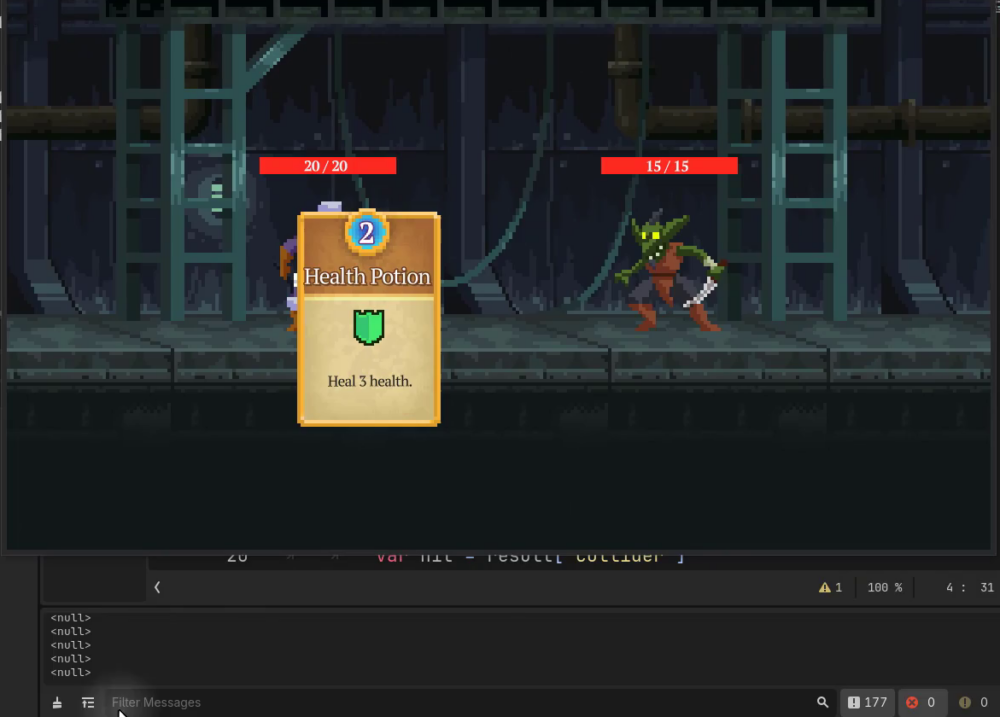
Test Card Detection
Temporarily call the helper every frame and print its result:
func _process (delta : float):
	print(_get_selected_card())
When the pointer is outside a card, the Output panel prints <null>. Moving the pointer over the card causes the query to return that Card instance instead. Once this test succeeds, remove the temporary print statement.
Track the Current Hover State
Add a selected_card variable so the interactor can remember which card is currently active. In _process(), get the card under the pointer and read whether the left mouse button is pressed:
var selected_card : Card

func _process (delta : float):
	var cur_hover_card : Card = _get_selected_card()
	var mouse_down : bool = Input.is_mouse_button_pressed(MOUSE_BUTTON_LEFT)
Only change the hover selection while the mouse button is released. This prevents the selected card from changing while a drag is in progress. If the pointer is over a card, store it and call the card’s hover_enter() method:
	if not mouse_down:
		if cur_hover_card != null:
			selected_card = cur_hover_card
			selected_card.hover_enter()
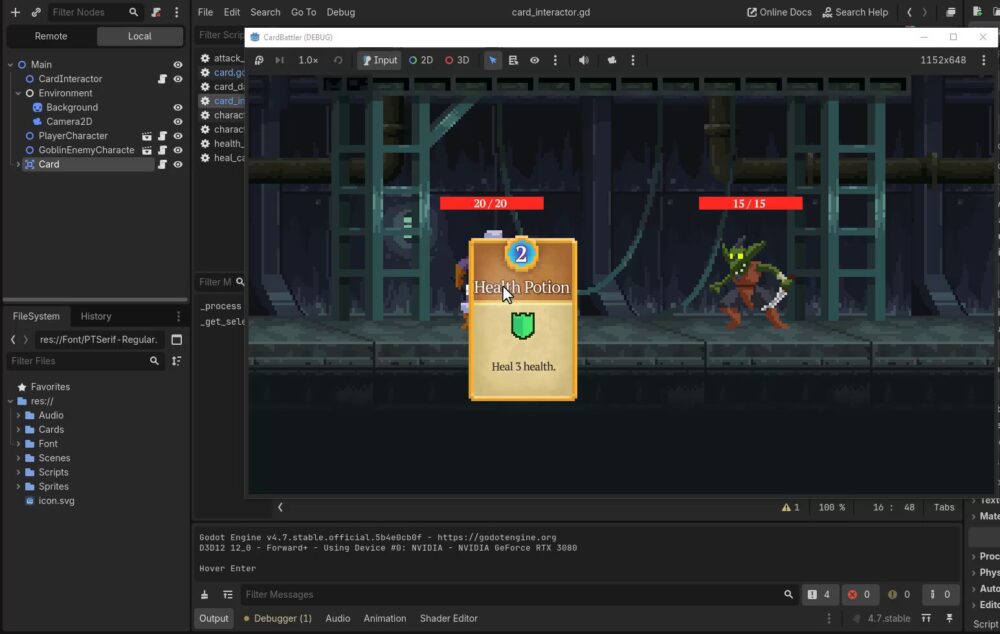
For testing, add temporary print statements to the card’s hover and drag methods. With the first version above, hover_enter() runs every frame while the mouse remains over the card. This produces many repeated Hover Enter messages and would also replay any future hover sound effect every frame.
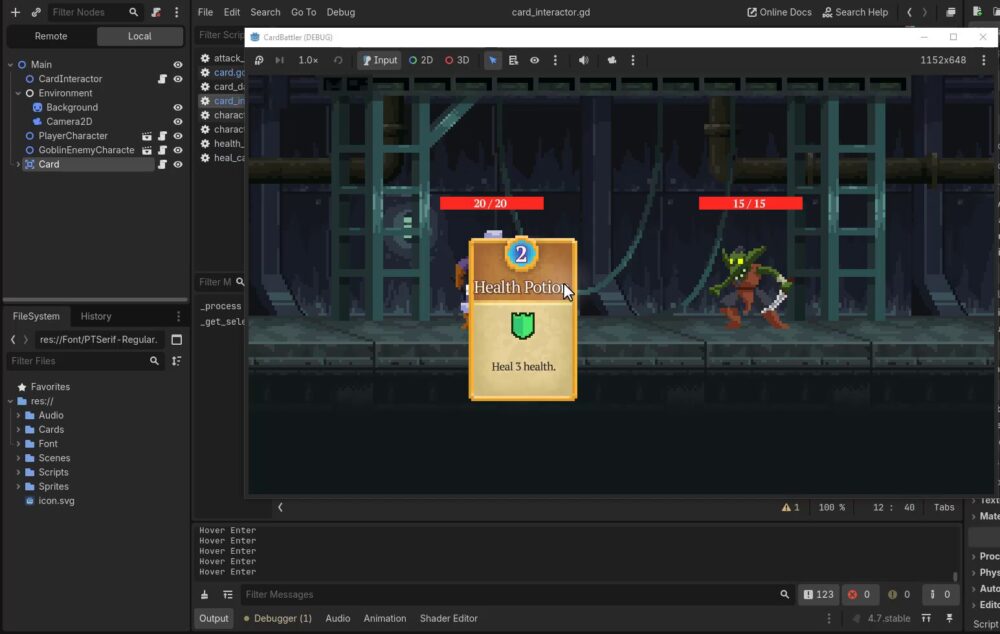
Guard the callback by checking that the card under the pointer differs from selected_card. The initial hover logic becomes:
	if not mouse_down:
		if cur_hover_card != null and cur_hover_card != selected_card:
			selected_card = cur_hover_card
			selected_card.hover_enter()
Now hover_enter() runs once when a new card becomes selected, rather than on every frame. The interactor can detect the topmost card and begin a clean hover transition. Next, you will handle leaving a card and continue building the click-and-drag behavior.
Card Interactor – Part 2
To complete the interaction, you will handle every hover exit path, detect when the mouse button is first pressed or released, and connect those input changes to card dragging. You will then update the card itself so it moves smoothly between its idle, hovered, and dragging positions.
Correcting Hover Transitions
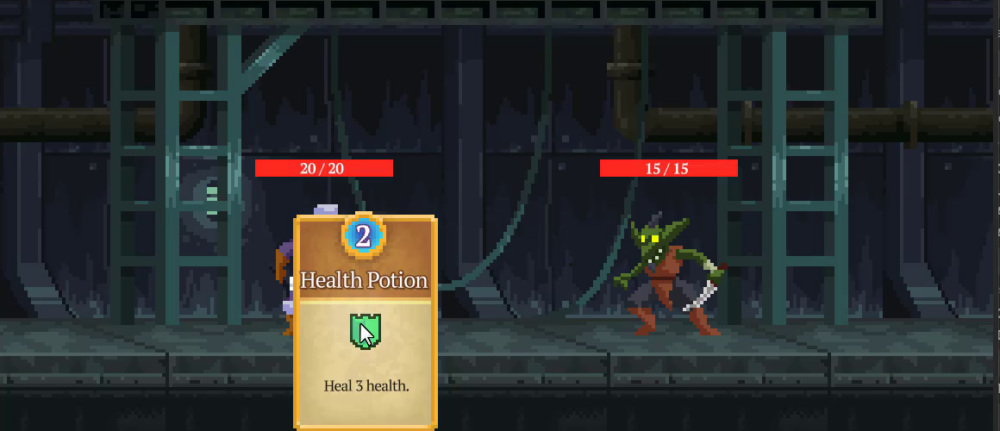
The current interaction logic can call hover_enter() once, but it does not yet handle every way the mouse can leave a card. This is especially important when cards overlap, because the pointer can move directly from one card to another during the same frame.
Inside card_interactor.gd, first check whether the pointer is currently over a card. If another card was already selected, exit that previous card and clear the selection. You can then select the new card and call its hover-enter behavior:
if not mouse_down:
	if cur_hover_card != null:
		if selected_card != null and cur_hover_card != selected_card:
			selected_card.hover_exit()
			selected_card = null

		if cur_hover_card != selected_card:
			selected_card = cur_hover_card
			selected_card.hover_enter()
This handles moving directly between overlapping cards, but it does not handle moving from a card onto empty space. When cur_hover_card is null and a selected card still exists, exit that card as well:
	elif selected_card != null:
		selected_card.hover_exit()
		selected_card = null
With both branches in place, the interaction can repeatedly enter and exit a card as the pointer moves across its boundary.
Detecting Mouse Press and Release Edges
Reading whether the left mouse button is currently down is not enough to distinguish the first pressed frame from every later frame while the button remains held. Add a Boolean variable that records the previous frame’s state:
var mouse_down_last_frame : bool
When a card is selected, comparing the current and previous values gives you two distinct transitions:
- The button is down now but was not down last frame, so you have just pressed it.
- The button is up now but was down last frame, so you have just released it.
if selected_card != null:
	if mouse_down and not mouse_down_last_frame:
		_pickup_card()
	elif not mouse_down and mouse_down_last_frame:
		_drop_card()

mouse_down_last_frame = mouse_down
Update mouse_down_last_frame at the end of _process(), after using its old value for the comparisons.
Separating Pickup and Drop Behavior
Place pickup and drop actions in their own helper functions. For now, these functions simply forward the interaction to the selected card:
func _pickup_card ():
	selected_card.begin_drag()

func _drop_card ():
	selected_card.end_drag()
This separation gives you clear extension points. Pickup can later trigger extra feedback such as a particle effect, while drop will eventually decide whether the card should be cast or returned to the player’s hand.
Moving Cards Based on State
Next, work in card.gd. The card needs to remember its resting location, so initially store its global position as idle_pos when the node becomes ready:
func _ready ():
	idle_pos = global_position
	_setup_visual()
Each frame, choose a target position and interpolation speed based on the card’s current state. The idle state uses idle_pos. The hovered state uses hover_pos, which places the card 30 pixels above its idle position. The dragging state follows the global mouse position.
func _process (delta : float):
	var lerp_speed : float = 10
	var target_pos : Vector2 = idle_pos

	if state == State.HOVERED:
		target_pos = hover_pos
		lerp_speed = 15
	elif state == State.DRAGGING:
		target_pos = get_global_mouse_position()
		lerp_speed = 20

	global_position = global_position.lerp(
		target_pos,
		delta * lerp_speed
	)
The higher speeds for hovering and dragging keep the card responsive, while interpolation creates smooth motion instead of snapping immediately to the target.
Testing the Completed Interaction
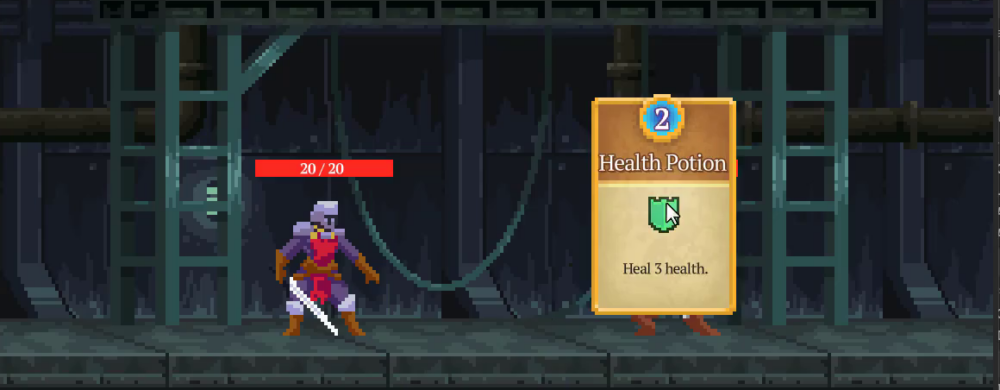
Run the scene and move the pointer over the card. Hovering raises the card so its description can be read. Holding the left mouse button changes the card to its dragging state, causing it to follow the pointer. Releasing the button ends the drag and returns the card toward its idle position.
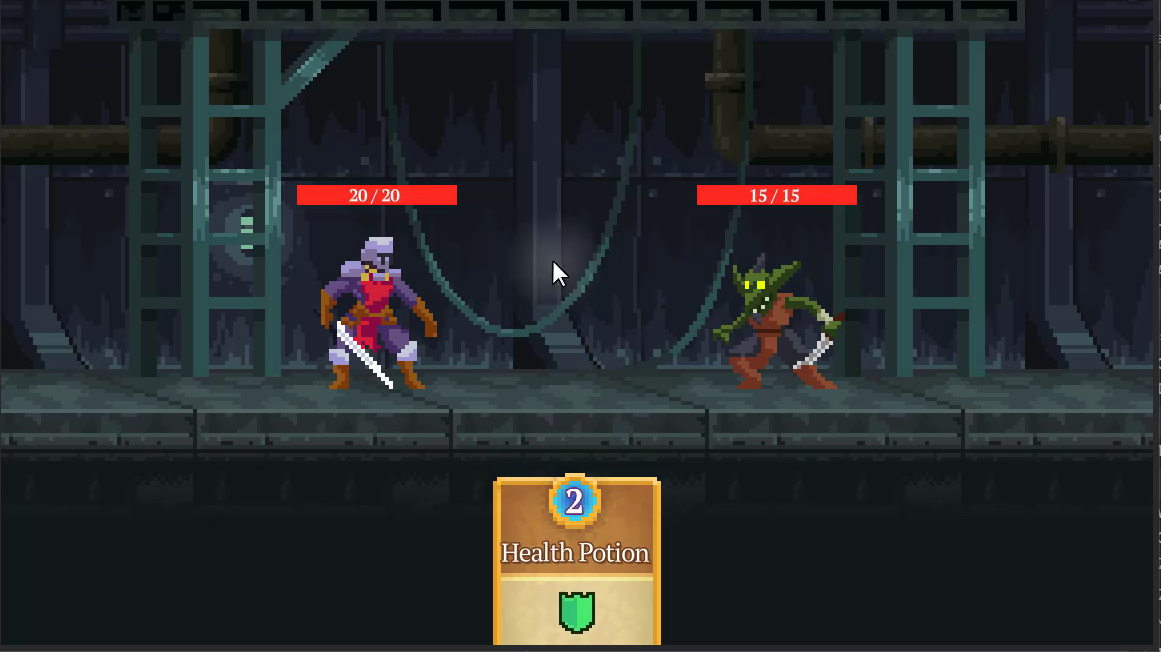
This movement also establishes the visual threshold needed for casting. Releasing a card below the battlefield will return it to the hand, while releasing it above that area will later trigger its cast behavior. With the core hover and drag interactions working, the system is ready to spawn cards into the player’s hand and implement casting.
Continue Building Your Card System
You now have the core pieces of an interactive Godot card system working together. Along the way, you learned how to:
- Create reusable
CardDataresources for shared properties and specialized effects. - Build a card scene with a collision area, labels, and an icon.
- Connect each card resource to the scene through
card.gd. - Use a 2D physics point query to select the topmost overlapping card.
- Track hover transitions and mouse press, release, and drag states without repeating hover callbacks every frame.
- Interpolate between idle, hovered, and dragging positions for smooth movement.
These pieces give you a solid base for the next stage of the project. From here, you can spawn cards into the player’s hand and connect the existing drop behavior to casting, extending the same data and interaction code you completed here.
To keep building practical Godot projects with a guided path, continue with the Godot 4 Game Development Mini-Degree, which includes the course behind these card-system lessons.
Did you come across any errors in this tutorial? Please let us know by completing this form and we’ll look into it!
FINAL DAYS: Unlock coding courses in Unity, Godot, Unreal, Python and more.