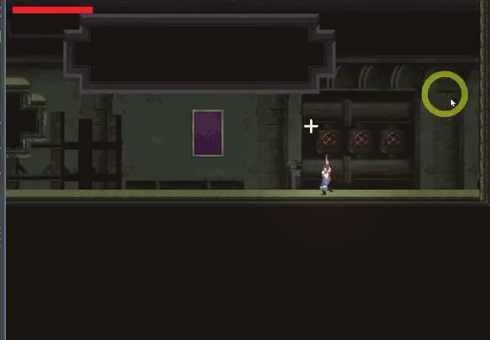
A Godot gun system needs to track your equipped weapon and give each gun its own firing behavior. Drawing on Zenva’s experience helping over 1,000,000 learners and developers gain digital skills, this tutorial guides you through those connected tasks in a Metroidvania project: switching weapons, customizing bullets and rockets, and adding a particle-based shotgun with area damage.
This tutorial assumes you have Godot installed, know GDScript basics, and are working with the existing combat project, including its player movement, aiming, bullets, drones, and explosion logic.
Table of contents
Download Project Files
The files and full project are available through the course included in the Godot 4 Game Development Mini-Degree. Follow that guided path for the complete project, or keep reading this free tutorial to work through the gun system.
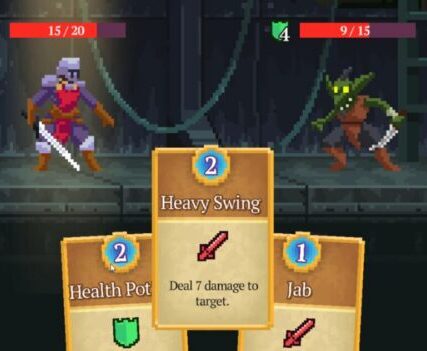
Build Your Godot Gun System With Weapon Switching
Start by giving the player three weapon choices: a standard gun, a shotgun, and a rocket launcher. You will track the selected weapon, cycle through the choices with an input action, and update the player’s torso sprite to match.
Creating a Global Data Script
The weapon types need to be accessible from different scripts. An Autoload script, also called a singleton, gives you a shared place to store them.
- In the FileSystem dock, create a folder named
global. - Inside it, create
data.gd. Keep the defaults: GDScript inheriting fromNode, then click Create.
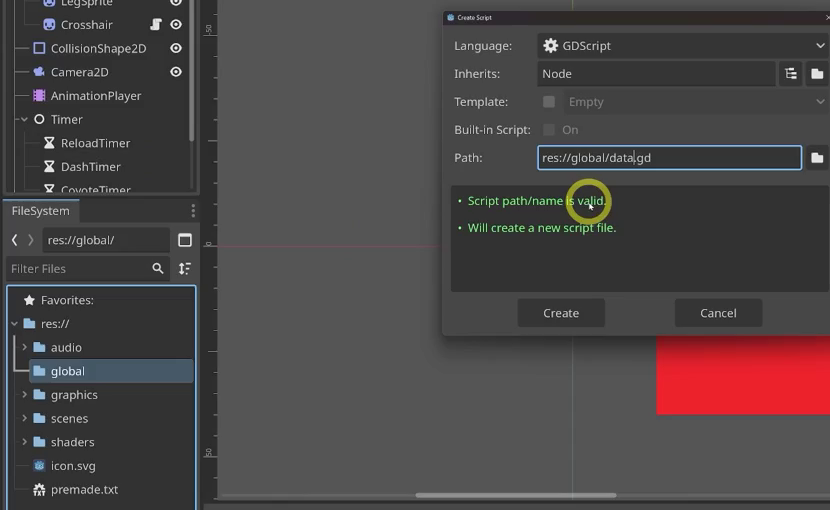
Next, register the script so Godot loads it automatically for every scene:
- Open Project > Project Settings and select Autoload, called Globals in some Godot 4 builds.
- Use the folder icon beside Path to select
res://global/data.gd. - Keep the node name
Data, click Add, and make sure Global Variable is enabled.

Any script can now refer to the singleton as Data. To check that it is loaded, run the game and open the Scene dock’s Remote tab. The Data node appears alongside the active scene.
Defining the Weapon Enum
An enumeration, or enum, is a set of named constants stored as integers. It lets you write Data.Gun.SHOTGUN instead of remembering which number represents the shotgun.
Add the following to data.gd:
extends Node

enum Gun {SINGLE, SHOTGUN, ROCKET}
Typing Data.Gun. gives you autocomplete suggestions for SINGLE, SHOTGUN, and ROCKET, helping you avoid typos. Internally, their values are 0, 1, and 2. Printing Data.Gun.SINGLE, for example, outputs 0.
Adding a Toggle Input
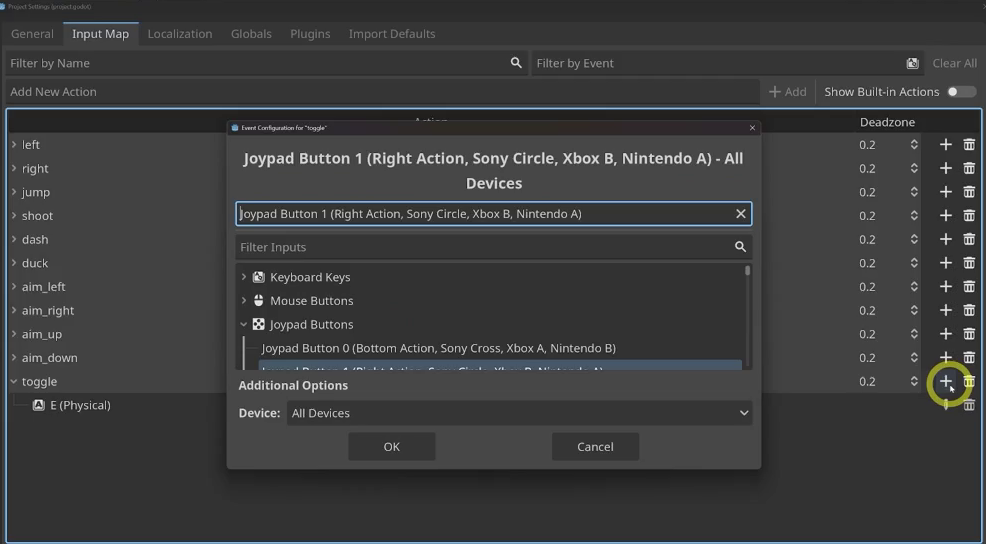
To switch weapons, open Project > Project Settings > Input Map and add an input action:
- Enter
togglein Add New Action and press Enter. - Click the action’s + button, choose Key, and press E.
- For an optional controller binding, click + again and choose Joy Button. You can use B on an Xbox-style controller, or another button you prefer.
Tracking the Current Weapon
In player.gd, declare a variable near the other player variables to remember the equipped weapon:
var current_gun: Data.Gun
The Data.Gun annotation gives this variable the enum type. Inside the existing get_input function, start by increasing its value when the player presses the toggle input:
if Input.is_action_just_pressed("toggle"):
    current_gun = current_gun + 1
If you temporarily print current_gun and run the game, pressing E produces 1, then 2, and continues upward. That reveals the problem with this first version: it can move beyond the enum’s valid range.
Wrapping the Value With posmod
You want the sequence to cycle through 0, 1, and 2, then return to 0. Godot’s posmod function keeps the result within a fixed range. Use Data.Gun.size() as that range so it follows the number of weapon entries.
Replace the toggle block with:
if Input.is_action_just_pressed("toggle"):
    current_gun = posmod(current_gun + 1, Data.Gun.size()) as Data.Gun
The as Data.Gun cast converts the integer returned by posmod back to the enum type. Pressing E now cycles through 1, 2, 0, 1, 2, 0 without leaving the weapon list.
Picking the Correct Torso Row
The project’s player.png sprite sheet in graphics/characters has three torso rows: the default gun, shotgun, and rocket launcher. Each row contains the same aiming directions, so changing weapons means selecting a different row.
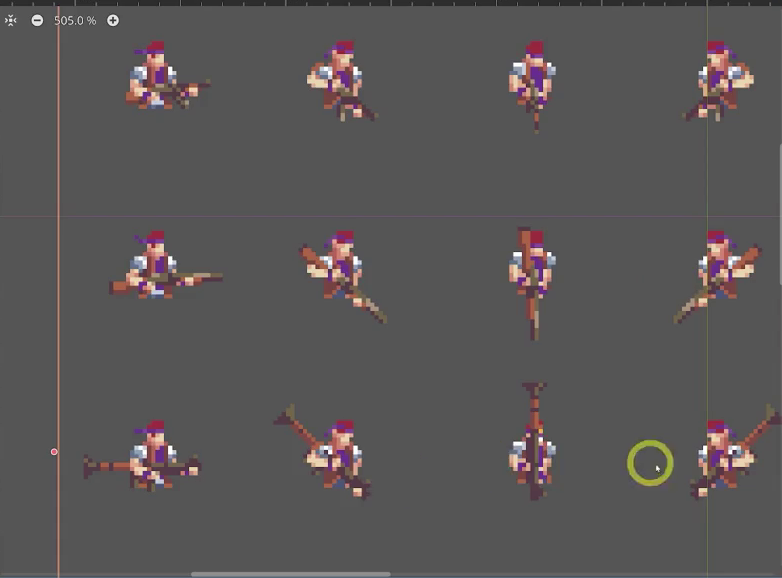
In player.gd, find the animation function. Its current torso-frame calculation uses only the aim direction:
var raw_dir = get_aim_dir()
var adjusted_dir = Vector2i(round(raw_dir.x), round(raw_dir.y))
$Sprites/TorsoSprite.frame = GUN_DIRECTIONS[adjusted_dir]
Add a row offset to the frame assignment. The offset is the weapon’s integer value multiplied by the sprite’s column count, hframes:
$Sprites/TorsoSprite.frame = GUN_DIRECTIONS[adjusted_dir] + int(current_gun) * $Sprites/TorsoSprite.hframes
int(current_gun) supplies the row index, and multiplying it by hframes moves the frame selection to that row.
Trying It Out
Run the game and press E. The torso switches to the shotgun, then the rocket launcher, then the default gun. Since this changes only the torso frame index, you can also toggle weapons during the existing ducking and jumping animations.
Customize Bullets and Rocket Explosions
With weapon switching in place, you can pass the selected gun type into the firing logic. Standard bullets will keep their existing appearance, while rockets will use a larger texture and trigger an explosion on impact. The shotgun will take a separate path in the next section.
Passing the Gun Type Through the Shoot Signal
First, let the level know which gun fired. In player.gd, add a third parameter to the shoot signal, typed as Data.Gun:
signal shoot(pos: Vector2, dir: Vector2, gun_type: Data.Gun)
In get_input, pass current_gun when you emit the signal. The existing input check fires only when the shoot action is pressed and the reload timer is inactive.
func get_input():
	# ...
	if Input.is_action_just_pressed("shoot") and not $Timer/ReloadTimer.time_left:
		shoot.emit(position, get_aim_dir(), current_gun)
		# ...
In level.gd, update the connected _on_player_shoot handler to accept the same parameter. Temporarily print it to check the connection:
func _on_player_shoot(pos: Vector2, dir: Vector2, gun_type: Data.Gun) -> void:
	print(gun_type)
Run the game and fire each weapon. The output should show 0, 1, and 2 for the three gun types, returning to 0 when you cycle back to the first weapon.
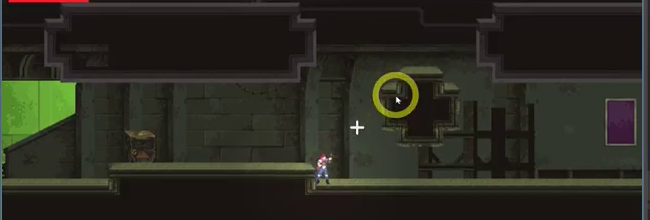
Passing the Gun Type Into the Bullet
The bullet also needs to know which gun fired it. In bullet.gd, add a type variable, accept gun_type in setup, and store that value:
extends Area2D

var direction: Vector2
var speed: int = 200
var type: Data.Gun
# ...

func setup(pos: Vector2, dir: Vector2, gun_type: Data.Gun):
	position = pos + dir * OFFSET
	direction = dir
	type = gun_type
	# ...
Back in level.gd, forward the new argument when you set up the instantiated bullet:
func _on_player_shoot(pos: Vector2, dir: Vector2, gun_type: Data.Gun) -> void:
	var bullet = bullet_scene.instantiate()
	$Bullets.add_child(bullet)
	bullet.setup(pos, dir, gun_type)
	# ...
Showing a Different Texture per Bullet
The project includes default.png for standard bullets and large.png for rockets in graphics/fire. Add a constant dictionary near the top of bullet.gd to map each gun type to its preloaded texture:
const TEXTURE = {
	Data.Gun.SINGLE: preload("res://graphics/fire/default.png"),
	Data.Gun.ROCKET: preload("res://graphics/fire/large.png"),
}
There is no shotgun entry because that weapon will not spawn a regular bullet. The bullet scene’s Sprite2D child displays the selected texture.
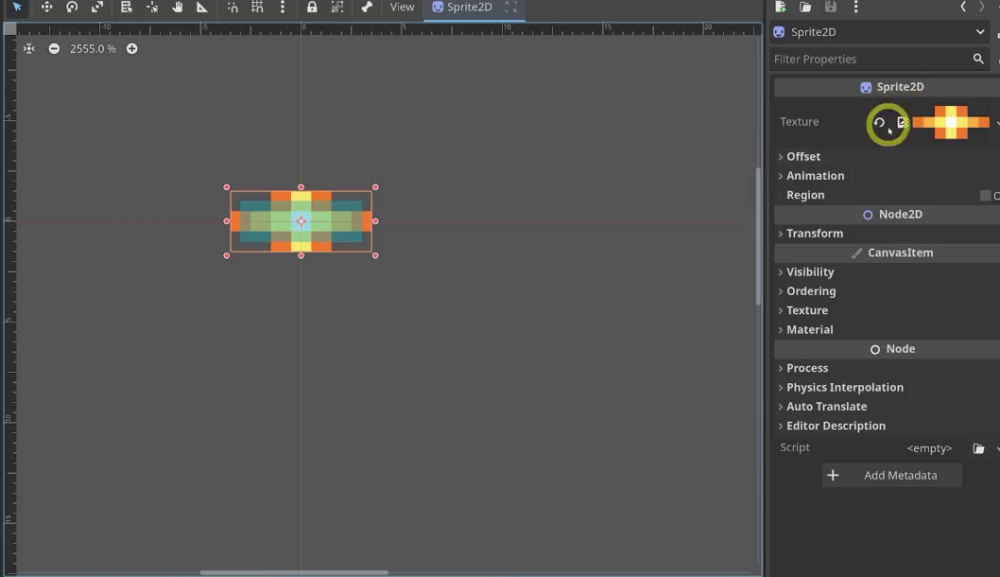
Inside setup, use the incoming gun_type to select a texture from the dictionary:
func setup(pos: Vector2, dir: Vector2, gun_type: Data.Gun):
	position = pos + dir * OFFSET
	direction = dir
	type = gun_type
	$Sprite2D.texture = TEXTURE[gun_type]
Run the game again. The basic gun fires its small bullets, while the rocket launcher uses the larger projectile sprite.
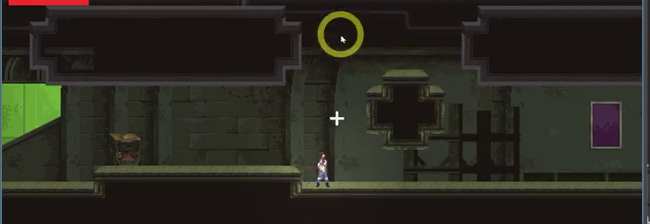
Emitting an Explosion on Collision
The bullet’s existing _on_body_entered callback handles collisions. Add a dedicated signal in bullet.gd so a rocket can announce its impact position:
signal explode(pos: Vector2)
In the collision callback, keep the existing damage handling, emit explode only for rockets, and then remove the bullet:
func _on_body_entered(body: Node2D) -> void:
	if 'hit' in body:
		body.hit()
	if type == Data.Gun.ROCKET:
		explode.emit(position)
	queue_free()
Connecting the Signal to Create an Explosion
The level already has a create_explosion function used when a drone is destroyed. Reuse it by connecting each new bullet’s explode signal immediately after instantiation:
func _on_player_shoot(pos: Vector2, dir: Vector2, gun_type: Data.Gun) -> void:
	var bullet = bullet_scene.instantiate()
	bullet.connect('explode', create_explosion)
	$Bullets.add_child(bullet)
	bullet.setup(pos, dir, gun_type)
	# ...
When a rocket hits a surface, it now produces the same explosion effect used for destroyed drones.
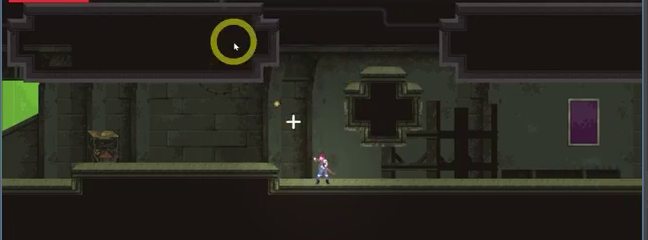
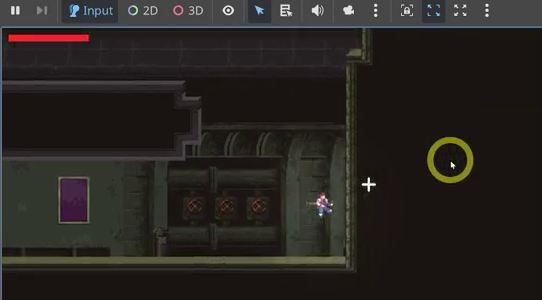
Rockets can quickly destroy a drone, but the player can also be hurt by their own explosions. The launcher now differs from the standard gun in both its projectile appearance and impact behavior.
Add Shotgun Particles and Area Damage
The shotgun uses a particle burst instead of a traveling bullet. You will connect that burst to the shoot input, make it follow the player’s aim, and add angle-and-distance checks to hit nearby enemies.
Adding the ShotgunParticles Node
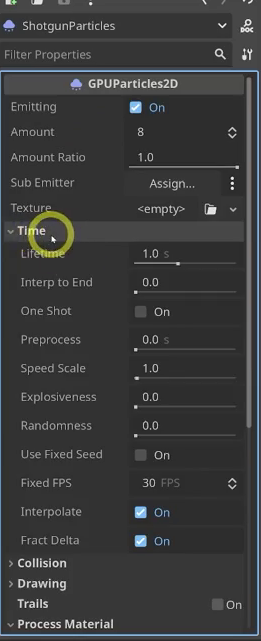
Open the Player scene, add a GPUParticles2D child to the player, and rename it ShotgunParticles. Then configure the initial burst in the Inspector:
- Assign a new
ParticleProcessMaterialto Process Material. This controls particle behavior. - Expand Time and enable One Shot. Setting
emittingtotruewill now trigger one batch of particles instead of continuous emission.
Triggering the Emission From player.gd
In player.gd, find the shoot-input block inside get_input(). After emitting the shoot signal and starting the reload timer, check whether current_gun is Data.Gun.SHOTGUN. If it is, trigger the particles:
func get_input():
	# ... existing input code
	if Input.is_action_just_pressed("shoot") and not $Timer/ReloadTimer.time_left:
		shoot.emit(position, get_aim_dir(), current_gun)
		$Timer/ReloadTimer.start()
		if current_gun == Data.Gun.SHOTGUN:
			$ShotgunParticles.emitting = true
	# ... more input code
The enum gives you a named value to compare against without relying on a weapon-name string.
Stopping the Bullet From Spawning for the Shotgun
At this point, firing the shotgun produces an error in bullet.gd: its texture dictionary has no shotgun entry. The fix is to skip bullet creation for this weapon.
In level.gd, update _on_player_shoot so it creates bullets only for gun types other than the shotgun. Leave the shotgun branch empty for now:
func _on_player_shoot(pos: Vector2, dir: Vector2, gun_type: Data.Gun) -> void:
	if gun_type != Data.Gun.SHOTGUN:
		var bullet = bullet_scene.instantiate()
		bullet.connect('explode', create_explosion)
		$Bullets.add_child(bullet)
		bullet.setup(pos, dir, gun_type)
	else:
		pass
You can now fire the shotgun without the texture-lookup error. The initial particle burst appears at the player’s position, ready for you to adjust its direction and appearance.
Setting the Particle Direction From Code
Back in player.gd, set the Process Material’s direction from get_aim_dir() before triggering emission:
# In player.gd, inside get_input()
if current_gun == Data.Gun.SHOTGUN:
	$ShotgunParticles.process_material.set('direction', get_aim_dir())
	$ShotgunParticles.emitting = true
Removing Gravity
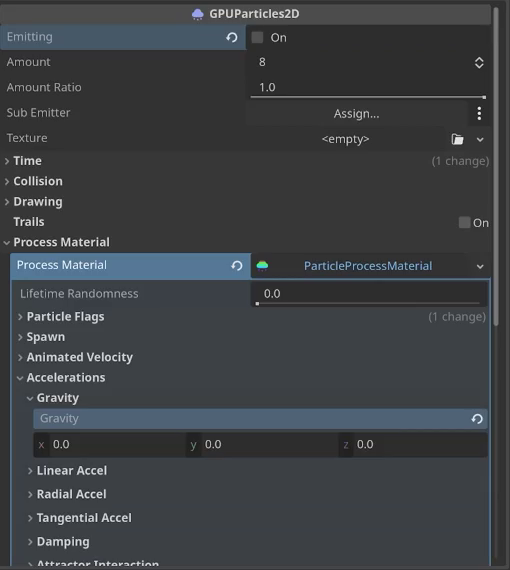
To keep the blast from arcing downward, select ShotgunParticles, expand Process Material > Accelerations, and set Gravity to (0, 0, 0).
If you fire now, the particles appear as a dot at the spawn point. They have a direction, but you have not given them velocity yet.
Adding Initial Velocity
Expand Initial Velocity in the Process Material. Set the minimum to 200 and the maximum to 280.
Firing the shotgun now sends a burst of dots outward in roughly the aim direction. Next, replace those dots with the project’s explosion animation.
Using the Explosion Sprite Sheet
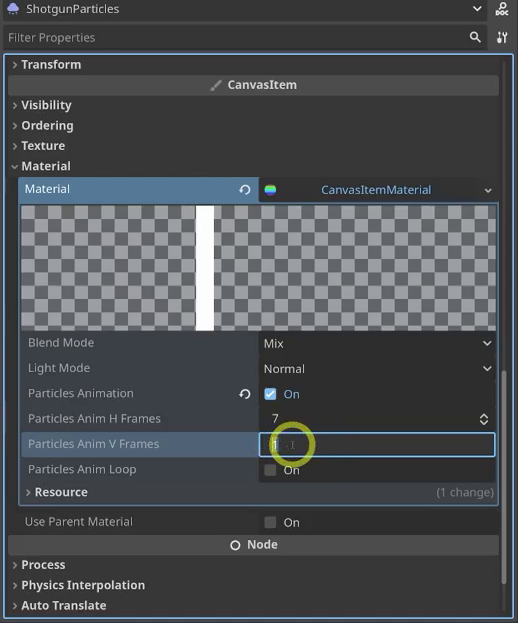
The project includes res://graphics/shotgun_explosion.png, a sprite sheet containing a small explosion animation. To use it for the particles, configure a separate Material on ShotgunParticles:
- Find the node’s Material property and assign a new
CanvasItemMaterial. - Expand that material and enable Particles Animation.
- Set H Frames to
7and V Frames to1. - Return to the top of the Inspector and set Texture to
res://graphics/shotgun_explosion.png.
Without the CanvasItemMaterial configuration, each particle displays the entire sprite sheet. The frame settings let it display individual explosion frames instead.
Animation Speed, Lifetime, and Amount
For variation in the animation, open Process Material > Display > Animation. Set Speed Min to 0.3 and Speed Max to 2, so particles play through their frames at different rates.
In the Time settings, set Lifetime to 0.3. At the top level of the ShotgunParticles Inspector, set Amount to 8. These settings create a short burst of eight particles.
Offsetting the Blast From the Player
The particles currently start at the player’s center. Move the emitter forward by multiplying the aim direction by an offset distance.
In player.gd, add an exported shotgun_distance variable alongside the existing crosshair_distance export:
# In player.gd
@export_category('shooting')
@export var crosshair_distance := 50
@export var shotgun_distance := 30
Use that value to position ShotgunParticles before setting its direction and triggering the burst:
# In player.gd, inside get_input()
if current_gun == Data.Gun.SHOTGUN:
	$ShotgunParticles.position = get_aim_dir() * shotgun_distance
	$ShotgunParticles.process_material.set('direction', get_aim_dir())
	$ShotgunParticles.emitting = true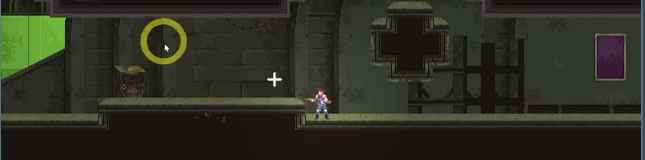
The blast now starts in front of the player and follows the aim direction. You can adjust the exported distance and particle settings to tune the effect.
Implementing Shotgun Damage
The visual effect is ready, but it does not damage enemies yet. Add the damage logic to the shotgun’s else branch in level.gd.
The project places drones in a Drones group. Loop through that group and compare the player’s aim angle with the angle toward each drone. Apply a hit only when the angle difference and distance are both within the chosen limits:
# In level.gd
func _on_player_shoot(pos: Vector2, dir: Vector2, gun_type: Data.Gun) -> void:
	if gun_type != Data.Gun.SHOTGUN:
		# ... bullet logic
	else:
		for drone in get_tree().get_nodes_in_group('Drones'):
			var aim_angle = rad_to_deg(dir.angle())
			var enemy_angle = rad_to_deg((drone.position - pos).angle())
			if abs(aim_angle - enemy_angle) < 90 and pos.distance_to(drone.position) < 100:
				drone.hit()
rad_to_deg converts both angles to degrees. The check abs(aim_angle - enemy_angle) < 90 controls the spread: a smaller threshold tightens it, while a larger one widens it. The distance check, pos.distance_to(drone.position) < 100, limits the blast’s range.
Testing the Hit Detection
To test without drones chasing you, temporarily disable their pursuit behavior. In drone.gd, find the function that runs when the player enters the detection area. Comment out the line that assigns the player and replace it with pass.
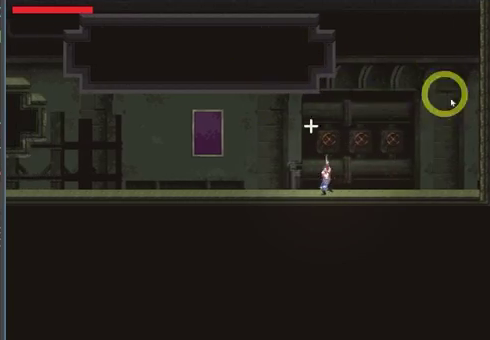
Stand near a drone and fire while aiming away from it, then aim toward it and fire again. The first shot should not hit; the second should. Three hits destroy the drone.
Once you are satisfied with the angle and distance settings, restore the drone’s pursuit behavior and remove any temporary debug prints.
Put Your Gun System to Work
You now have three selectable weapons with distinct firing behavior in your Metroidvania project. Across this tutorial, you have:
- Shared weapon types through an Autoload enum and cycled between them with
posmod. - Selected the torso sprite row that matches the equipped gun.
- Passed gun types through signals to choose bullet textures and trigger rocket explosions.
- Created an animated, aim-directed shotgun burst with an adjustable position offset.
- Applied shotgun damage using angle-and-distance checks and tested it against drones.
From here, you can tune the shotgun’s particle effect, spread, and range while testing how each weapon behaves in the project.
Keep building your game-development skills with the Godot 4 Game Development Mini-Degree. Follow the full project with guided instruction and turn these combat mechanics into skills you can use in your own games.
Did you come across any errors in this tutorial? Please let us know by completing this form and we’ll look into it!
FINAL DAYS: Unlock coding courses in Unity, Godot, Unreal, Python and more.