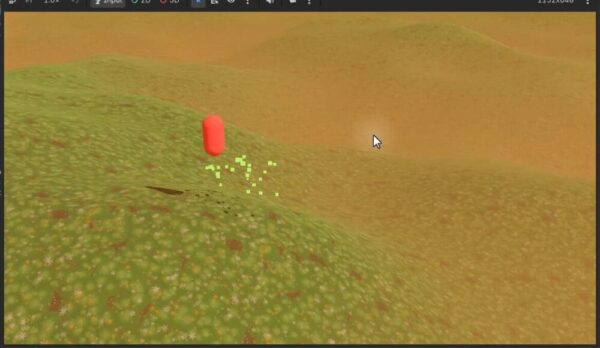
In a growing Godot project, scripts constantly need access to shared systems like an audio manager, a game manager, or a UI manager. Direct node references break when you move a node or change scenes, and giving every manager its own singleton makes global dependencies hard to organize. The Godot service locator pattern solves this with one central hub that managers register with and any script can query.
Scalable architecture like this is a core part of what Zenva teaches its community of over 1,000,000 learners and developers. In this tutorial, you’ll put the pattern into practice with a jumping player that plays audio and spawns particles through two services, all requested through the locator. It assumes you have Godot 4 installed and are comfortable with scenes, nodes, and basic GDScript.
Download Project Files
The project files for this tutorial, including the prepared Environment scene and the BasePlayerController used below, come from a course included in the Intermediate Godot Mini-Degree. If you want the ready-made assets so you can follow along exactly, that’s where to find them, but you can also apply the pattern to your own project.

What the Godot Service Locator Pattern Solves
The service locator pattern tackles a dependency problem that shows up in almost every Godot project: how scripts reach the shared management scripts they need, such as an audio manager, game manager, player manager, or UI manager.
The Problem with Direct References
Godot nodes usually need a direct reference to access a shared management script, and those references depend on the current scene and its node hierarchy. Moving a node or changing the active scene can therefore break the path used to reach a manager.
Creating an autoload or singleton for each manager removes the node-path dependency, but a larger project can accumulate many fixed singletons. That makes the project’s global dependencies harder to organize and change.
Using One Service Hub
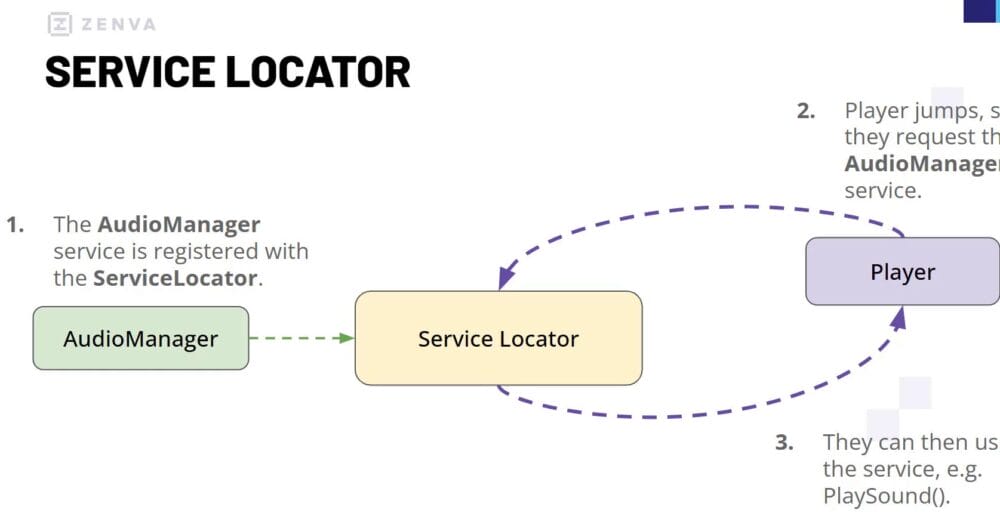
A service locator provides one singleton that acts as a central hub for any number of managers and services. Instead of exposing every manager as its own singleton, each manager registers with the locator under a string identifier. From there, accessing a service follows a simple sequence:
- A manager registers its identifier and node instance with the service locator.
- Another system asks the locator for the service associated with that identifier.
- The locator returns the registered manager, allowing the caller to use its functions.
Say an AudioManager registers itself when it enters the scene. When the player jumps, the player requests the audio manager from the ServiceLocator and uses the returned service to play the jump sound. The player never needs to know where the AudioManager node sits in the scene tree.
Swapping Services at Runtime
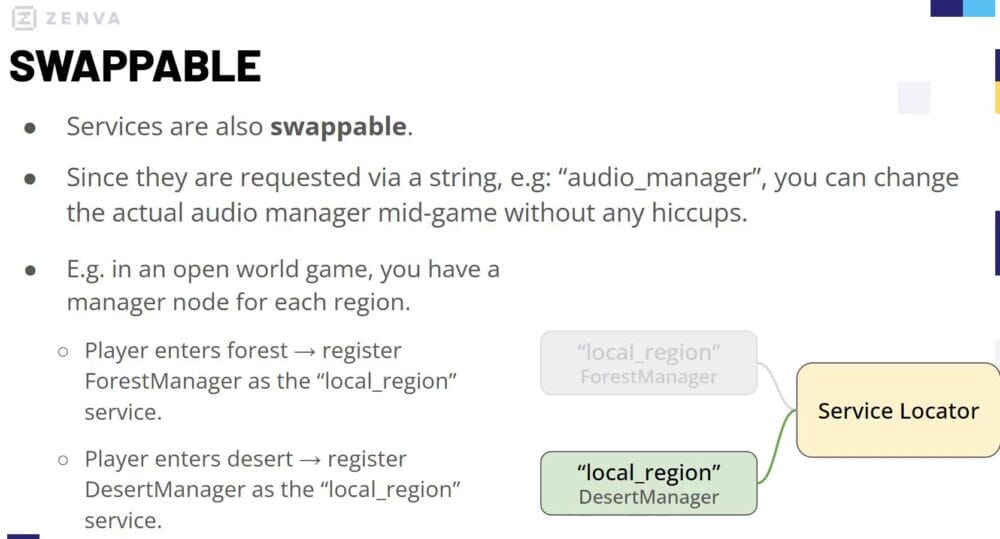
Reducing the number of singletons is useful, but the pattern’s main advantage is that services are swappable. Because callers request a service by identifier, a new manager can register under the same identifier and replace the previous instance without changing the calling code.
Imagine an open-world game with a different manager for each region. When the player enters a forest, the ForestManager registers itself as the local region service, and other systems request the local region to obtain its level, quests, enemies, or other regional data. When the player crosses into a desert, the DesertManager registers under the same local region identifier and replaces the forest service. Callers keep requesting the local region in exactly the same way, but the locator now returns the DesertManager.
Why the Pattern Scales
This design keeps callers independent from concrete scene paths and from the specific manager currently providing a service. Systems don’t need chains of conditions to determine which regional manager or other implementation is active; they only need the stable service identifier, while registration determines which instance will answer the request.
Setting Up the Demo Scene
With the theory in place, you can set up the small Godot scene that demonstrates the pattern in action. The finished example lets a player move and jump, ready for audio and particle services to respond to the jump action.
Creating the Main Scene
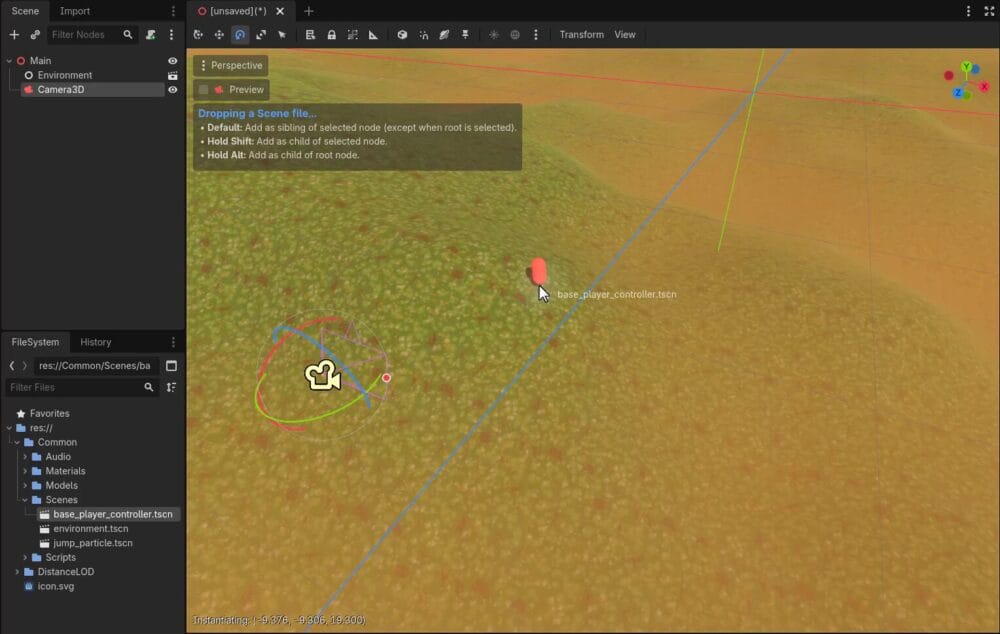
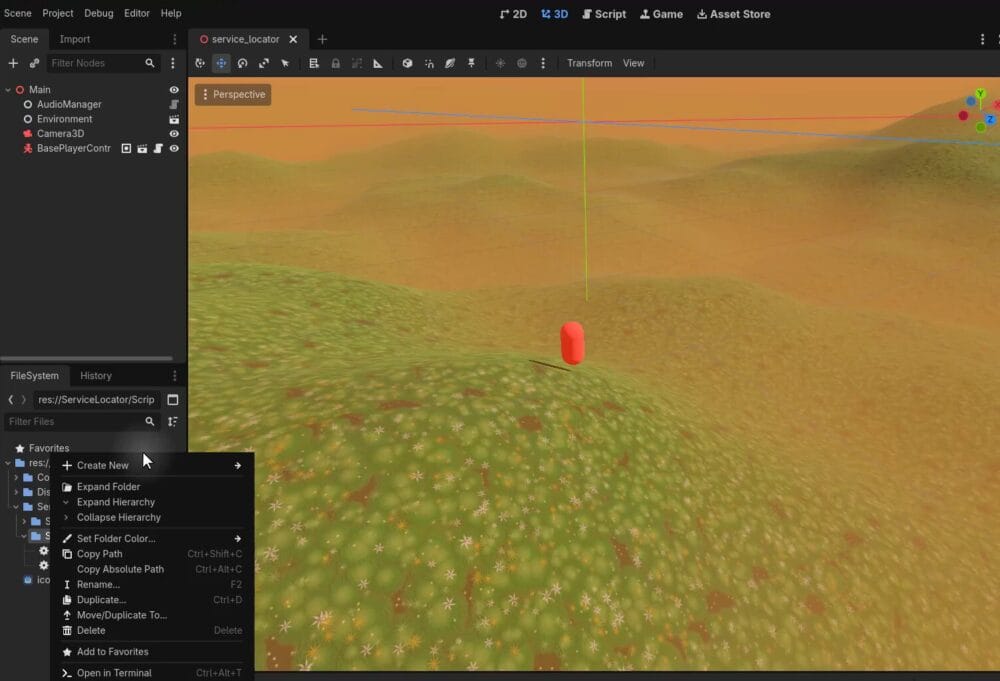
Create a new 3D scene and rename its root node Main. In the Common/Scenes folder provided with the course project, locate the prepared Environment scene and drag it into Main; this supplies the terrain for the example.
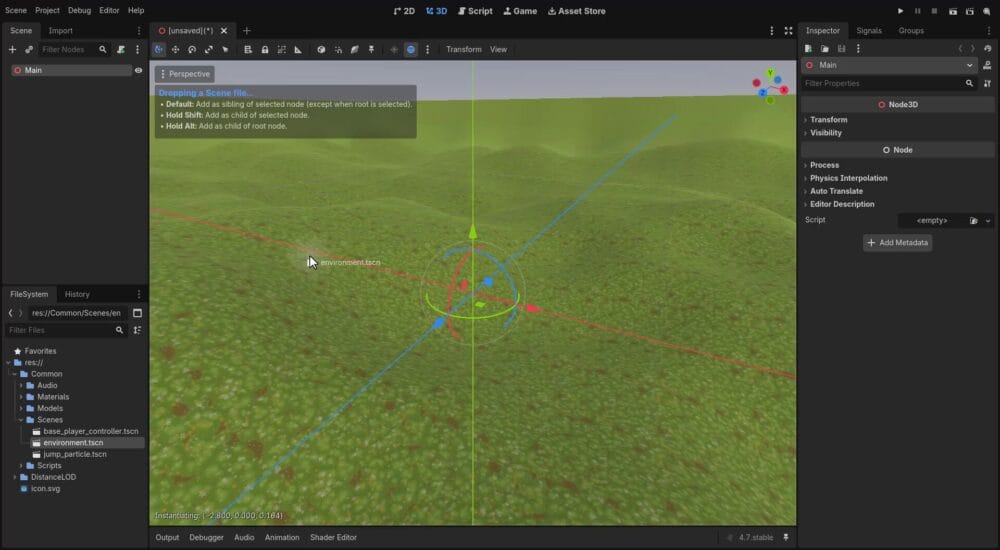
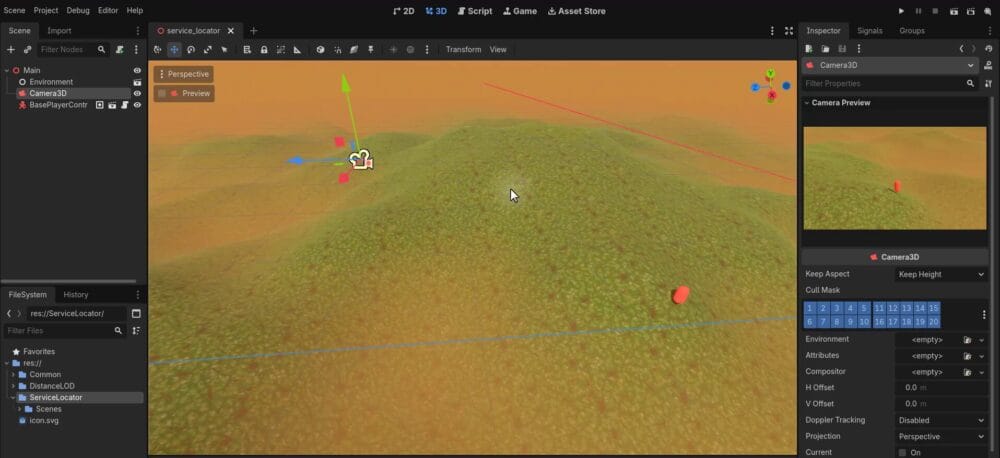
Next, add a Camera3D as another child of Main. Position the camera above the terrain and tilt it downward so the center of the environment is visible in its preview.
Adding the Player Controller
Drag BasePlayerController from Common/Scenes into Main. This prepared character controller uses the input actions configured earlier in the course, so confirm those actions are available before testing the scene. The scene tree should now contain the Environment, Camera3D, and BasePlayerController beneath Main.
Saving and Testing the Scene
Create a ServiceLocator folder in the project, add a Scenes subfolder, and save the new scene there as service_locator.tscn.
Run the scene to verify the initial setup. The player should move with the WASD keys and jump with Space.
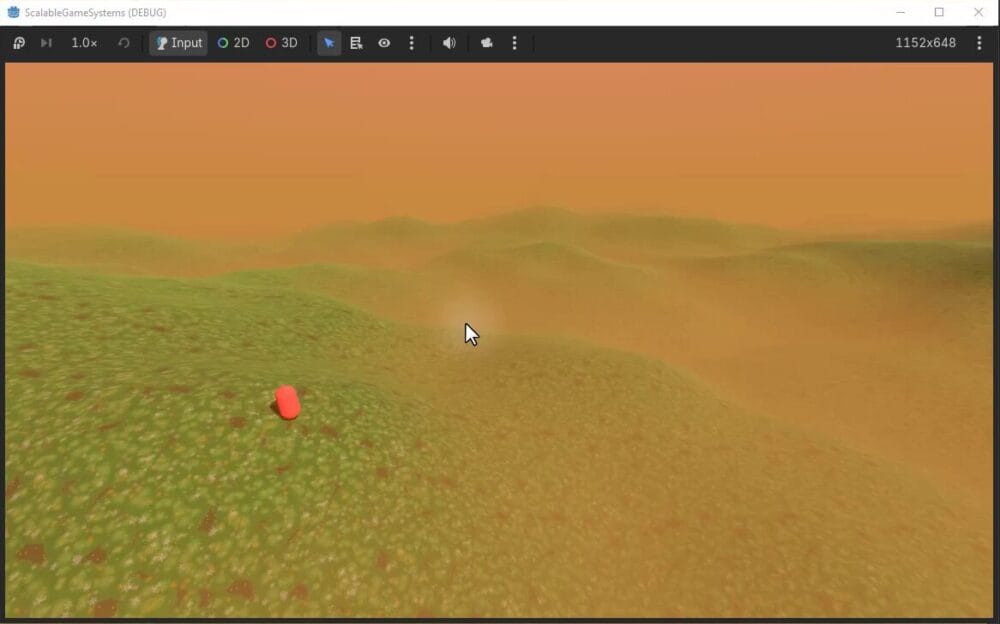
For a closer view, reduce the Camera3D field of view and adjust its position or angle until the player and nearby terrain are framed clearly.
Preparing the Service Example
This scene will demonstrate two services: when the player jumps, an audio manager plays a jump sound and a particle manager spawns a particle effect. The player will request those services through the service locator rather than holding direct references to AudioManager or ParticleManager nodes. The scripts will also check whether each requested service exists before trying to use it. With the environment, camera, player, and input behavior working, the scene is ready for the service locator implementation.
Implementing the Service Locator Autoload
Now for the hub itself. You’ll implement the service locator as a Godot autoload so it can register, validate, remove, and retrieve service nodes through stable string identifiers.
Creating the Autoload Script
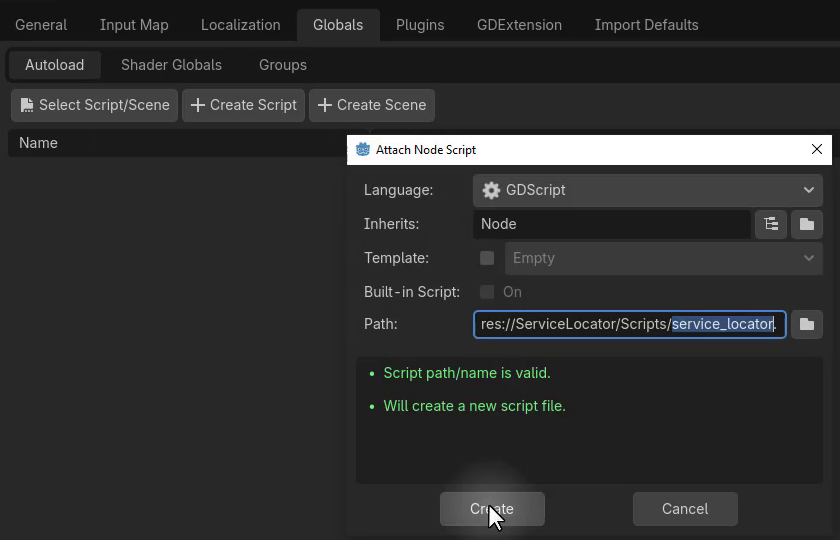
Open Project > Project Settings, select Globals > Autoload, and choose Create Script.
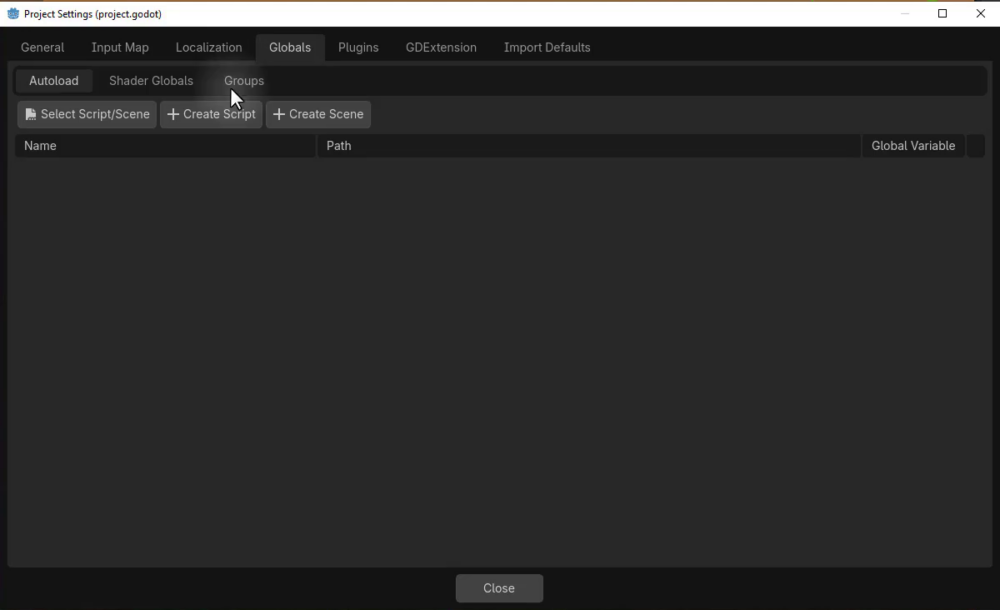
Create a Scripts folder inside ServiceLocator and save the new script as service_locator.gd. Godot adds it as an autoload that can be accessed globally through ServiceLocator.
Storing and Registering Services
Store the services in a typed dictionary. Each String key identifies a service, such as an audio manager, while its Node value references the manager instance:
var services : Dictionary[String, Node]
Managers will register themselves when they enter the scene tree. Assigning the instance to its service name also lets a newer manager replace an older service under the same identifier:
func register_service (service_name : String, instance : Node):
	services[service_name] = instance
Checking Service Availability
Before retrieving or removing a service, check that its key exists and that its stored Node is still valid. If a stale null reference turns up, remove it from the dictionary as part of the check:
func has_service (service_name : String) -> bool:
	if not services.has(service_name):
		return false

	var service_node : Node = services[service_name]

	if service_node == null:
		services.erase(service_name)
		return false

	return true
This helper returns true only when the requested identifier currently points to a usable service node.
Unregistering the Correct Instance
Unregistration receives both the service name and the Node instance. The instance check matters because services can be swapped: unloading an old forest manager must not remove a newer desert manager that has already registered under the same local-region identifier.
func unregister_service (service_name : String, instance : Node):
	if not has_service(service_name):
		return

	if services[service_name] != instance:
		return

	services.erase(service_name)
The function returns early when the service is absent or belongs to another Node. It erases the entry only when the caller is still the registered instance.
Retrieving a Service
Complete the locator with a getter that returns the registered Node when available. When the service cannot be found, report a descriptive error and return null:
func get_service (service_name : String) -> Node:
	if has_service(service_name):
		return services[service_name]

	printerr(str(service_name, " service not found."))
	return null
The resulting autoload provides a guarded interface for shared managers. Services can register and unregister with their scene lifecycle, callers can test availability, and implementations can be replaced without changing the identifier used to retrieve them.
Creating an Audio Manager Service
With the locator in place, you can create the first real service: an AudioManager that connects to the ServiceLocator and plays a sound whenever the player jumps.
Creating the AudioManager
Create audio_manager.gd in the ServiceLocator/Scripts folder. The manager extends Node and has a global class name so it can be identified clearly throughout the project:
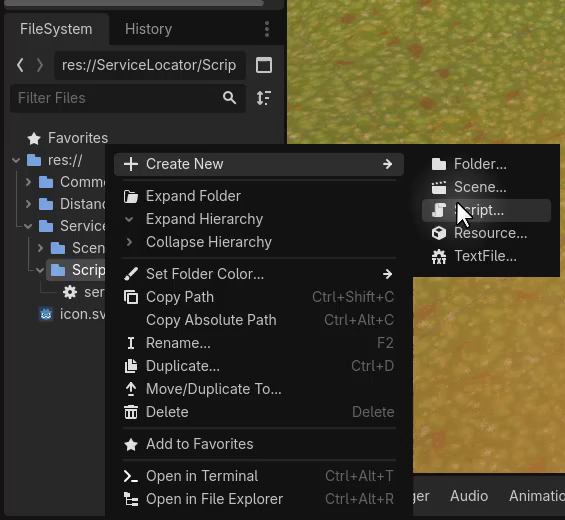
class_name AudioManager
extends Node
Add a play() function that receives an AudioStream. Each call creates a temporary AudioStreamPlayer, adds it to the current scene, plays the requested stream, waits for playback to finish, and then frees the player:
func play (audio : AudioStream):
	var player : AudioStreamPlayer = AudioStreamPlayer.new()
	get_tree().current_scene.add_child(player)

	player.stream = audio
	player.play()

	await player.finished

	player.queue_free()
This temporary-player approach keeps the example simple. A production audio system could use object pooling to reuse players instead of creating and freeing one for every sound.
Registering the Service
Add an AudioManager Node near the top of the main service-locator scene and attach audio_manager.gd. Register the manager from _enter_tree(), which runs as the Node enters the scene tree:
func _enter_tree ():
	ServiceLocator.register_service("audio_manager", self)
For a management Node that doesn’t depend on initialized children, _enter_tree() makes the service available earlier than _ready(). Since the ServiceLocator autoload persists when scenes change, unregister the manager when its Node exits the scene tree:
func _exit_tree ():
	ServiceLocator.unregister_service("audio_manager", self)
Passing self allows the locator to remove the entry only when this AudioManager is still the instance registered under the audio_manager identifier.
Assigning the Jump Sound
Open the base player controller script and export an AudioStream for the jump sound effect:
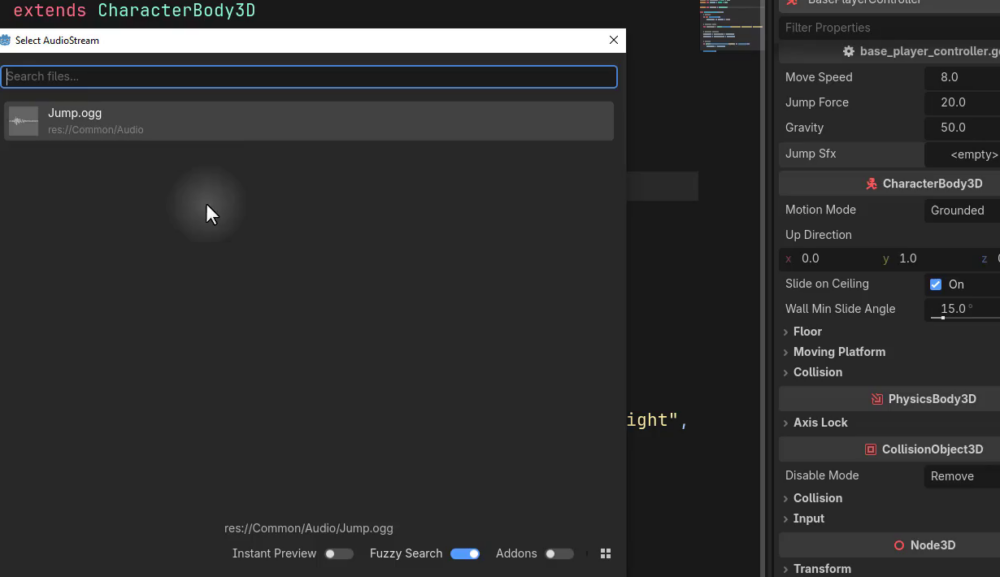
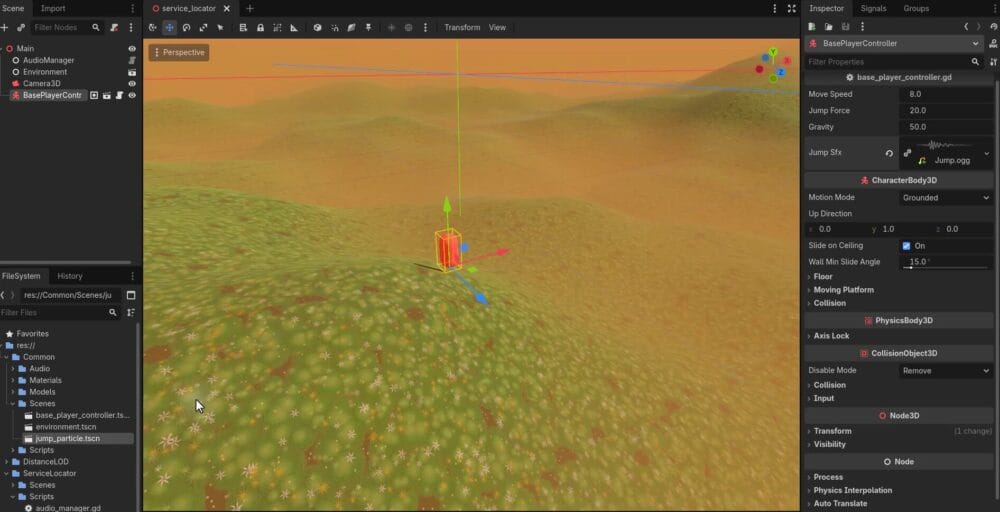
@export var jump_sfx : AudioStream
Select BasePlayerController in the scene and assign Jump.ogg to the new Jump Sfx property in the Inspector.
Playing Audio Through the Locator
Inside the existing jump condition, first confirm that the service is available. Then retrieve the AudioManager and call play() with the exported stream:
if Input.is_action_just_pressed("jump") && is_on_floor():
	velocity.y = jump_force

	if ServiceLocator.has_service("audio_manager"):
		ServiceLocator.get_service("audio_manager").play(jump_sfx)
The availability check prevents a null-service error when a scene doesn’t contain an AudioManager. Run the scene and jump to verify that the sound plays through the service.
Audio is only half the demo, though. The particle service follows the same lifecycle, so it slots right into the pattern you’ve already built.
Adding a Particle Manager Service
To complete the example, you’ll create a ParticleManager, register it as a service, and spawn a jump effect through the player controller.
Creating the ParticleManager
Create particle_manager.gd in ServiceLocator/Scripts. Like the AudioManager, it extends Node and defines a global class name:
class_name ParticleManager
extends Node
Add a public spawn_particle() function that receives a PackedScene and a global Vector3 position. Instantiate the scene as CPUParticles3D, add it to the current scene, position it, and begin emission:
func spawn_particle (scene : PackedScene, pos : Vector3):
	var particle : CPUParticles3D = scene.instantiate()
	get_tree().current_scene.add_child(particle)
	particle.global_position = pos
	particle.emitting = true

	await get_tree().create_timer(particle.lifetime).timeout

	particle.queue_free()
The timer waits for the particle’s configured lifetime before freeing the temporary instance. As with the audio manager, this straightforward approach suits the example, while a production system could use object pooling to reuse particle instances.
Registering the Particle Service
Register the manager when it enters the scene tree and unregister it when it exits:
func _enter_tree ():
	ServiceLocator.register_service("particle_manager", self)

func _exit_tree ():
	ServiceLocator.unregister_service("particle_manager", self)
The lifecycle matches the AudioManager’s, keeping the persistent ServiceLocator synchronized with whichever ParticleManager Node is currently active.
Configuring the Player
Export a PackedScene on the base player controller:
@export var jump_particle : PackedScene
Select BasePlayerController and assign the prepared jump particle scene from Common/Scenes to the Jump Particle property. Inside the player’s existing jump logic, check whether the particle service exists before retrieving it. Then request the service and spawn the scene at the player’s global position:
if ServiceLocator.has_service("particle_manager"):
	ServiceLocator.get_service("particle_manager").spawn_particle(jump_particle, global_position)
The function is named spawn_particle() without a leading underscore because it’s part of the manager’s public interface and is called from another script.
Testing the Completed System
Add a ParticleManager Node near AudioManager in the main scene and attach particle_manager.gd. Save and run the scene. Each jump should now play the audio service’s sound and create a particle burst through the particle service.
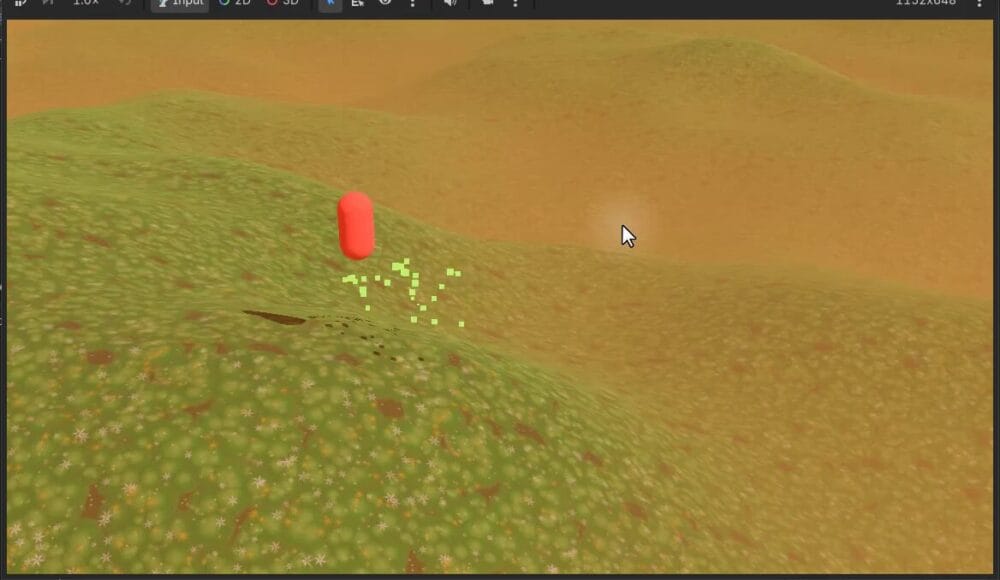
The player never needed direct references to either manager Node. It only checks for the audio_manager and particle_manager identifiers, then requests the corresponding services when they are available.
Choosing Service Identifiers
String identifiers keep the locator flexible and concise, and the availability checks you’ve built reduce the risk of runtime errors. For stricter identifiers, a project could use an enum of predefined service types instead. An enum avoids spelling mismatches, but it can become unwieldy when a large project contains hundreds of managers. Choose the identifier strategy that best fits the scale and maintenance needs of your game.
Recap and Next Steps
You now have a complete service locator wired into a working scene, and the pattern will keep paying off as your project grows. Along the way, you covered:
- Why direct references and per-manager singletons become hard to maintain as a project grows
- How to implement a service locator autoload with registration, availability checks, guarded retrieval, and instance-safe unregistration
- How to attach real services, an AudioManager and a ParticleManager, to the same hub
- How callers request services by identifier and stay independent of the scene tree
From here, any manager can join the locator under its own identifier, and you can swap implementations at runtime without touching the calling code. When you’re ready to keep building scalable Godot systems, the full course behind this tutorial is part of the Intermediate Godot Mini-Degree, a structured pathway through intermediate Godot topics that includes the complete project files, so you can continue with the exact scene you just built.
Did you come across any errors in this tutorial? Please let us know by completing this form and we’ll look into it!
FINAL DAYS: Unlock coding courses in Unity, Godot, Unreal, Python and more.