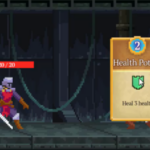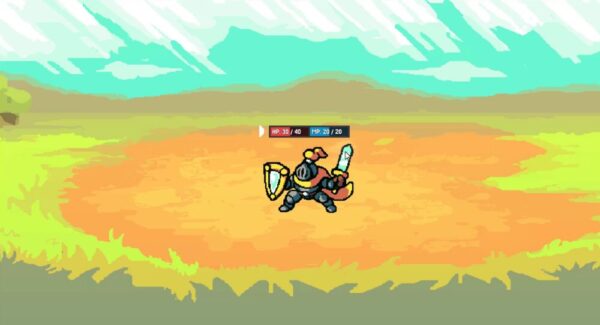
Turn-based battles are the heart of countless JRPGs, and behind every one of them sits the same building block: the battler. Each hero and enemy on the field needs an animated presence, health and mana displays, statistics to drive its actions, and code to apply damage and healing. In this Godot turn-based battle tutorial, you’ll build exactly that: a reusable battler scene and script that can represent any character on either side of the fight.
These steps are adapted from a guided Zenva game project, drawn from a catalog of over 400 courses teaching coding and game development, so the battler you build here is the same one that carries through the complete JRPG battle.
Before starting, make sure you have Godot installed and are comfortable with the basics, such as creating scenes, attaching scripts, and working with the Inspector.
Download Project Files
The sprite sheets, UI sprites, pixel font, and full project files are available through the course included in the Intermediate Godot Mini-Degree if you’d like to follow along with the completed project.
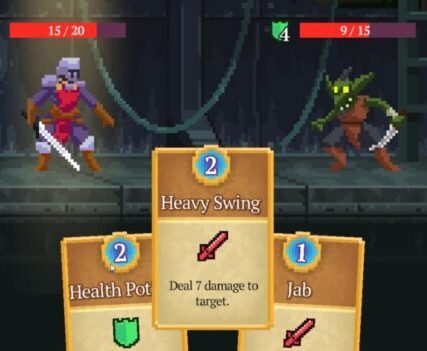
What a Battler Needs for a Godot Turn-Based Battle
A battler is a single reusable scene that represents one character in battle, whether it fights on the player’s side or the enemy’s. A complete battler eventually combines character sprites, health and mana, skills, statistics, status effects, and turn feedback. You’ll build it in three layers: first the scene structure with an idle animation and header UI, then a data resource that defines its statistics, and finally the script that controls it during combat.
Create the Battler Root and Collider
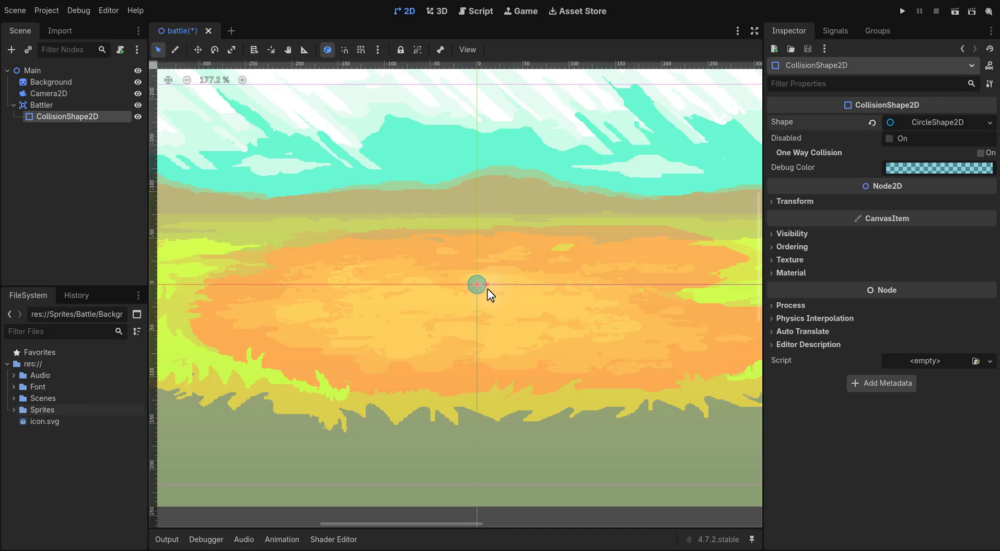
Create an Area2D as the root of the new scene and rename it Battler. An Area2D is the right choice here because it can later detect when the mouse is hovering over a battler.
Add a CollisionShape2D as a child of Battler, assign a CircleShape2D, and enlarge the circle. You can refine its size after adding a character sprite.
Create the Idle Animation
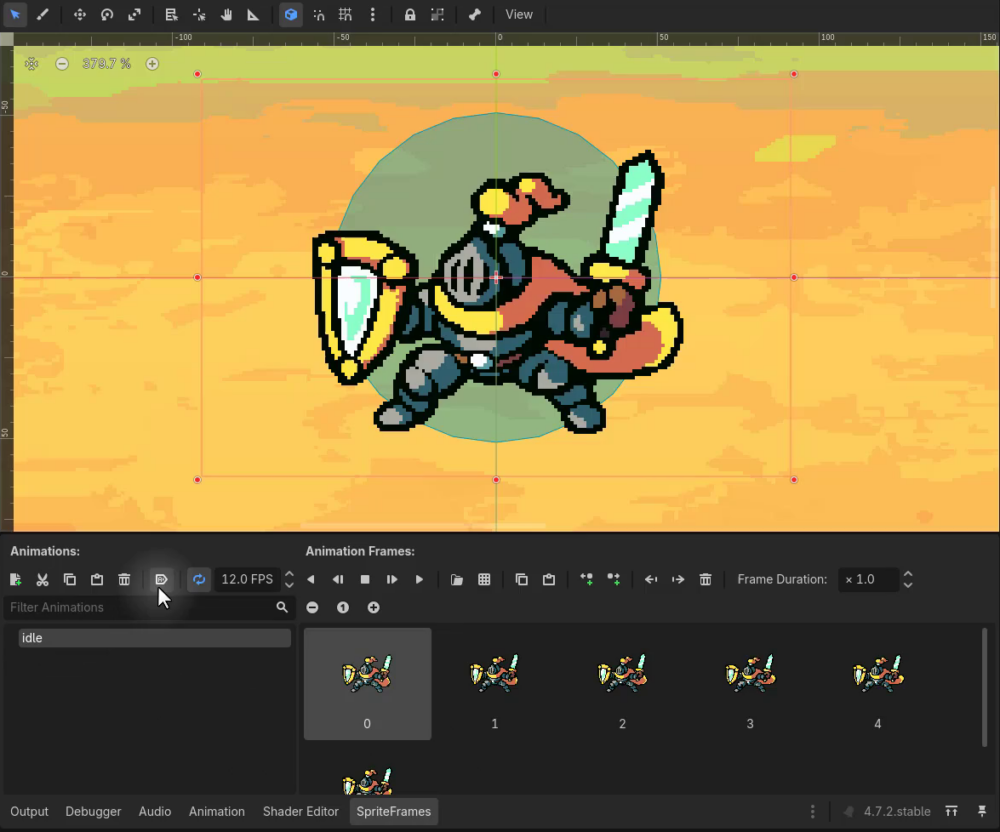
The character artwork is stored in sprite sheets, so a regular Sprite2D is not sufficient. Add an AnimatedSprite2D to Battler, create a new SpriteFrames resource, open it, and rename the default animation to idle.
Keep animation names consistent across every player and enemy battler. Later scripts will trigger animations by name, including actions such as idle, attack, and block.
Use the SpriteFrames toolbar to add frames from a sprite sheet. Navigate to the battle player-character sprites and select the knight sheet. Adjust the horizontal and vertical slicing until each character frame is separated correctly, select the six frames in the top row, and add them to the idle animation.
Preview the animation and increase its speed to 12 FPS for a more fluid result. Enable Auto Play on Load for the idle animation so it starts automatically and continues looping when the scene runs.
Prepare the Header Bar
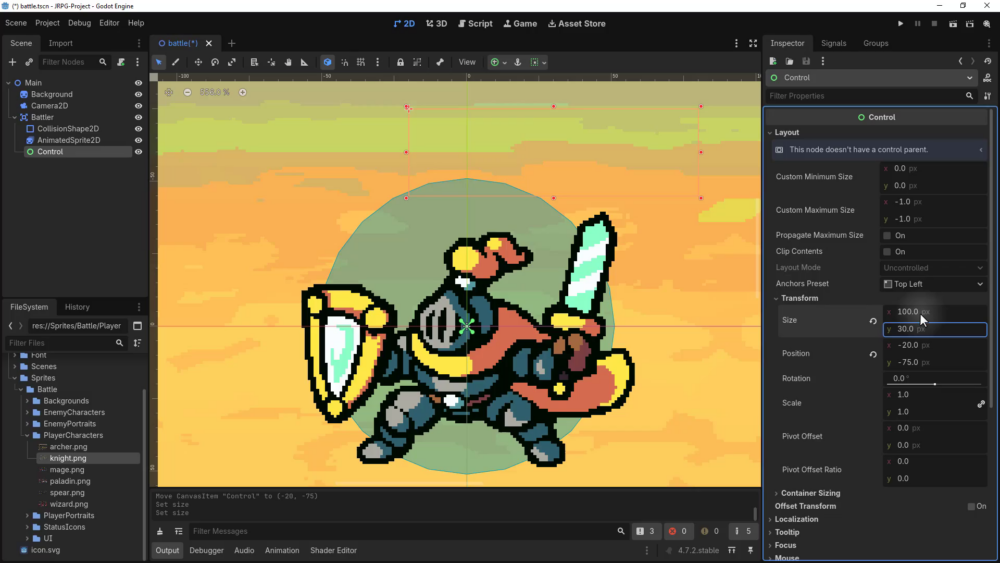
Add a Control node as another child of Battler. Position it above the character, set its size to approximately 100 pixels wide by 30 pixels high, center it over the battler, and rename it HeaderBar. A dedicated script will manage the header values as the project continues.
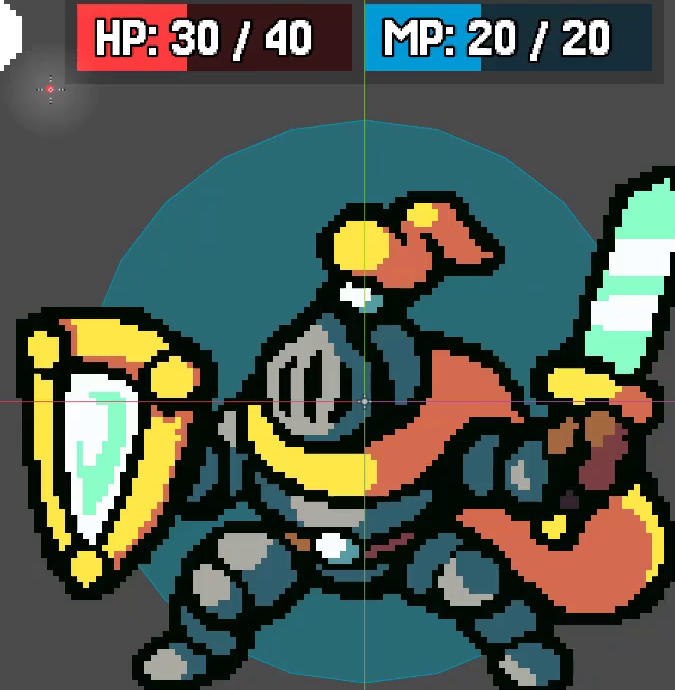
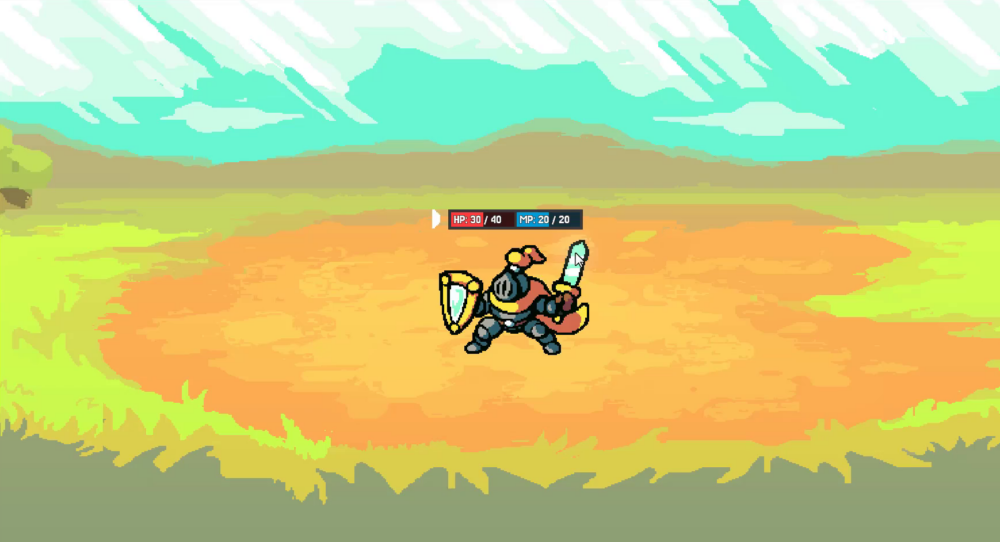
The completed header will place HP on the left and MP on the right. Each resource display uses a darker background, a lighter fill that changes with the current value, and text for the current and maximum amounts. The area above the bars will hold status indicators for effects such as poison or an attack increase. A separate turn indicator will identify the battler whose turn is active.
Add the Header Background
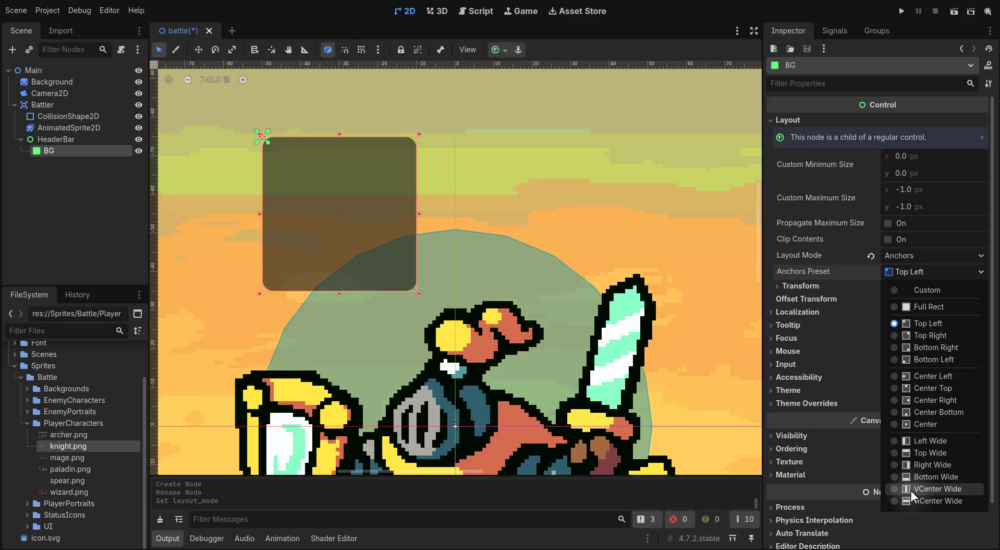
Add a Panel as a child of HeaderBar and rename it BG. Position it across the bottom half of the header, leaving the upper portion available for status icons.
Set the panel’s layout mode to Anchors and choose the Bottom Wide anchor preset. This allows the background to follow changes to the header bar’s size. Set its height to approximately 15 pixels.
Under Theme Overrides > Styles > Panel, create a StyleBoxFlat. Set its background color to a dark gray to replace the default rounded, translucent panel appearance.
Create the Health Bar
Add a ProgressBar as a child of HeaderBar and rename it HealthBar. Resize it to fit over the left side of the background. Disable Show Percentage so you can add custom text later, then leave a small gap of about one pixel along the top, left, and bottom edges. Set the value to around 50 while working so the filled and unfilled portions are easy to compare.
In the health bar’s theme overrides, create a StyleBoxFlat for both Background and Fill. Use a dark red for the background and a brighter red for the fill.
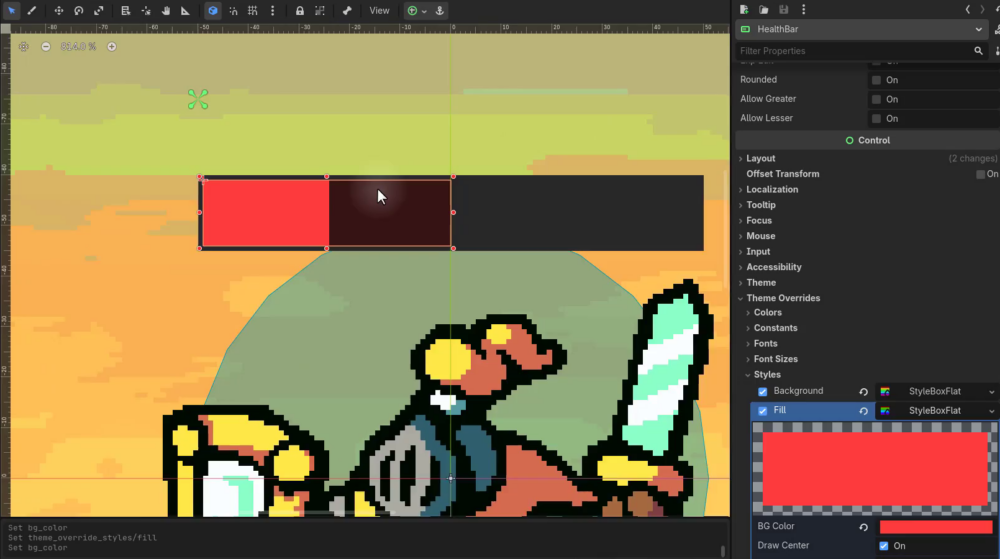
To complete this stage of the battler header, you’ll duplicate the health bar, move the copy to the right side, and change its colors to distinguish mana from health.
Create and Style the Mana Bar
Select HealthBar, duplicate it with Ctrl+D, and rename the copy ManaBar. Move and resize the new bar so it fits the second section of the header. Use a two-pixel gap around both bars to keep their spacing centered and consistent.
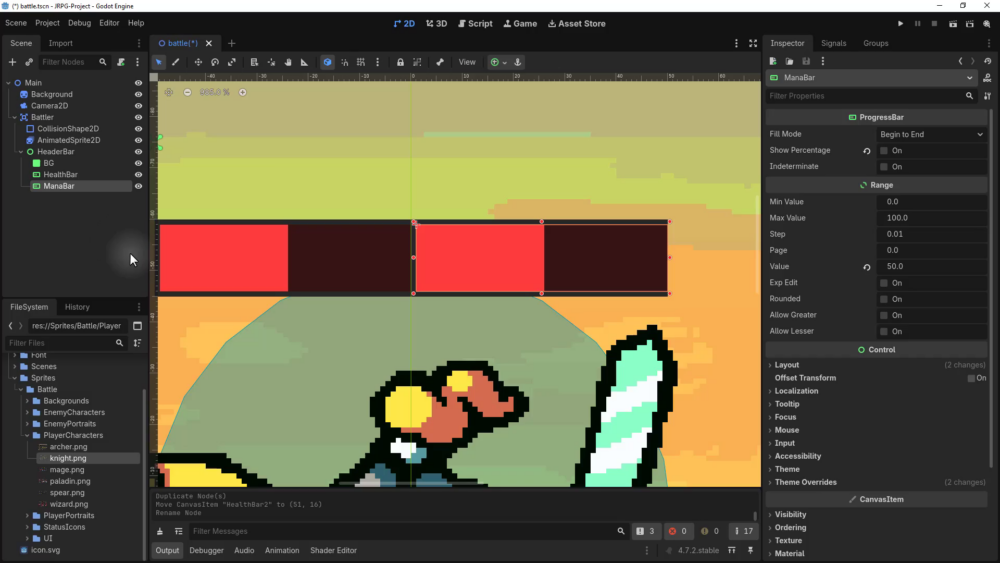
The duplicated bar initially shares its style subresources with the health bar. If you edit a shared color, both bars change. Expand Theme Overrides > Styles, then click the link icon beside the background style to make the resource unique. Repeat this for the fill style.
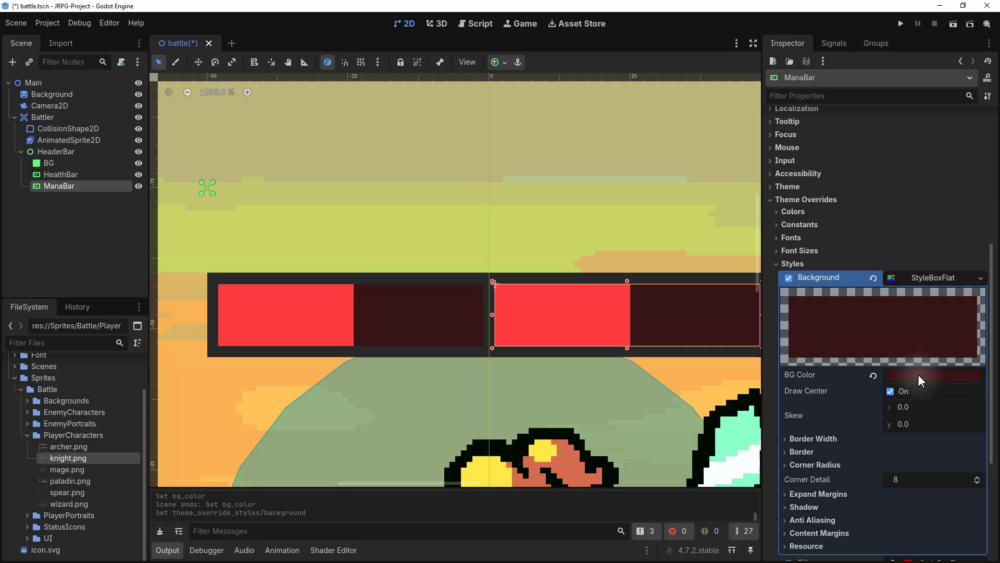
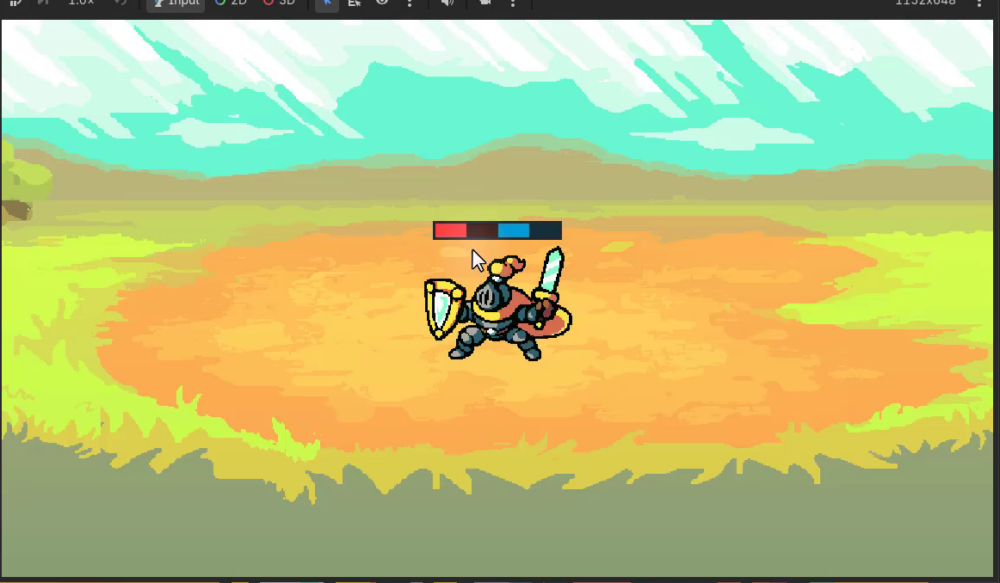
After unlinking both styles, choose a distinct blue fill for the mana bar. Run the project to review the red health bar and blue mana bar together. If the header background blends into the empty portions of the bars, increase its lightness to create clearer separation.
Add the Health Label
Create a new Label node, rename it HealthLabel, and position it over the health bar. Add temporary text such as HP: 30 / 40 so you can judge the label’s size and placement.
Create a new LabelSettings resource for the label. In its font property, quick-load the imported Jersey 20 pixel font, then reduce the font size to approximately nine pixels. Reposition the label until it fits comfortably inside the health bar.
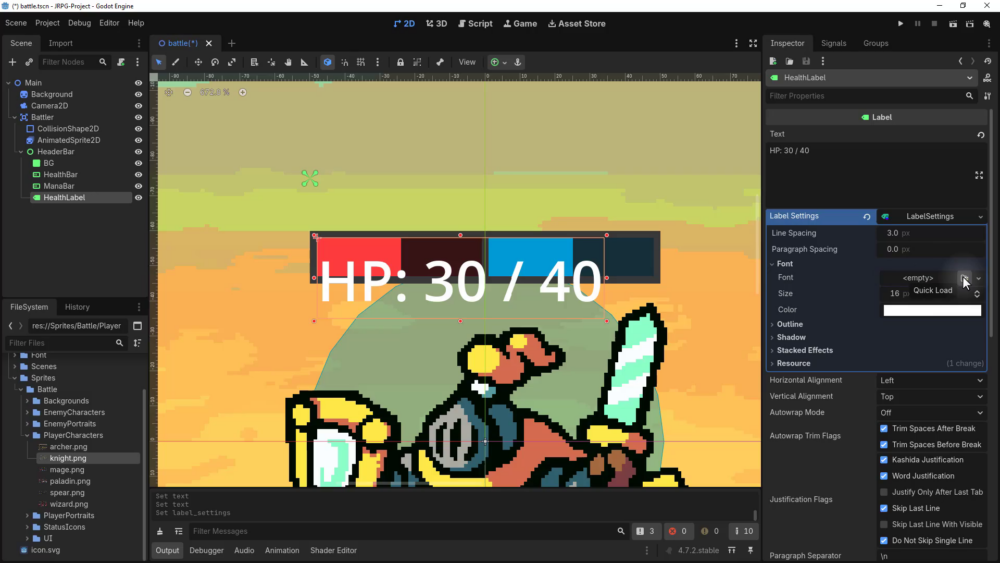
When previewing the scene inside Godot, use the three-dot menu in the top-right of the game view and enable Keep Aspect Ratio. This allows the preview to fill more of the available space without distorting the game.
Improve Pixel Font Rendering
The pixel font can appear blurry when the game view is enlarged because it is being rendered according to the scene’s pixel density. Select the font file in the FileSystem dock, open the Import dock, enable Multichannel Signed Distance Field, and reimport the asset.
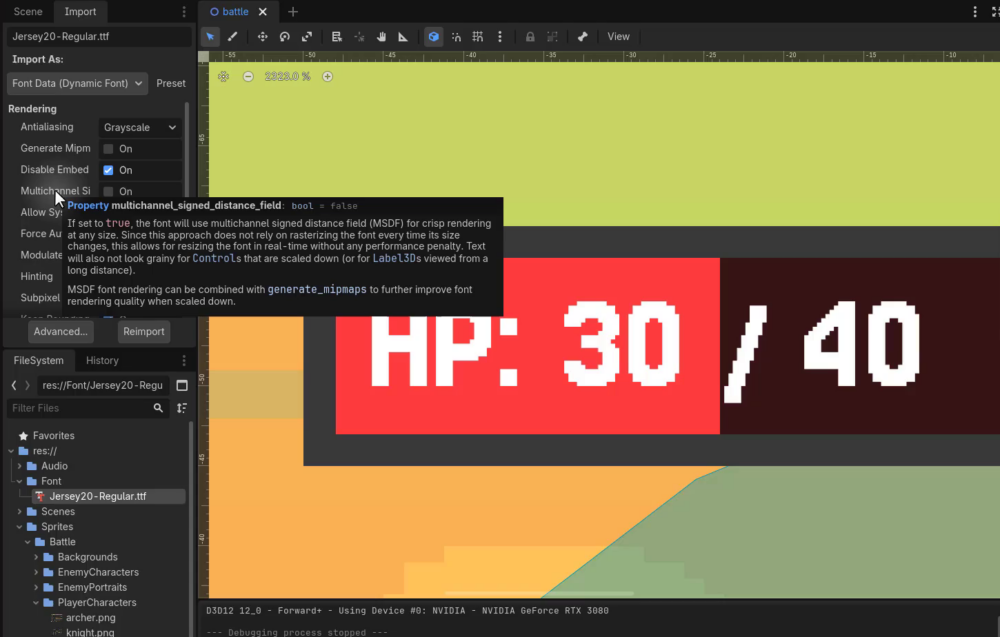
Run the project again to confirm that the text is crisp, then make any small position adjustments needed. To improve contrast, set the label outline color to black or a very dark gray and use an outline size of approximately two pixels.
Add the Mana Label
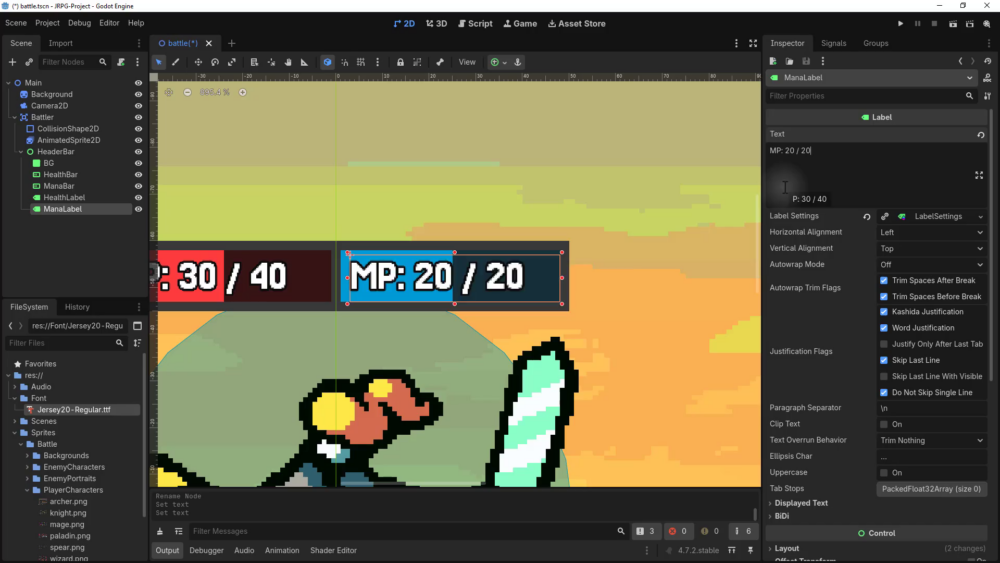
Duplicate HealthLabel, rename the copy ManaLabel, and move it over the mana bar. Change its temporary text to MP: 20 / 20, where MP represents mana points. Because the label was duplicated, it retains the font and outline settings you already configured.
Prepare the Status Icon Container
Create an HBoxContainer for the status area. This node will automatically arrange its future child icons horizontally, including their positioning and scaling. Resize the container to fill the status section of the header, then choose Layout > Layout Mode > Anchors > Top Wide. This anchor preset lets the container grow with the header if its size changes later.
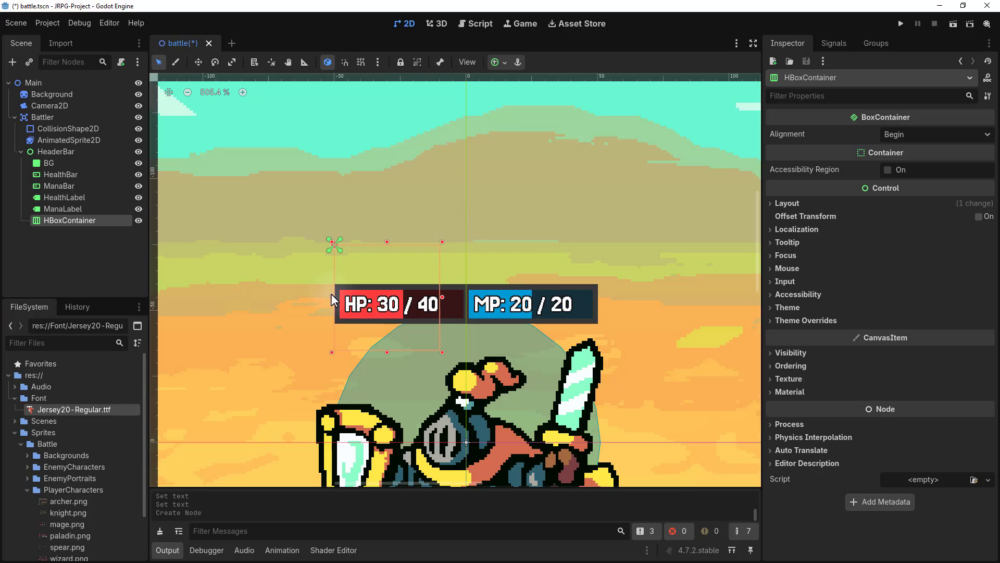
Rename the node StatusIconContainer. For now you are only preparing the container; the individual status icons will be added later.
Add the Turn Indicator
Find the turn indicator sprite in the UI sprites folder and drag it into the scene as a child of Battler. Position it beside the header bar and rotate it so that it points toward the battler’s information.
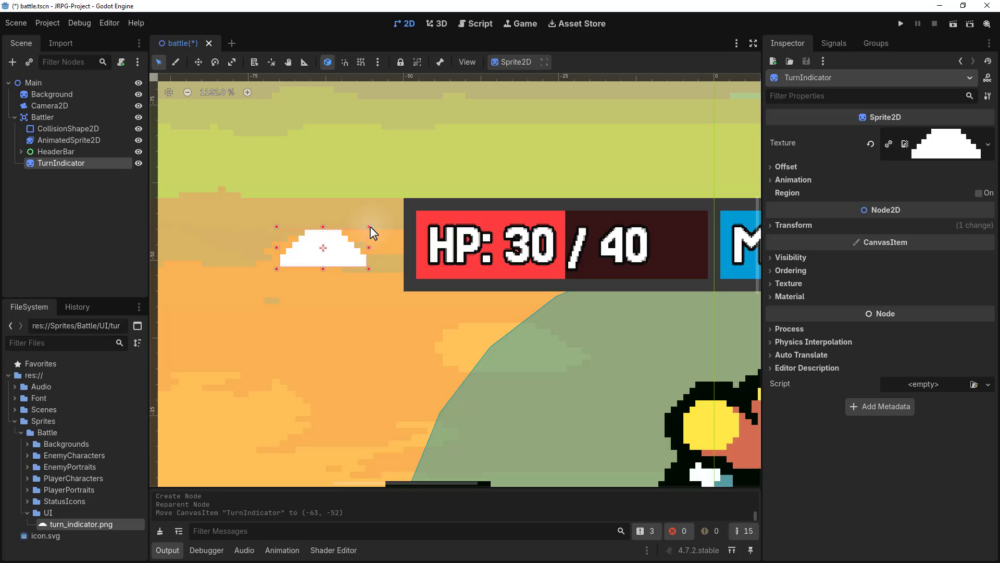
Run the project once more to review the completed header. It now contains distinct health and mana bars, crisp HP and MP labels, space for status icons, and a turn indicator.
Save the Battler Scene
Inside the Scenes folder, create a new folder named Battle for all battle-related scenes. Move the existing battle scene into this folder, then save the Battler node as battler.tscn.
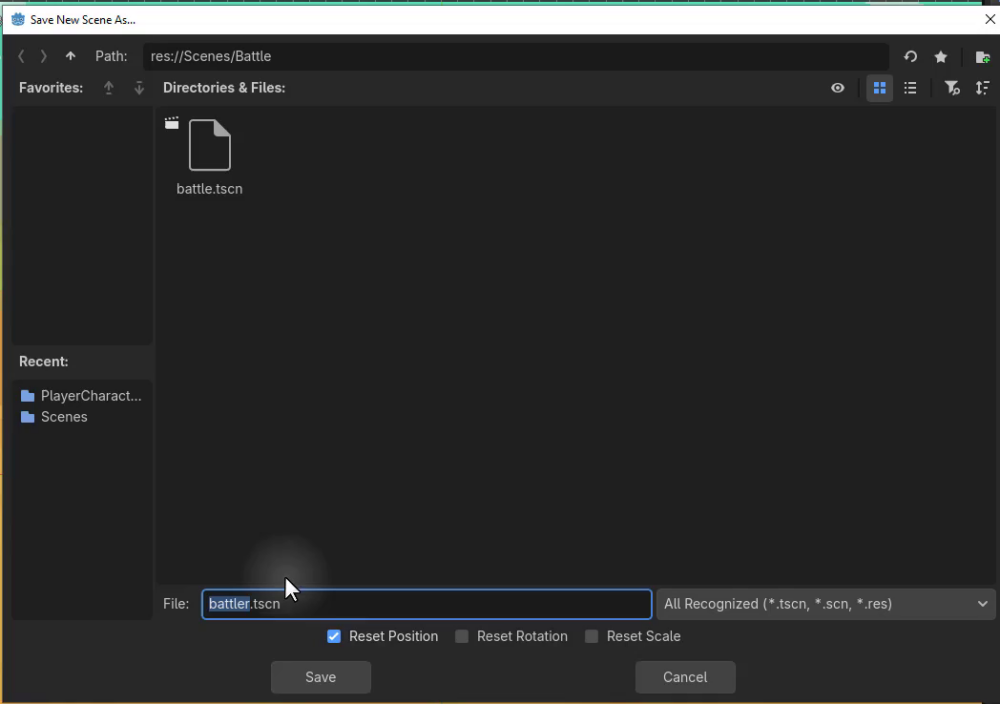
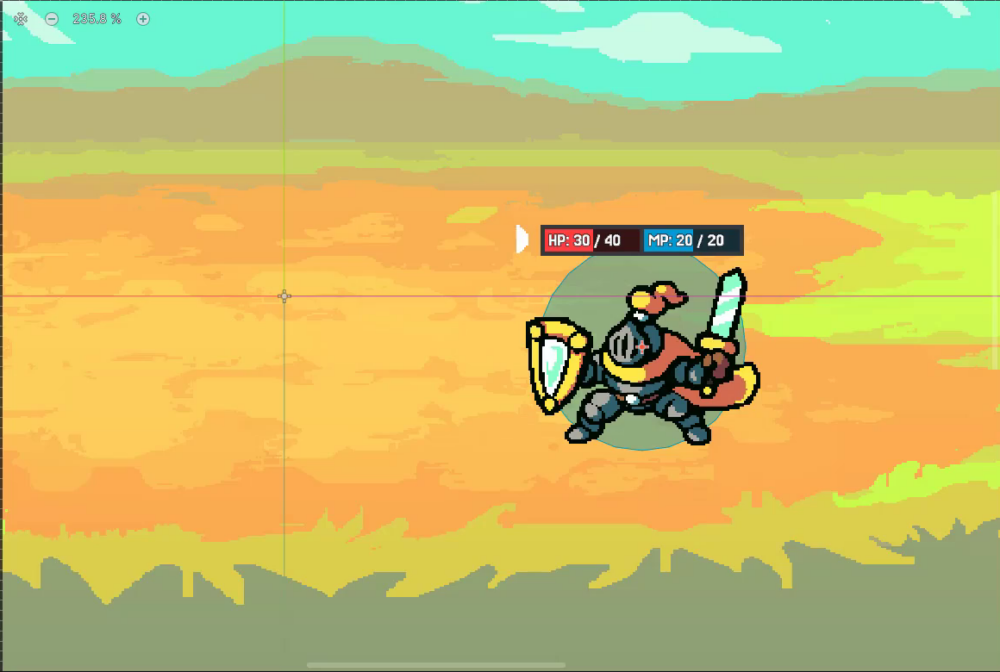
The reusable battler scene is now ready. Next, you’ll give it data to describe each character, followed by the script that controls the battler during combat.
Create the Battler Data Resource
A battler needs more than a scene: it needs data describing who it is and what it can do. You’ll create a reusable data resource that collects the information needed to represent a character in battle, including its display name, team, and base statistics. The same resource can later be extended with skills, attacks, status data, sprites, and enemy AI.
Inside the Scripts folder, create a Common folder for scripts shared by the battle scene and the future overworld. You can then add battler_data.gd and make it a named Resource class:
class_name BattlerData
extends Resource
Extending Resource lets you create data files that can be assigned through the Godot Inspector. Each file can hold the settings for one battler while the project continues to use a shared battler scene.
Define the Battler Identity and Team
The display name identifies a battler in menus, such as a target-selection list. You’ll also define a Team enum so each battler belongs either to the player-controlled party or to the enemy team:
enum Team
{
    PARTY,
    ENEMY
}

@export var display_name : String
@export var team : Team
An enum gives you a small set of named values instead of relying on arbitrary numbers or text. Because the variables are exported, Godot displays a text field for display_name and a dropdown for team.
Create the Knight Resource
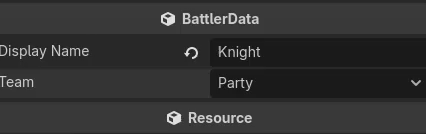
In the FileSystem dock, create Data/Battlers, add a new BattlerData resource, and save it as knight.tres. For this resource, set the display name to Knight and choose Party as the team. Future party members can use the same class with different values, while enemy resources can select the Enemy option.
List the Supported Stats
Next, add a Stat enum containing every statistic that your battle calculations will need:
enum Stat
{
    MAX_HEALTH,
    MAX_MANA,
    MANA_REGEN,
    ATTACK,
    DEFENCE,
    MAGIC_ATTACK,
    MAGIC_DEFENCE,
    ACCURACY,
    EVASION
}
MAX_HEALTH and MAX_MANA set the battler’s resource limits, while MANA_REGEN determines how much mana returns each turn. ATTACK and DEFENCE support physical damage, and MAGIC_ATTACK and MAGIC_DEFENCE provide corresponding values for spells. ACCURACY represents the chance to land an attack, and EVASION represents the chance to avoid one.
These separate values let you build different character roles. A knight can favor physical attack and defense, while a wizard can favor magic attack and magic defense.
Store the Base Stats in a Dictionary
Rather than create a separate variable for every statistic, you’ll store them in a typed dictionary. Each Stat enum value becomes a key, and its associated number becomes the value. Using Variant for the value type lets a statistic use an integer or a floating-point number when needed.
You can begin with entries for maximum health and maximum mana:
@export var base_stats : Dictionary[Stat, Variant] = {
    Stat.MAX_HEALTH: 100,
    Stat.MAX_MANA: 100
}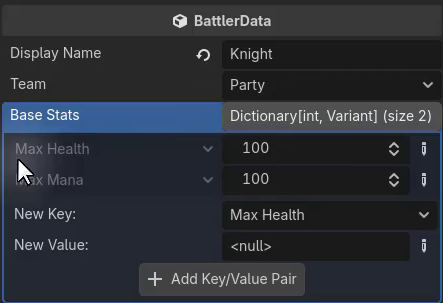
These are called base stats because effects applied during battle may modify the values used by a battler. The resource keeps the original configuration, and exporting the dictionary lets you customize each battler directly in the Inspector.
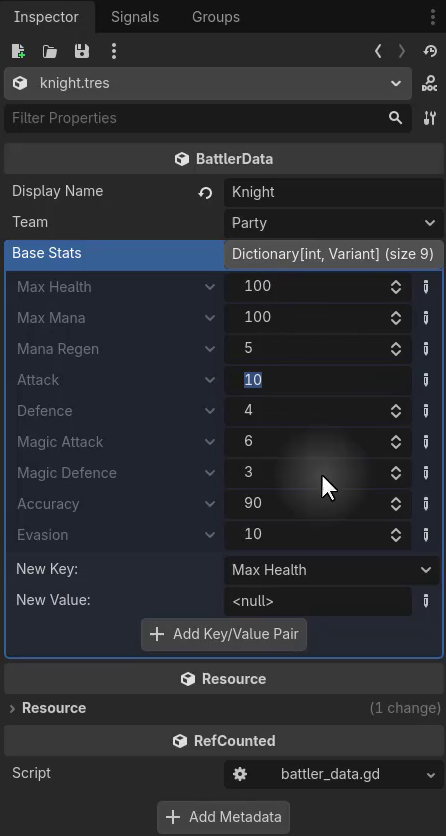
Then provide defaults for every current statistic:
@export var base_stats : Dictionary[Stat, Variant] = {
    Stat.MAX_HEALTH: 100,
    Stat.MAX_MANA: 100,
    Stat.MANA_REGEN: 5,
    Stat.ATTACK: 10,
    Stat.DEFENCE: 4,
    Stat.MAGIC_ATTACK: 6,
    Stat.MAGIC_DEFENCE: 3,
    Stat.ACCURACY: 90,
    Stat.EVASION: 10
}
An accuracy value of 90 gives the battler a 90 percent base chance to land an attack, while the evasion value contributes to its chance to dodge. You can adjust any of these defaults for individual battler resources as the project grows.
The BattlerData script will continue evolving. Future fields will hold the battler’s skills, its mana-free basic attack, status immunities, and the defending status used to reduce incoming damage, along with sprites or portraits and, for enemies, AI data that controls decision-making.
With the initial data resource ready, the next step is the script attached to the shared battler scene. That script will read from BattlerData and use these settings during combat.
Create the Battler Script
Open the Battler scene, select its root Area2D node, and attach a new script. Organize the file as Scripts/Battle/Battler/battler.gd so battle-related scripts remain grouped together.
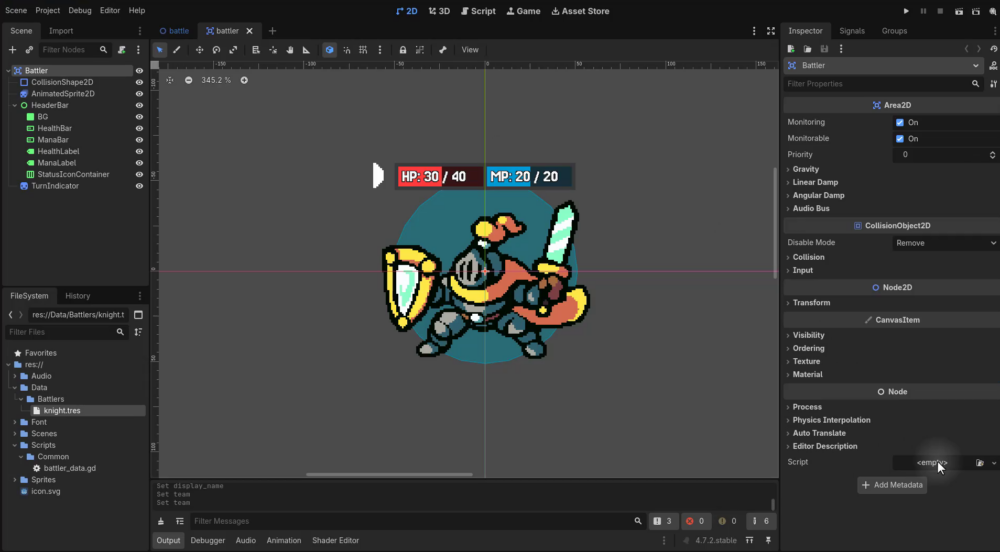
Give the script the global class name Battler and extend Area2D to match the scene’s root node:
class_name Battler
extends Area2D
While BattlerData stores the fixed configuration for a battler, the Battler class will track changing values such as health, mana, and whether the battler is alive.
Each Battler instance needs a reference to the resource that describes it. Exporting the variable makes it available in the Godot Inspector, where you can assign a resource such as knight.tres.
@export var data : BattlerData
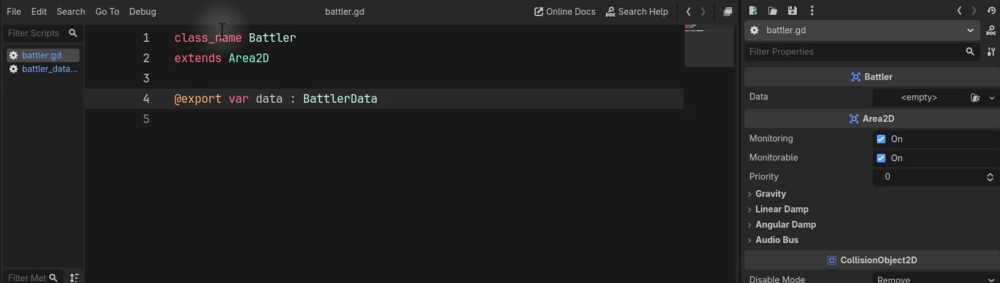
The resource contains stable configuration such as maximum health, maximum mana, attack, defense, sprites, and abilities. The Battler node uses that shared definition while keeping its own changing combat state.
Track Runtime State
Add integer variables for current health and mana, then add a Boolean that records whether the battler remains active in combat:
var current_health : int
var current_mana : int
var is_alive : bool = true
Maximum values belong in BattlerData, but current values belong to each Battler instance because they change as actions occur. You may later add more instance data for active status effects, such as poison that applies damage on every turn.
Add Update Signals
Other nodes need to react when the battler changes. For example, the header bar must update its health and mana displays, while the battle system needs to know when a battler dies. Define three signals for this communication:
signal HealthChanged (cur : int, max : int)
signal ManaChanged (cur : int, max : int)
signal Died
The health and mana signals provide both the current and maximum values, giving UI code everything it needs to update a label or progress bar. The Died signal will support later checks for victory or defeat.
Read Battler Stats Safely
Create a get_stat function that receives one member of the BattlerData.Stat enum and returns a floating-point value. The full name BattlerData.Stat is important because the enum is declared inside the BattlerData class; referring to Stat alone leaves Godot unable to find that type.
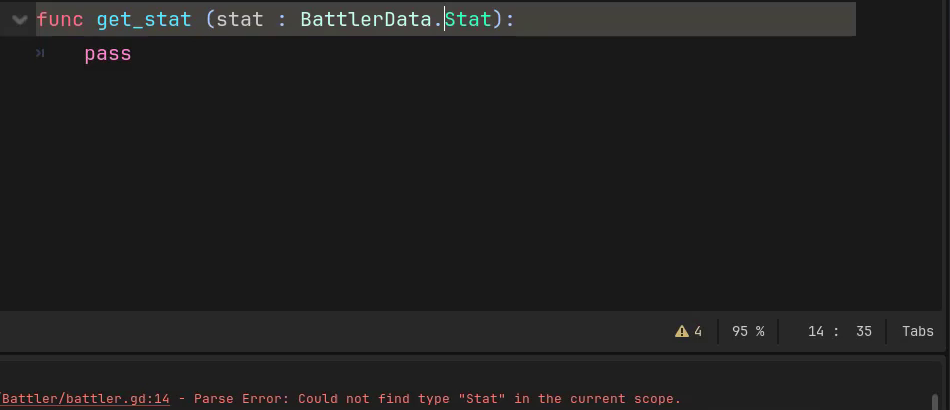
Read the requested key from the resource’s base_stats dictionary. A default of 0 keeps the lookup safe if the key does not exist. The TODO comment leaves a reminder that status effects may modify the returned value later.
func get_stat (stat : BattlerData.Stat) -> float:
    var value : float = data.base_stats.get(stat, 0)

    # TODO: Apply status effects

    return value
Apply Damage
The take_damage function accepts an integer amount and subtracts it from current_health. It also retrieves the battler’s maximum health and emits HealthChanged so connected UI elements can refresh immediately.
func take_damage (amount : int):
    var max_health : int = get_stat(BattlerData.Stat.MAX_HEALTH)
    current_health -= amount
    HealthChanged.emit(current_health, max_health)

    if current_health <= 0:
        die()

func die ():
    pass
get_stat returns a float, but max_health is declared as an integer because this health system uses whole numbers. If health reaches zero or lower, die is called. That function remains an empty placeholder for now and will gain its behavior later.
Heal Without Exceeding Maximum Health
Healing follows the opposite flow. Add the amount to current_health, then clamp the result to the maximum so healing cannot push the battler above its configured limit. Emit the same health signal after the final value is ready.
func heal (amount : int):
    var max_health : int = get_stat(BattlerData.Stat.MAX_HEALTH)
    current_health += amount

    if current_health > max_health:
        current_health = max_health

    HealthChanged.emit(current_health, max_health)
Challenge: Manage Mana
To complete this part of the Battler script, use the same patterns to plan two mana functions:
spend_manashould reduce the current mana value.restore_manashould increase current mana without exceeding the battler’s maximum mana.- Mana changes should notify connected systems through
ManaChanged.
The solution follows.
Spend Mana
Start the challenge solution by adding a function that receives the amount of mana to spend. The first version retrieves the battler’s maximum mana, subtracts the requested amount, and emits the ManaChanged signal with both the current and maximum values.
func spend_mana (amount : int):
    var max_mana : int = get_stat(BattlerData.Stat.MAX_MANA)
    current_mana -= amount
    ManaChanged.emit(current_mana, max_mana)
This signal gives the user interface and other connected systems the information they need to react to the updated resource value.
Prevent Invalid Mana Spending
The initial implementation can reduce mana below zero when the battler cannot afford the requested amount. You prevent this by checking the available mana before changing it, and by returning a Boolean value so callers can tell whether the operation succeeded.
func spend_mana (amount : int) -> bool:
    if current_mana < amount:
        return false

    var max_mana : int = get_stat(BattlerData.Stat.MAX_MANA)
    current_mana -= amount
    ManaChanged.emit(current_mana, max_mana)
    return true
If current_mana is lower than amount, the function exits with false and leaves the resource unchanged. Otherwise, it deducts the mana, emits the signal, and returns true.
Restore Mana
Restoring mana follows a similar pattern, but it needs an upper limit instead of an affordability check. Add the requested amount, clamp the result to the maximum mana stat, and then emit ManaChanged.
func restore_mana (amount : int):
    var max_mana : int = get_stat(BattlerData.Stat.MAX_MANA)
    current_mana += amount

    if current_mana > max_mana:
        current_mana = max_mana

    ManaChanged.emit(current_mana, max_mana)
The maximum check ensures that recovery effects cannot raise the battler’s mana beyond the value defined in its data.
Prepare the Evade Behavior
Finally, add an empty evade function. Battle logic will call this function after an opponent attacks and the battler successfully avoids the hit. Later, it can play an evasion animation and sound effect.
func evade ():
    pass
With these functions in place, the battler can manage mana without exceeding its valid range and can report changes through signals.
Conclusion
You now have a complete, reusable battler ready for battle. Along the way, you covered:
- Building a battler scene with an Area2D root, collider, and animated idle sprite
- Creating an HP and MP header with styled bars, pixel-font labels, a status icon container, and a turn indicator
- Defining a BattlerData resource with teams and base stats
- Exporting a data reference and tracking runtime health, mana, and alive state
- Signaling health, mana, and death changes to other nodes
- Applying damage, healing, and safe mana spending and restoration
The natural next step is connecting those health and mana signals to the header bar so its values and labels stay up to date automatically.
If you want to keep building this JRPG battle with a structured, project-based path, the Intermediate Godot Mini-Degree continues this project through the full battle system and other intermediate Godot topics.
Did you come across any errors in this tutorial? Please let us know by completing this form and we’ll look into it!
FINAL DAYS: Unlock coding courses in Unity, Godot, Unreal, Python and more.