A Godot building system needs more than a way to place tiles: walls must connect, the player must appear at the right depth, and furniture needs suitable collisions. Drawing on Zenva’s experience helping a community of over 1,000,000 learners and developers gain digital skills, this tutorial walks you through those connected tasks in a top-down house-building project.
This tutorial assumes basic Godot familiarity and access to the course project with its existing player, input actions, and assets. You’ll set up walls and floors, add a grid-aligned build preview, then extend placement to furniture and carpets.
Table of contents
Download Project Files
The project files and full project are available through the course included in the Godot 4 Game Development Mini-Degree. Follow that guided path if you’d like the complete project context, or keep reading this free tutorial to work through the building system.

Set Up Tiles for Your Godot Building System
Start with the house’s tile layers. Separating walls from floors lets you control their depth independently while using auto-tiling to connect the walls.
Separating the Floor and Wall Layers
In a top-down game, the player should appear in front of a wall when standing below it and behind it when standing above it. The floor, however, should always remain beneath the player. A single background TileMap layer cannot provide both behaviors.
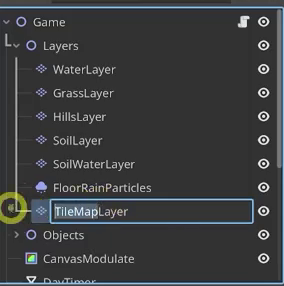
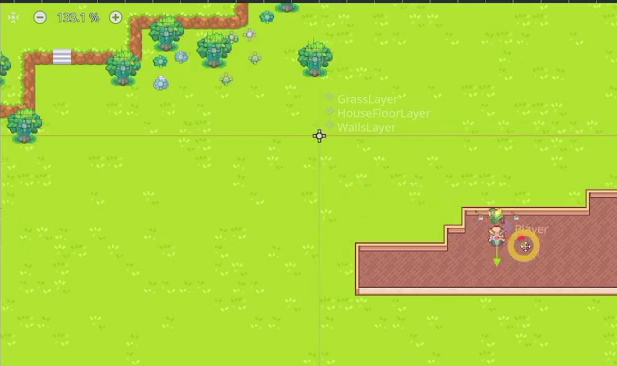
Rename the existing tilemap layer to House Floor Layer. Inside the Objects node, add another tilemap layer named Walls Layer. Keep both the player and Walls Layer inside Objects; their relative depth will rely on YSort, so the wall layer’s exact position within that node is not important.
Setting Up the TileSet for Walls
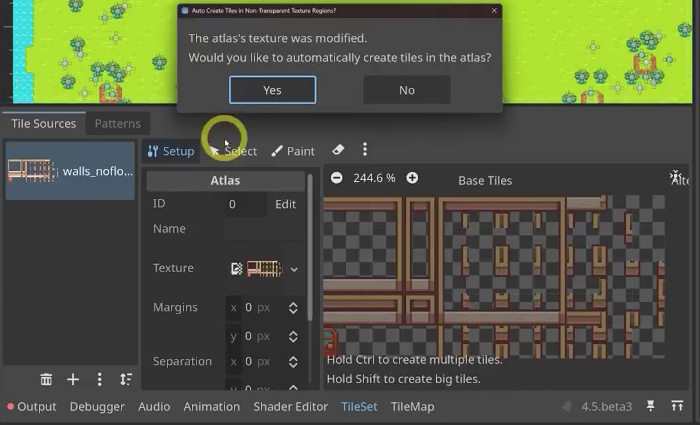
On Walls Layer, create a new TileSet with the defaults and add walls_no_floor.png, the wall artwork without floor graphics. Accept Godot’s offer to create tiles automatically in the texture’s non-transparent regions.
Expand Terrain Sets, add a terrain set, and add one terrain inside it. Name the terrain Walls and give it a distinct purplish-pink color so its connections are easy to see.
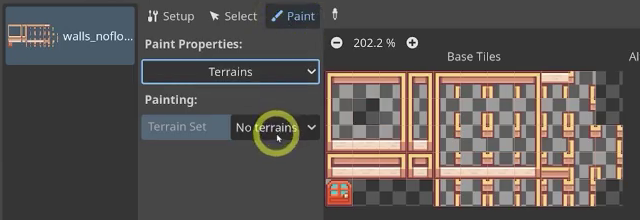
Switch to Paint, select terrain set zero and the Walls terrain, and enable the wall tiles, leaving out the door. Paint each tile’s connection points for corners, straight walls, T-junctions, and the other connections. Leave out the center tiles covered by the floor.
Enabling the Empty Center Tile
Select Walls Layer and use the Walls terrain to draw a house. If the center is left with gaps, the empty center tile needs to be enabled: because it has no pixels, Godot ignores it by default.
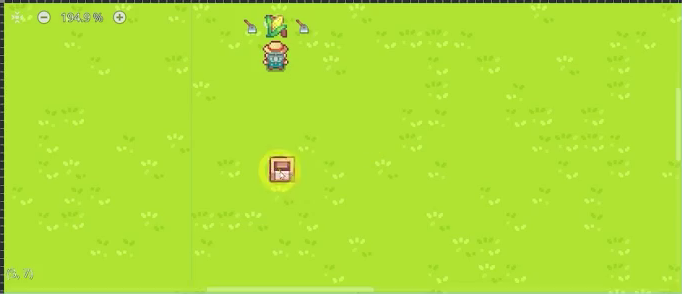
In Setup, create a region for that empty tile to activate it manually. Return to Paint and include it in the terrain connections so the house draws cleanly.
Configuring the Floor
On House Floor Layer, create another TileSet, removing walls.png and keeping only the single floor cell. The floor uses the same tile throughout, so it does not need auto-tiling. Give the floor tile an ID of zero for access from code later.
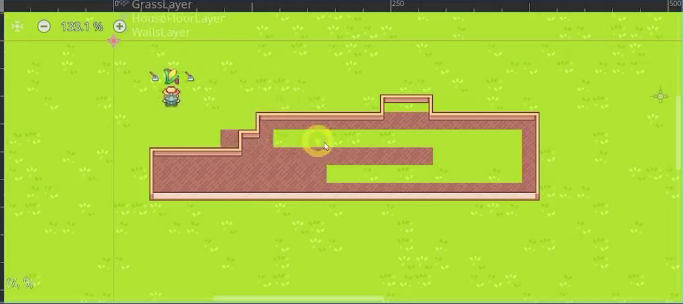
Draw the floor shape on House Floor Layer, then draw the walls over it on Walls Layer.
Enabling YSort for Correct Depth
Select Walls Layer, open Ordering in the Inspector, and enable YSort Enabled.
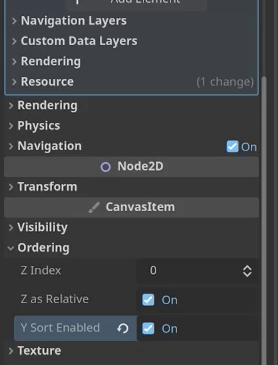
The player’s Y position now determines whether they appear behind or in front of a wall tile. A smaller Y position places the player behind the wall; a larger one places them in front. The separate floor layer stays beneath the player.
Adding Collisions to the Walls
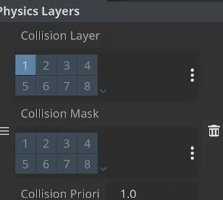
To make the walls solid, open the wall TileSet, expand Physics Layers, and add a physics layer. Keep its collision layer set to 1 for the terrain.
Switch to Paint and choose Physics Layer 0. Enable Grid Snap, then draw a collision polygon around the part of each wall tile that should block movement. Repeat this for every solid wall tile.
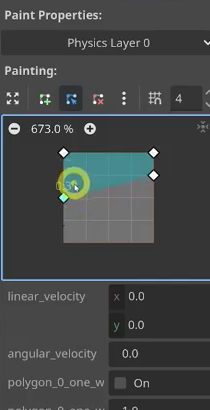
A single polygon may leave small areas with too much or too little collision. For a closer fit, use the Add polygon tool to create additional polygons on the same tile.

Place the player inside the house and test movement. The walls should now block the player.
Add Build Mode and a Grid-Aligned Preview
With the house tiles ready, you can connect the player’s build input to an overlay that previews placement and pauses the day timer.
Emitting a Build Mode Signal
At the top of player.gd, alongside the existing signals, declare a parameterless build_mode signal:
signal build_mode
In Project Settings > Input Map, the project’s build action is mapped to M. Check for that action inside get_input.
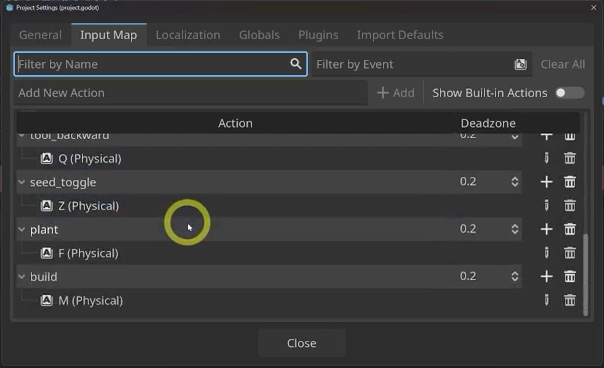
When the action is pressed, disable movement, emit the signal, clear the movement direction, and return the move state machine to idle:
func get_input():
	direction = Input.get_vector("left", "right", "up", "down")

	# ... existing input checks

	if Input.is_action_just_pressed("build"):
		can_move = false
		build_mode.emit()
		direction = Vector2.ZERO
		move_state_machine.travel('idle')
		$AnimationTree.set("parameters/MoveStateMachine/idle/blend_position", Vector2.DOWN)
The final line is optional: setting the idle blend position to Vector2.DOWN makes the character face downward when build mode starts.
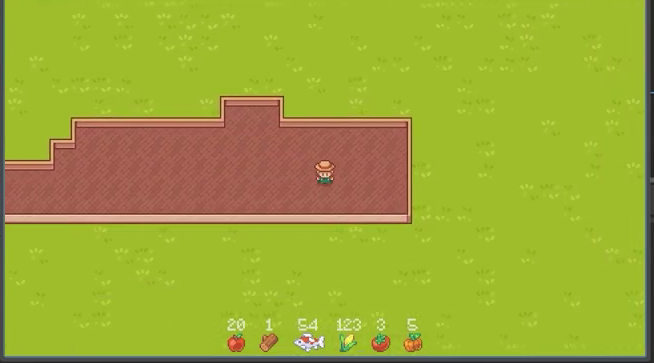
Listening for Build Mode in the Game Scene
Select the Player node in the Game scene and connect its build_mode signal to game.gd.
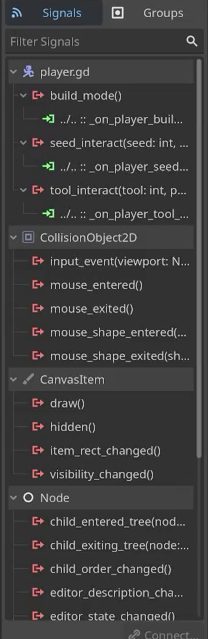
In the generated handler, pause DayTimer and reveal the build overlay using the player’s current position. You’ll create the overlay next.
func _on_player_build_mode() -> void:
	$DayTimer.paused = true
	$Overlay/BuildOverlay.reveal($Objects/Player.position)
Use the timer’s paused property here. A Timer node does not have a pause() method; calling it produces a runtime error.
Creating the Build Overlay Scene
Create the placement preview as a separate scene:
- Add a
Node2Droot namedBuildOverlay. - Add a
Sprite2Dchild namedPreviewSprite. - Assign
graphics/ui/objects.pngto the sprite. This spritesheet contains seven buildable objects. - Save the scene in the
uifolder.
The sprite’s Frame value in the Inspector’s Animation section chooses which object is displayed.

In the Game scene, add an instance of BuildOverlay beneath Overlay. Hide it with the Scene dock’s eye icon so it appears only when the player enters build mode.
Scripting the Reveal Function
Attach build_overlay.gd to the overlay’s root. Its reveal function takes the player’s position, shows the overlay, and converts that position into a grid coordinate:
extends Node2D

var current_grid_coord: Vector2i

func reveal(pos: Vector2):
	show()
	current_grid_coord = Vector2i(
		int(pos.x / Global.TILE_SIZE),
		int(pos.y / Global.TILE_SIZE)
	)
	position = current_grid_coord * Global.TILE_SIZE
Dividing by Global.TILE_SIZE gives the grid coordinate. The int() conversions make the integer conversion explicit. Multiplying the resulting coordinate by the tile size returns it to pixel space for the overlay’s position.
Adding a Positional Offset
The first version places the preview directly over the player.
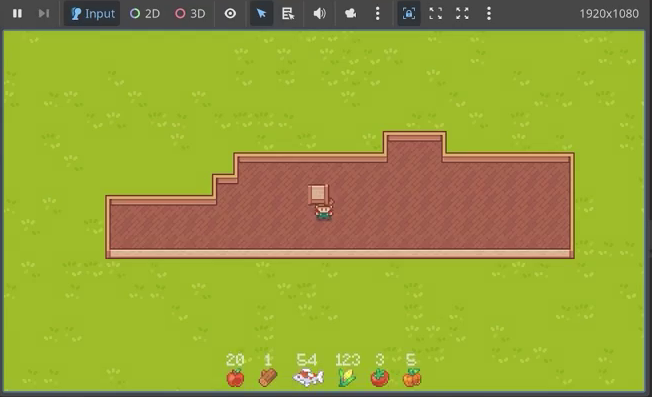
Add an exported start_grid_offset so you can adjust the starting position in the editor. The default below places it two cells to the right without moving it down:
extends Node2D

var current_grid_coord: Vector2i
@export var start_grid_offset: Vector2i = Vector2i(2, 0)

func reveal(pos: Vector2):
	show()
	current_grid_coord = Vector2i(
		int(pos.x / Global.TILE_SIZE),
		int(pos.y / Global.TILE_SIZE)
	) + start_grid_offset
	position = current_grid_coord * Global.TILE_SIZE
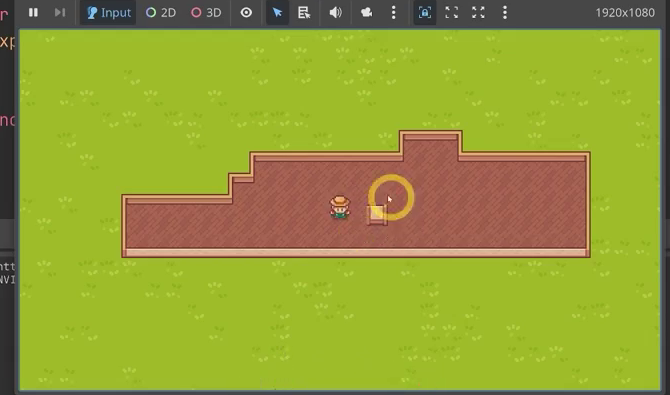
Pressing M now stops the player, pauses the day timer, and displays the grid-aligned preview beside the character.
Move the Build Cursor and Place Walls and Floors
Next, let the player move the preview with WASD and press space to place a tile. The overlay will emit a signal, leaving the placement logic in the game script.
Tracking Whether the Player Is Building
Add a building flag to player.gd, initially set to false:
var building := false
In the existing build-action check inside get_input, also set that flag to true when build mode starts:
if Input.is_action_just_pressed("build"):
	build_mode.emit()
	building = true
Reading Input in the Build Overlay
In build_overlay.gd, get a reference to the player through the Player group:
@onready var player = get_tree().get_first_node_in_group('Player')Handle the overlay’s controls in _input, checking player.building before responding. The event parameter has an underscore because you do not need to use it.
Read the four directional actions with Input.get_vector and store the result as a Vector2i. Add it to the grid coordinate, then multiply by the tile size to update the overlay’s pixel position:
func _input(_event: InputEvent) -> void:
	if player.building:
		var direction: Vector2i = Input.get_vector("left", "right", "up", "down")
		current_grid_coord += direction
		position = current_grid_coord * Global.TILE_SIZE
Enter build mode with M and use WASD to move the preview around the grid.
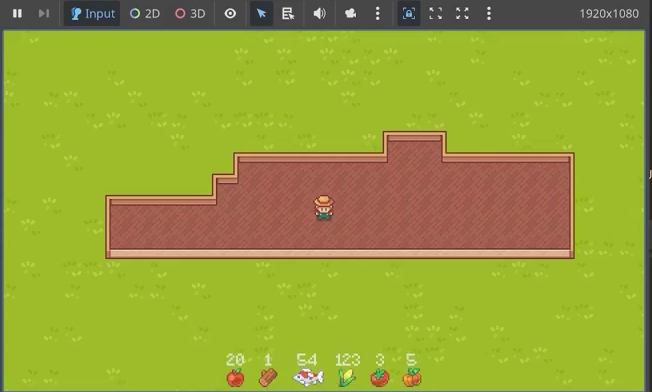
Emitting a Build Signal
The action input, mapped to spacebar, will place the selected object. At the top of build_overlay.gd, track that object, starting with walls:
var current_object: Global.Objects = Global.Objects.WALLS
The object types come from the enum in global.gd:
enum Objects {WALLS, DOOR, CARPET, BED, PLANT, SHELF, TABLE}Declare a signal carrying both the grid position and the selected object type:
signal build(pos: Vector2i, object: Global.Objects)
Then extend _input to emit it when the action button is pressed:
func _input(_event: InputEvent) -> void:
	if player.building:
		var direction: Vector2i = Input.get_vector("left", "right", "up", "down")
		current_grid_coord += direction
		position = current_grid_coord * Global.TILE_SIZE

		if Input.is_action_just_pressed("action"):
			build.emit(current_grid_coord, current_object)
Connecting the Signal and Placing a Wall
Select BuildOverlay, open the Node tab, and connect its build signal to game.gd. In the generated _on_build_overlay_build handler, call set_cells_terrain_connect on WallsLayer:
func _on_build_overlay_build(pos: Vector2i, object: int) -> void:
	$Objects/WallsLayer.set_cells_terrain_connect([pos], 0, 0)
The method receives an array of grid positions, then the terrain set and terrain indices, both 0. Auto-tiling connects adjacent wall tiles. Test it by entering build mode, positioning the cursor beside a wall, and pressing space to extend the wall.
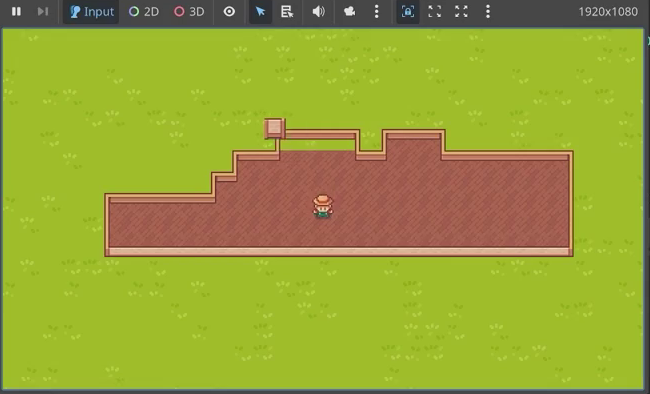
Fixing the Preview Alignment
The preview sprite uses a center origin, while the tiles are placed from their top-left corner. To line them up, select PreviewSprite and set its Transform > Position to (8, 8). With 16-pixel tiles, that offset aligns the sprite’s top-left corner with the node origin.
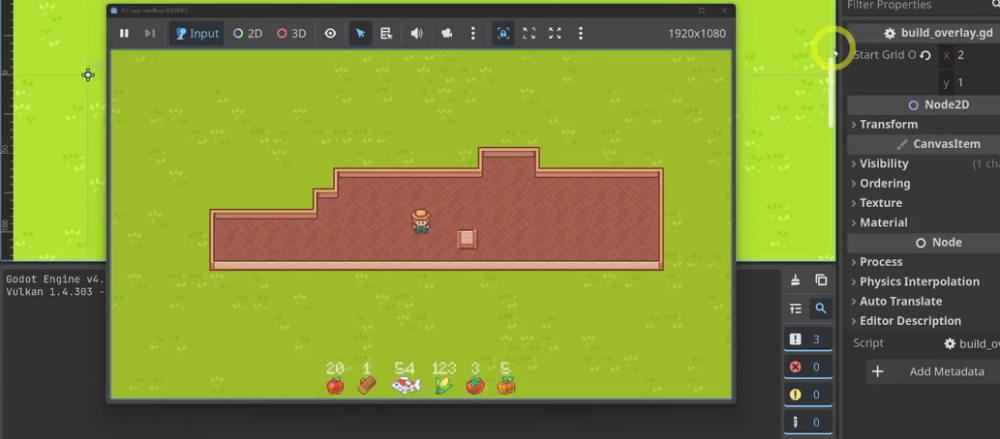
Keep the starting grid offset at two cells to the right and zero down:
@export var start_grid_offset: Vector2i = Vector2i(2, 0)
Placing the Floor
Add floor placement to the same handler. Call set_cell on HouseFloorLayer beneath Layers, passing the position, source ID 0, and atlas coordinate Vector2i.ZERO for its single floor tile:
func _on_build_overlay_build(pos: Vector2i, object: int) -> void:
	$Objects/WallsLayer.set_cells_terrain_connect([pos], 0, 0)
	$Layers/HouseFloorLayer.set_cell(pos, 0, Vector2i.ZERO)
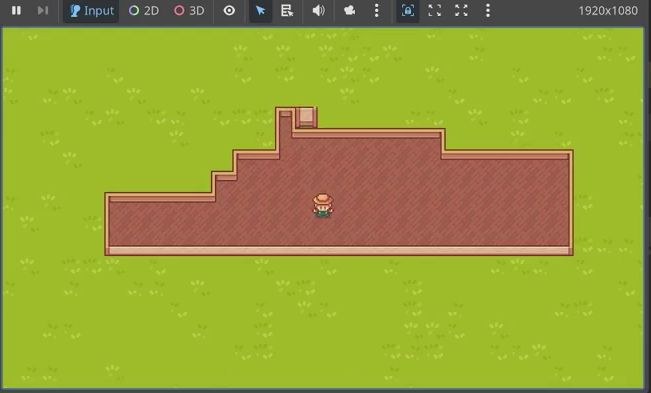
Now M enters build mode, WASD moves the cursor, and space places connected walls with floor tiles underneath.
Add Tile Deletion, Exit Controls, and Object Selection
With placement working, add controls to remove tiles, leave build mode, and choose the next object to build.
Deleting Placed Objects
In build_overlay.gd, declare a delete signal carrying the current grid position:
signal delete(pos: Vector2i)
Inside _input, emit it when the player presses backspace, represented by ui_text_backspace:
if Input.is_action_just_pressed("ui_text_backspace"):
	delete.emit(current_grid_coord)
Select BuildOverlay and connect delete to the main Game node through the Node tab. In the resulting _on_build_overlay_delete handler, remove the floor with erase_cell.
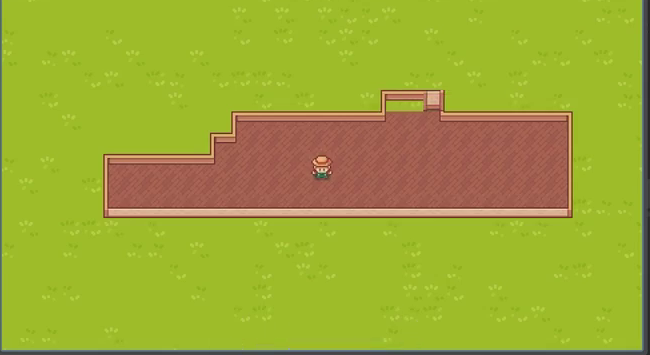
For walls, use set_cells_terrain_connect with terrain value -1 instead of directly erasing the cell. This removes the tile while preserving the surrounding auto-tile connections:
func _on_build_overlay_delete(pos: Vector2i) -> void:
	$Layers/HouseFloorLayer.erase_cell(pos)
	$Objects/WallsLayer.set_cells_terrain_connect([pos],0,-1)
Exiting Build Mode
Back in the overlay’s _input function, check for ui_cancel, the escape key. Clear the player’s build flag, allow movement again, and hide the overlay:
if Input.is_action_just_pressed("ui_cancel"):
	player.building = false
	player.can_move = true
	hide()
You can now place or remove tiles, then press escape to walk around again.
Toggling Buildable Objects
Use the existing tool_forward and tool_backward actions to cycle through object types. Input.get_axis returns 1 when only the forward action is pressed and -1 when only the backward action is pressed.
Add that direction to current_object. Use posmod to wrap within the enum’s bounds, cast the result back to Global.Objects, and update the preview frame:
if Input.is_action_just_pressed("tool_forward") or Input.is_action_just_pressed("tool_backward"):
	var toggle_dir = int(Input.get_axis("tool_backward", "tool_forward"))
	current_object = posmod(current_object + toggle_dir, Global.Objects.size()) as Global.Objects
	$PreviewSprite.frame = int(current_object)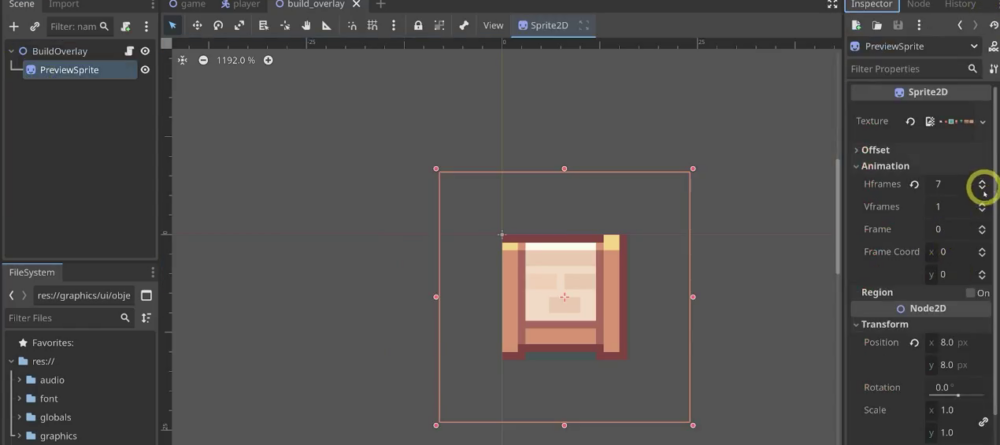
Each frame in the spritesheet corresponds to a buildable object, so the preview changes as you cycle through the choices.
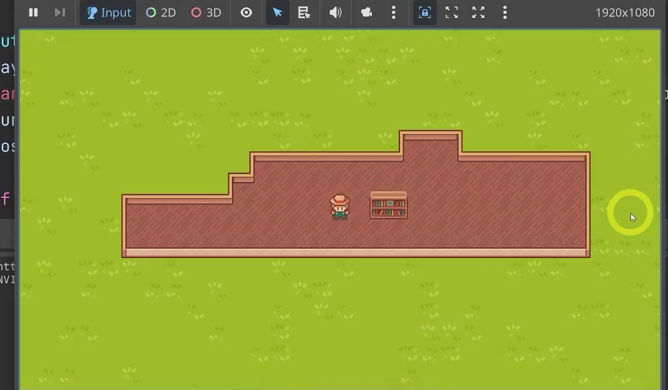
At this stage, the preview can show different objects, but placement still creates walls. The next section adds the generic object-placement logic.
Place Furniture and Carpets With a Reusable Scene
A single generic object scene can handle the bed, plant, shelf, table, and carpet. Walls retain their tile-based logic; door implementation is outside this tutorial.
Checking Which Object We Are Building
In game.gd, place the existing wall and floor logic under a check for Global.Objects.WALLS. A separate condition will handle everything except walls and doors. The following outline shows where those branches belong:
func _on_build_overlay_build(pos: Vector2i, object: int) -> void:
	if object == Global.Objects.WALLS:
		# existing wall and floor logic

	# door handling comes in the next lesson

	if object not in [Global.Objects.WALLS, Global.Objects.DOOR]:
		# place a generic object here
The generic objects will use a static body so they can sit in the world and, where appropriate, block movement.
Creating a Generic Object Scene
Create a scene with a StaticBody2D root named Object, then add Sprite2D and CollisionShape2D children.
- Assign the objects spritesheet at
res://graphics/ui/Objects.pngto the sprite’s Texture. In Animation, set Hframes to7. - Assign a new
RectangleShape2Dto the collision node’s Shape. Its initial dimensions are not important because you will set them from code.
Save the scene as object.tscn in scenes/levels/.
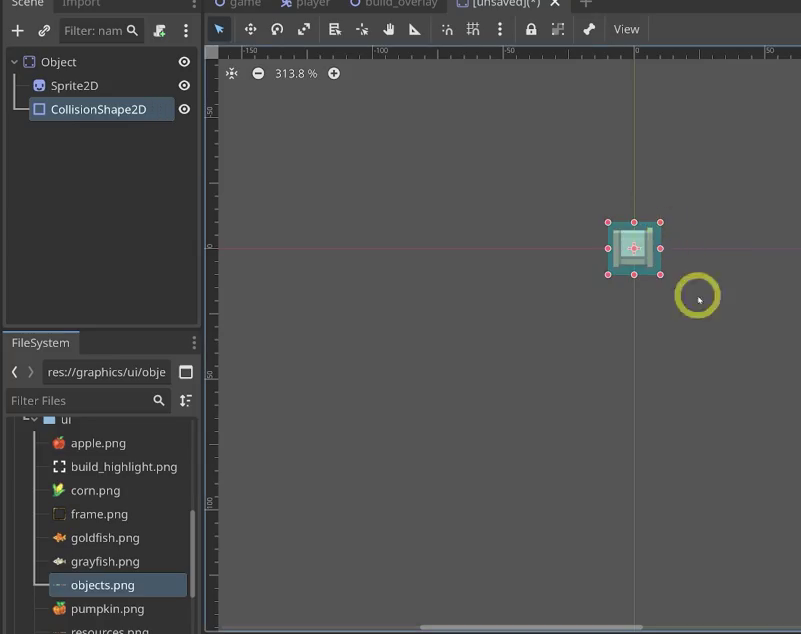
Scripting the Object
Attach object.gd to the root. Start with a setup function that selects the sprite frame from the object enum. The enum order matches the frames in the spritesheet:
extends StaticBody2D

func setup(object_enum: Global.Objects):
	$Sprite2D.frame = int(object_enum)
Spawning Objects From the Game Script
At the top of game.gd, preload the scene:
var object_scene = preload("res://scenes/levels/object.tscn")Inside the generic-object condition, instantiate the scene, call setup with the chosen type, and add it to Objects. Use object_instance for the variable because object is already the function parameter:
	if object not in [Global.Objects.WALLS, Global.Objects.DOOR]:
		var object_instance = object_scene.instantiate() as StaticBody2D
		object_instance.setup(object)
		$Objects.add_child(object_instance)
Fixing the Placement Position
The object can now appear, but its position has not yet been set to match the cursor.
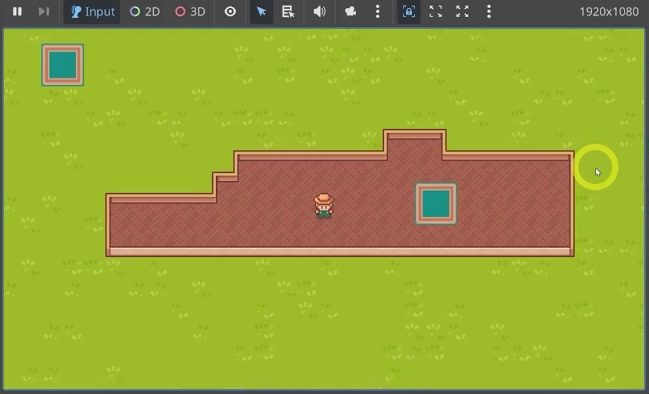
Convert the build position from tile coordinates to pixels by multiplying by 16. Since the object is centered, add a half-tile offset of Vector2i(8, 8):
object_instance.position = pos * 16 + Vector2i(8, 8)
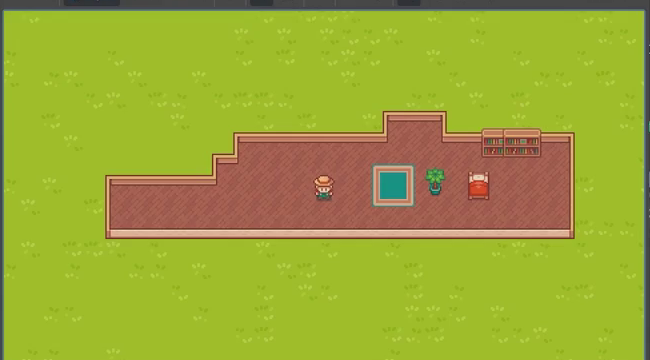
With that position set, you can place carpets, beds, plants, and shelves at the selected location.
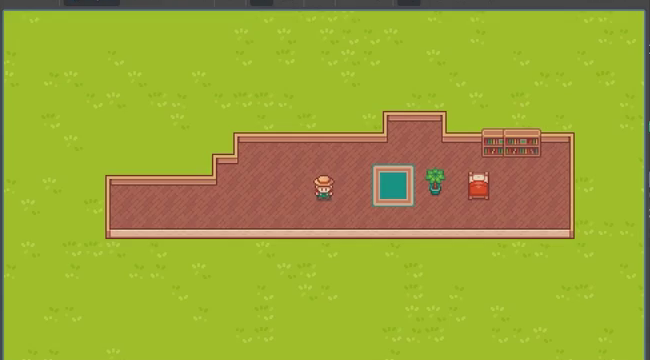
Giving Each Object Its Own Collision Shape
One rectangle size does not suit every item. In object.gd, define the collision dimensions for each object type:
const collision_sizes = {
	Global.Objects.PLANT: Vector2(8, 15),
	Global.Objects.BED: Vector2(16, 12),
	Global.Objects.SHELF: Vector2(29, 11),
	Global.Objects.TABLE: Vector2(29, 11),
	Global.Objects.CARPET: Vector2(32, 32),
}
Extend setup to create a fresh RectangleShape2D, set its size using the dictionary, and assign it to CollisionShape2D. Disable the shape for carpets so they do not block movement:
func setup(object_enum: Global.Objects):
	$Sprite2D.frame = int(object_enum)
	var collision_shape = RectangleShape2D.new()
	collision_shape.size = collision_sizes[object_enum]
	$CollisionShape2D.shape = collision_shape
	if object_enum == Global.Objects.CARPET:
		$CollisionShape2D.disabled = true
Enable Visible Collision Shapes in the debug menu and run the game. The furniture should display its individual collision outlines, while the carpet should have none.
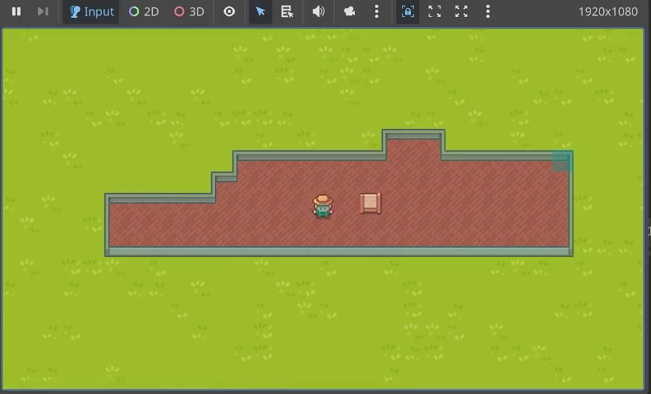
Rendering Carpets Below the Player
Carpets need a different draw order from furniture: they should appear over the floor but beneath the player. Inside Layers, add a Node2D named CarpetLayer and arrange it to render between the floor and the nodes holding the player and other objects.
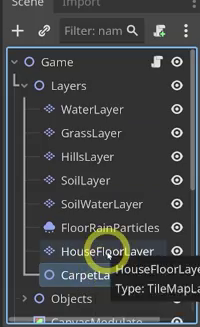
Update the generic-object placement code to choose a parent based on the object type. Carpets go into CarpetLayer; everything else goes into Objects:
	if object not in [Global.Objects.WALLS, Global.Objects.DOOR]:
		var object_instance = object_scene.instantiate() as StaticBody2D
		object_instance.setup(object)
		var target_group = $Layers/CarpetLayer if object == Global.Objects.CARPET else $Objects
		target_group.add_child(object_instance)
		object_instance.position = pos * 16 + Vector2i(8, 8)
Carpets now render under the player without blocking movement, while the other objects retain their collisions.
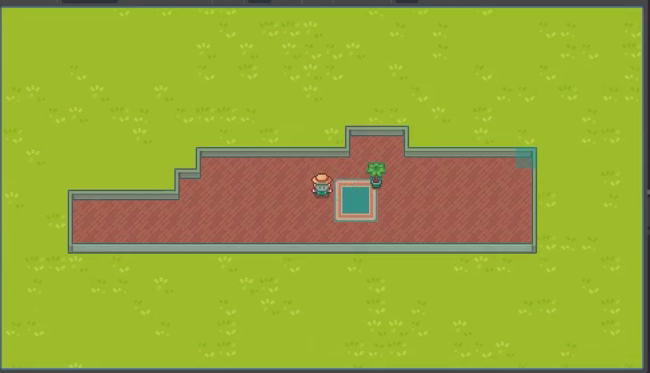
Review Your House-Building Controls
You now have the core pieces of a tile-based house-building system, from connected walls to placeable furniture. As you test the project, check that you can:
- Draw walls and floors on separate layers, with YSort and wall collisions configured.
- Press M to enter build mode and move the grid-aligned preview with WASD.
- Place connected walls and floor tiles with space, and remove them with backspace.
- Cycle through object previews and press escape to restore player movement.
- Place furniture with individual collision sizes and carpets that render beneath the player.
Next, try different house layouts and furniture arrangements to see how the placement, collision, and layering work together.
For a structured path through the full project, explore the Godot 4 Game Development Mini-Degree and keep building your Godot skills with guided game projects.
Did you come across any errors in this tutorial? Please let us know by completing this form and we’ll look into it!
FINAL DAYS: Unlock coding courses in Unity, Godot, Unreal, Python and more.