VR allows us to explore different environments from the comfort of our homes, and one of these is the ocean. In this tutorial, I will show you how to create an underwater VR adventure for the Oculus Go and Gear VR.
Table of contents
Project Files
The Unity project for this tutorial is available here. The following models used in this tutorial are licensed under the CC-BY license:
- Coral by Poly by Google
- Goldfish by Poly by Google
- Coral reef by Ashley Alicea
- Anemone by Poly by Google
- Fish by Poly by Google
- Shark by Poly by Google
- Deep sea angler fish by Cordula Hansen
Did you come across any errors in this tutorial? Please let us know by completing this form and we’ll look into it!

FINAL DAYS: Unlock coding courses in Unity, Godot, Unreal, Python and more.
Setup
We start by creating a new project in Unity3D. Create the folder Assets/Plugins/Android/assets within the project, and copy your phone’s Oculus signature file there. See https://dashboard.oculus.com/tools/osig-generator/ to create a new signature file.
Also copy the Assets/ZenvaVR/Scripts folder from the attached project to your project and add the script DragCamera.cs to the Main Camera. This script lets you move the camera by holding down your middle mouse button and dragging in Unity game mode.
Select File -> Build Settings from the menu and choose Android as the platform. Click on Player Settings to load PlayerSettings in Unity inspector. Add Oculus under Virtual Reality SDK’s and select API Level 19 as the Minimum API Level.
If you are testing on a Gear VR headset, activate Developer Mode on your phone to test your app. In your phone settings, go to “About Device” and tap seven times on “Build number.”
You will also need to activate Developer Mode if you are using an Oculus Go. First, create an organization in your Oculus account at https://dashboard.oculus.com/. Then, in the Oculus mobile app, choose the headset you’re using from the Settings menu, select More Settings, and toggle Developer Mode. See https://developer.oculus.com/documentation/mobilesdk/latest/concepts/mobile-device-setup-go/ for details. Finally, make sure you have the Android Debug Bridge installed.
Terrain
We’ll start by creating a terrain for the ocean floor using Unity’s terrain engine. Right click and select 3D Object -> Terrain to create a new terrain object. The terrain initially appears to be a large white rectangle in the scene view. This does not look very interesting yet, but it will better after we add textures and elevation.
The textures we’ll be using are Open Source textures from the VR Development mini-degree and are included in the project files for this tutorial. They are located in the Assets/Textures folder. If you’re following along, copy the Assets/Textures folder into your own project.
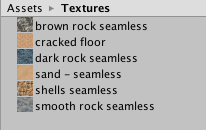
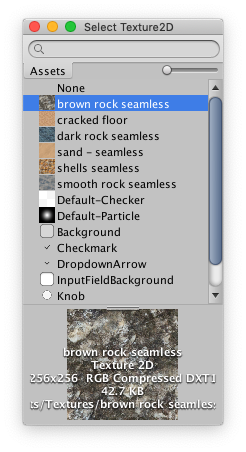
With the terrain loaded in the Inspector tab, select the paintbrush icon. This is the tool for painting textures onto the terrain. Click “Edit Textures.” In the popup window, click “Select” in the Albedo window, and choose “brown rock seamless” from the new popup window. Then click the add button.
The texture will appear in the Textures box in the inspector:
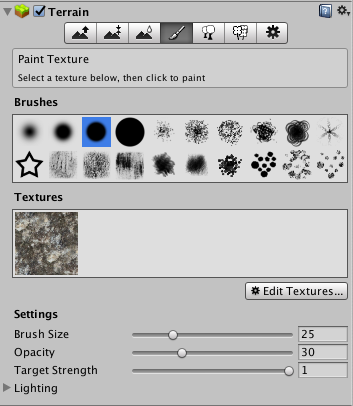
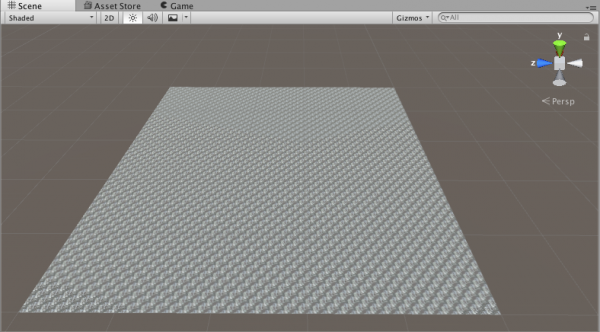
and cover the entire terrain.
Click “Edit Textures” again and add the other textures in Assets/Textures one by one. We will be using them later.
The leftmost button in the inspector, which has the image of a mountain and an up arrow, activates the brush for raising or lowering terrain. Click this button, and a palette of brushes appears. After selecting a brush, go to the scene window, hold down the left mouse button, and drag the cursor over the terrain to see it being raised. If you also hold down the shift key, the terrain will be lowered instead of raised. The type of brush determines the area and shape of the terrain that will be affected with each drag.
The next terrain button lets you create terrain at a fixed height. You can use this to create plateaus. The third button lets you smooth the edges of mountains you create with the other buttons. Experiment with brushes and terrain raising and lowering until you get a seascape you like.
The fourth button, which we’ve already looked at, paints textures onto the terrain. Select a brush and select a texture. Click and drag the mouse over the terrain to see the texture painted onto the terrain. Play with this until you like what you have. If you get into trouble, use CTRL-Z to undo your last change, or start over with a new terrain.
The models in the project source code include models of coral and sea anemone in the Assets/Models folder of the zipped project folder. Copy Assets/Models into your project, and add copies of these models to the scene. You can also search online for other models that might look interesting, such as starfish or shipwrecks, or create your own.
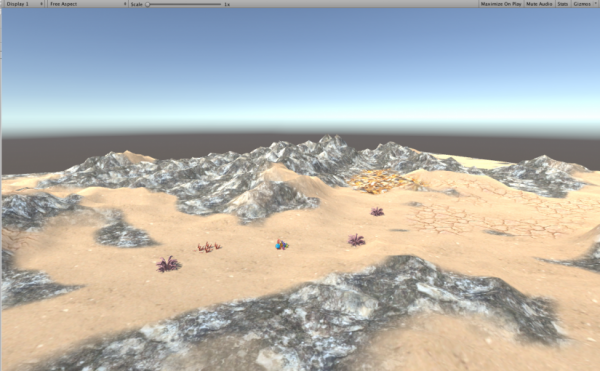
The hierarchy is now looking cluttered with all these models. Create an empty GameObject named Sealife, and nest the the coral and anemone models under this new object.
Lighting
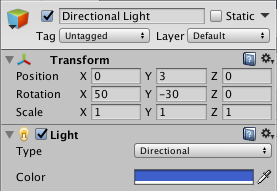
Next, we’ll look at lighting. Under the ocean, everything looks bluer, and visibility is limited. The lighting in Unity is white by default, but we can change the color. Select the directional light, and click the Color field in the inspector. Drag the selector to a shade of blue.
A blue background is the result of setting the background of the Main Camera. Change the “Clear Flags” field to “Solid Color” and click the Background field to select a color.
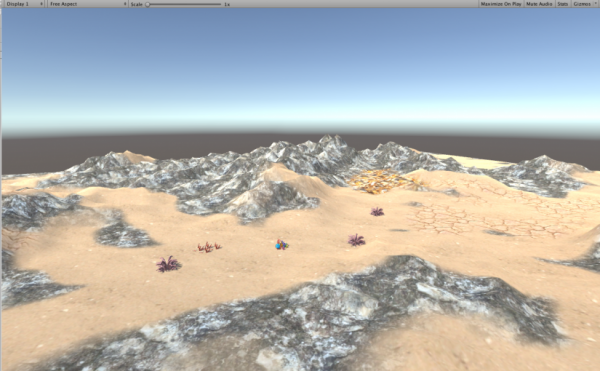
When you play the scene, the view in the Game window shows a blue background.
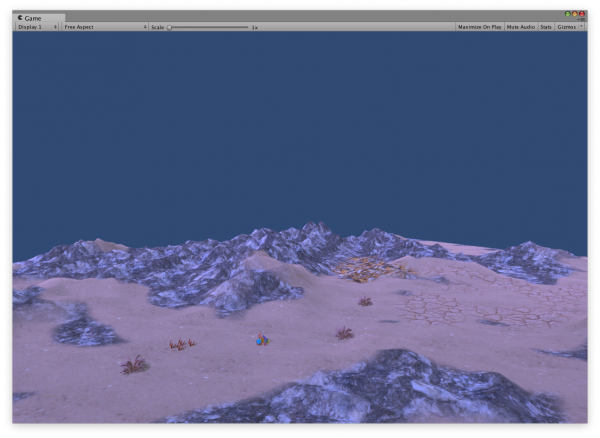
Underwater, you can’t see very far. Load the Main Camera in the Inspector, and change the value of the far clipping plane to adjust visibility. Reducing the far clipping plane reduces how far ahead you can see. For more realism, add fog. From the Window menu, select Lighting -> Settings. Scroll down until you find the fog fields under “Other Settings.” Check the checkbox to activate fog, and set the end distance to adjust visibility.

Player Movement
The player will move in the direction she’s facing by pulling the trigger of the controller. Recall that we are not supposed to directly move the main camera because the camera is controlled by the headset. So what do we do? The answer is to encapsulate the main camera inside another game object that represents the player. Create a new game object named Player and drag Main Camera under Player.
Now we create a script to control the player. Create the C# script PlayerController.cs in Assets/Scripts and add it to the Player object. We want the player to move, so we need set a speed. Add the following fields to Player:
[SerializeField] float speed;
Rigidbody rb;
The SerializeField tag allows the value of a private variable to be set in the inspector.
In the inspector, add a Rigidbody component to Player. A Rigidbody lets the Unity physics engine control Player. Make sure the “Use Gravity” box is unchecked. Disabling gravity gives the impression of buoyancy.
In the Awake() method in PlayerController.cs, store the Rigidbody in rb .
void Awake () {
  rb = GetComponent<Rigidbody> ();
}
Unity comes with a built-in Input library that can handle basic device interactions. Since we will only be using the trigger button of the controller, Input is sufficient. The trigger is the equivalent of the Fire1 button, so add this code to the Update() method:
void Update () {
  if (Input.GetButtonDown ("Fire1")) {
    rb.velocity = Camera.main.transform.forward * speed;
  }
}
If the player press the Fire1 button, the Rigidbody’s velocity is set to a magnitude of speed in the direction the main camera is facing. The player will start to move with this velocity.
We can now try this game by clicking the play button. If you added the DragCamera script as documented in this tutorial’s setup section, you can look around by dragging your mouse as you hold down the middle mouse button. Left clicking will trigger Fire1 and move in the direction you’re facing.
Creating Fish
An underwater scene wouldn’t be complete without fish. The Assets/Models folder copied from the project files includes a number of fish models: two goldfish (Goldfish_01 and NOVELO_GOLDFISH), a shark, and a deep sea angler fish (model 1).
We’re going to create fish prefabs and spawn points that will automatically generate single fish or a school of fish. For our first prefab, create a new object, Goldfish1, in the hierarchy and and drag the Goldfish_01 model to it. This makes the model a child of the object. Rotate the model until the mouth of the fish lines up with blue z-axis. Scale the model until it looks reasonable.
Add a rigid body and a box collider to the Goldfish1 object. Uncheck the “Use Gravity” field under Rigidbody. If you let gravity affect the fish, it will fall instead of float in the water.
The box collider is visible as a cube around the fish. Click “Edit Collider” and adjust the size of the cube to just enclose the fish.
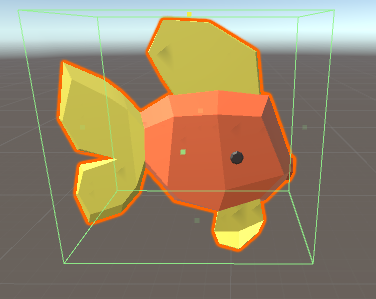
Create a new script, FishController.cs, in Assets/Scripts, and add it to the Goldfish1 object. The code FishController will move the fish by setting the velocity of the Rigidbody. The fish’s speed will be a field that we can set in the inspector:
[SerializeField] float speed;
Rigidbody rb;
In the inspector, set speed to 2. You can change this later.
We need to get the Rigidbody in Awake() when the FishController is created and then set the velocity in the Start() method. Note that velocity is speed times the direction vector :
void Awake () {
  rb = GetComponent<Rigidbody> ();
}

void Start () {
  rb.velocity = transform.forward * speed;
}
Turn the Goldfish1 object into a prefab by moving it to a new folder, Assets/Prefabs.
Now construct prefabs for the other fish models. Create a Goldfish2 prefab that contains the Goldfish_02 model and has a Rigidbody component and the FishController script, and choose a speed. Similarly, create an AnglerFish prefab and a Shark prefab. Experiment with the positioning and scaling of the models.
Spawning Schools of Fish
Many fish species travel in schools, while others swim alone. To simulate this behavior, we will create spawn points that generate individual fish or randomly sized schools.
Create a GameObject named FishSpawner and attach a new script, Assets/Scripts/FishSpawner.cs. The FishSpawner class defined in the script needs parameters to set school size and the prefab of the fish that will be created:
[SerializeField] int minSchoolSize = 1;
[SerializeField] int maxSchoolSize = 1;
[SerializeField] GameObject fishPrefab;
These fields will be set in the inspector when we create FishSpawners. The defaults of 1 for minSchoolSize and maxschoolsize generate exactly one fish.
The spawner will only activate when the player is within a radius around the spawner. Once the player moves beyond another distance from the spawner, the fish will be destroyed to save memory and processing power. These radii are the activation and deactivation distances:
[SerializeField] float activationDistance = 5;
[SerializeField] float deactivationDistance = 30;
We also need a list to keep track of fish in the school and a flag to indicate whether the spawner has been activated.
List<GameObject> school = new List<GameObject>();
bool activated = false;
Each frame, the Update() method will compute the distance to the player. If the player is within the activation distance, and the spawner is not currently active, SpawnSchool() creates the fish. If the spawner is already active, and the player moves past the deactivation distance, DestroySchool() is called to destroy all the fish in the school.
// Helper function that chooses the rotation of the fish
// in the school.
Vector3 GetRandomRotation() {
  Vector3 rotation = Vector3.zero;
  rotation.x = Random.Range (-45, 45);
  rotation.y = Random.Range (-45, 45);
  return rotation;
}

void Update () {
  // Determine the distance between the FishSpawner and the player.
  float distance = Vector3.Distance (transform.position, Camera.main.transform.position);

  // If the player is within the activation distance, and the fish are not active,
  // initialize a school of fish.
  if (!activated && (distance <= activationDistance)) {
    SpawnSchool ();
    activated = true;
  }

  // Destroy the school when the player is outside maxDistance.
  else if (activated && (distance >= deactivationDistance)) {
    DestroySchool ();
    activated = false;
  }
}
SpawnSchool() choose the the size of the school and a random rotation for all the fish in the school. Then it calls SpawnFish() to instantiate each fish.
// Instantiate a school of fish and populate the school list.
void SpawnSchool() {
  int numFish = Random.Range (minSchoolSize, maxSchoolSize + 1);

  // Generate a rotation for all fish in the school.
  Vector3 euler = GetRandomRotation();
  for (int i = 0; i < numFish; i++) {
    school.Add(SpawnFish(euler));
  }
}

// Instantiate and return a single fish near the FishSpawner object.
GameObject SpawnFish(Vector3 euler) {
  GameObject newFish = Instantiate (fishPrefab, transform);

  // Generate randomness in the position of this new fish.
  float x = transform.position.x + Random.Range (-5f, 5f);
  float y = transform.position.y + Random.Range (-5f, 5f);
  float z = transform.position.z + Random.Range (-5f, 5f);
  newFish.transform.position = new Vector3 (x, y, z);

  newFish.transform.eulerAngles = euler;
  return newFish;
}
DestroySchool() deletes the fish in the school.
void DestroySchool() {
  foreach (GameObject fish in school) {
    Destroy(fish);
  }

  school = new List<GameObject> ();
}
Save the FishSpawner object as a prefab in Assets/Prefabs. To create spawn points, add instances of FishSpawner to the scene and position them wherever you want fish to spawn. If you want, you can change the name of the FishSpawner instances to something more descriptive. You will need to adjust the parameters for minimum and maximum school size and add a prefab to the fishPrefab field for each spawner.
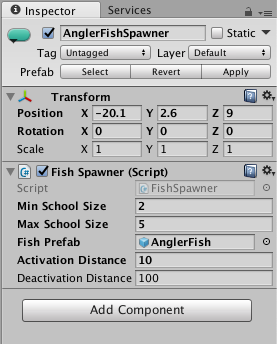
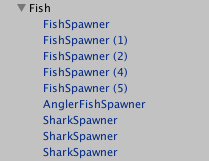
To keep the hierarchy cleaner, group the spawners under a Fish object.
Collisions
When fish run into a foreign object, they often dart away in a different direction. We’ll simulate this behavior by making the fish reverse direction whenever they collide with another object that isn’t a fish.
When we created the fish prefabs, we used a box collider. Load each fish prefab in the inspector and select the box collider’s “Is Trigger” checkbox. This lets us define behavior in MonoBehaviour’s OnTriggerEntered() method whenever the fish’s collider encounters another collider. We’ll also set a tag for each fish prefab. In the Inspector, click the Tag dropdown, click “Add tag”, and create a tag named “Fish.” Once created, we can use this tag for the other fish prefabs as well.
When the fish changes direction, its speed might be different from the original speed. Create a new field in FishController.cs:
[SerializeField] float reverseSpeed;
Set the value of reverseSpeed in the Inspector. Setting reverseSpeed higher than speed makes sense — a startled fish moves faster than a relaxed fish.
Add a method to reverse the fish’s direction and change its velocity:
void Reverse() {
  transform.forward *= -1;
  rb.velocity = reverseSpeed * transform.forward;
}
Negating the forward vector reverses the direction the fish is facing.
The OnTriggerMethod method calls Reverse() when the fish runs into another collider that isn’t tagged as a fish.
void OnTriggerEnter(Collider other) {
  if (!other.CompareTag("Fish")) {
    Reverse ();
  }
}
We can potentially customize the behavior of fish prefabs by using different tags. This would allow us to make a goldfish continue on its way when it runs into another goldfish but flee when it runs into a shark.
Creating Boundaries
Once you play this this game for a while, you’ll notice that both you and the fish can swim through the terrain and past the edges of the terrain. How can we fix this?
We’ll use the fact that GameObjects are only visible because they have a renderer. This means we can create invisible walls that are not rendered.
Create a new plane parallel to the terrain set to a scale large enough to cover the terrain. Drag it to the maximum height above the terrain that you want the player and the fish to be able to reach. Add a mesh collider to the plane, and remove the mesh render. This makes the plane look like an empty mesh when highlighted. When not highlighted in Unity, it’s invisible.
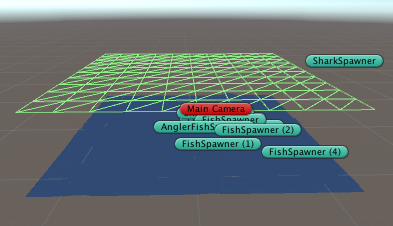
Make four copies of this plane, and rotate the copies so that they can block each of the remaining edges of the terrain. We don’t need a sixth plane because the terrain itself will serve as a boundary.
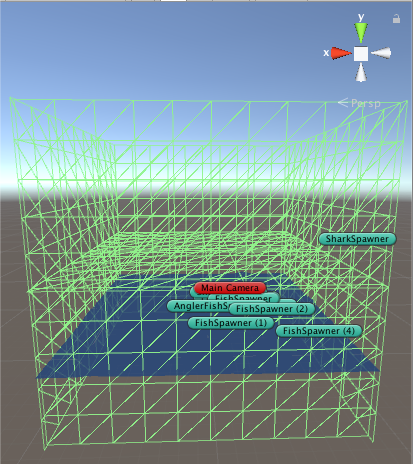
To keep the hierarchy clean, nest all the planes under a GameObject named Boundaries.
Add a terrain collider to the terrain to transform it into another boundary. Now, when the fish run into one of the walls or any part of the the terrain, they will reverse direction because the walls and terrain are not tagged as fish.
Let’s not forget about the player. Add a sphere collider to the Player object, and check the “Is Trigger” box. In PlayerController.cs, add the OnTriggerEntered() method:
void OnTriggerEnter(Collider other) {
  if (!other.CompareTag ("Fish")) {
    rb.velocity = new Vector3 (0f, 0f, 0f);
  }
}
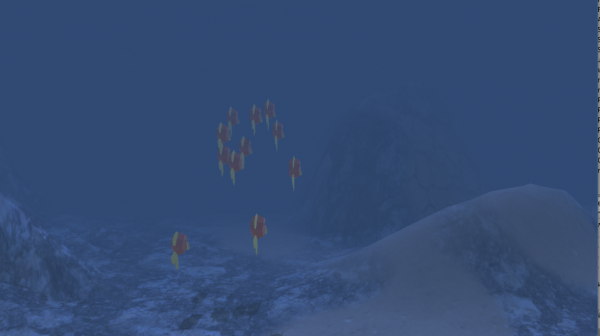
When you run into anything other than a fish, you stop moving. You can then turn and move in another direction. When a fish runs into you, the fish will reverse direction.
Conclusion
Now that you’ve gotten your feet wet, it’s time to add your own touches to your underwater adventure. Try modifying the terrain, creating more types of fish, and experimenting with different fish behaviors. Have fun!
