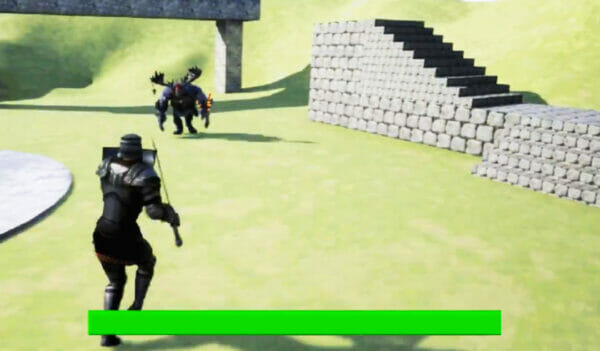
In this tutorial, we will learn how to animate a player character using Unreal Engine 5. We will set up an Animation Blueprint with a State Machine to switch between different animations depending on the player’s movement. Additionally, we will cover how to connect the Animation Blueprint to the Player Blueprint, allowing for seamless transitions between various animations such as idle, running, and strafing. This tutorial requires basic knowledge of Unreal Engine 5 and its interfaces.
Table of contents
Project Files
To help you follow along, we have provided the project files, including all animations and blueprints used in this tutorial.
Download Project Files Here
Animating the Player – Part 1
Unreal 5 Animation Setup
If you are following along with Unreal 5, there is one step we need to do before continuing.
For all of your animations that loop (movement), we need to double click on the animation asset to open up the animation window. Then in the Asset Details panel, enable Loop.
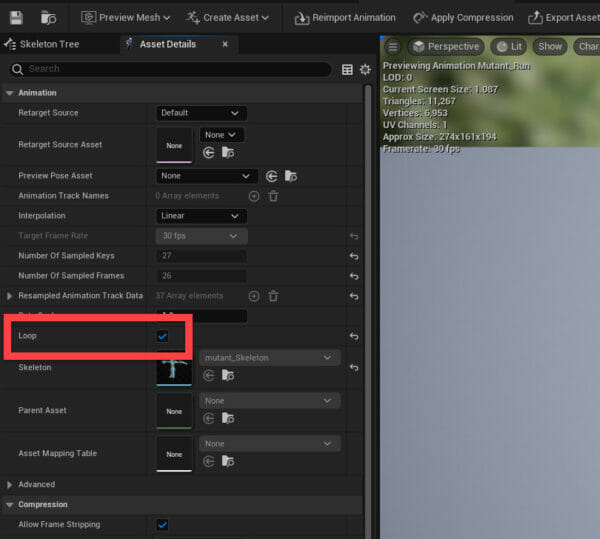
Do this for all of your animations and make sure to save the asset afterwards. Once that’s done, we can continue on with setting up our state machine.
Animation Blueprint
In the Blueprints folder, create a new blueprint of type Animation > Animation Blueprint. Set the Target Skeleton to PlayerModel_Skeleton. Call the blueprint PlayerAnimation. Double click to open it up in the animation editor. What we want to do first of all is create a State Machine.
A state machine is where we enter in some values such as: are we moving? jumping? attacking? etc… It then uses these variables to determine which animation to play. So here in the AnimGraph, right click and create a new state machine. Connect that to the Output Pose node.
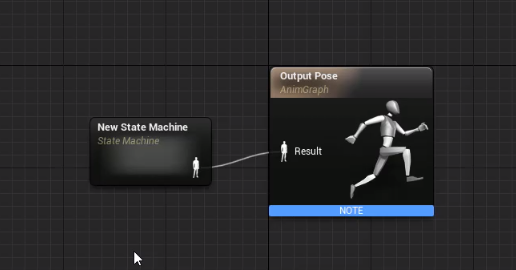
We can then double-click it to open up the state machine. We have an entry node which gets triggered at the start of the game. A state machine is made up of nodes and transitions. Nodes are our animations and transitions are the conditions for transitioning from one animation to another.
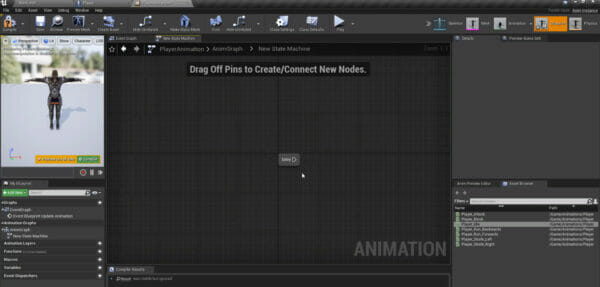
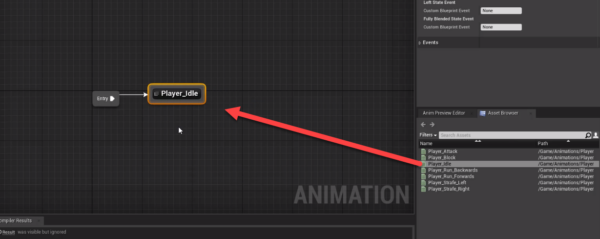
So when the game starts, we want to play the default animation which would be the idle animation. Drag in the idle animation and connect that from the entry node.
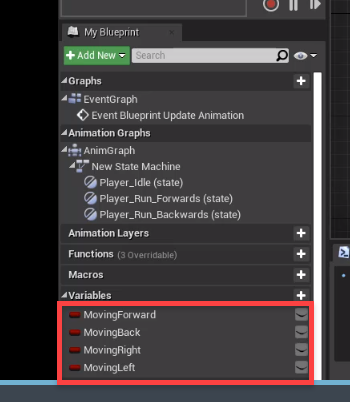
Now in order to transition to our other animations, we’ll need to create some variables to setup conditions.
Next, let’s drag in the Player_Run_Forwards and Player_Run_Backwards animations. Make a transition from the idle to forwards nodes like so:
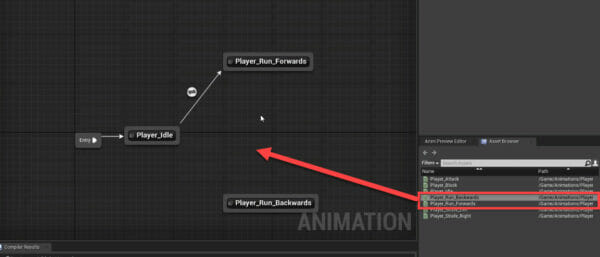
On the transition, you’ll see a circle in the middle. Double click that to open up the condition graph. Here, we can create a condition that will be checked and if it’s true – the animation will be changed to that.
So for the idle to run fowards transition, the condition will be if we’re moving forward.
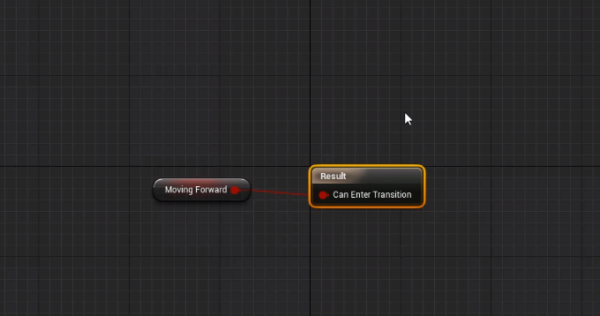
At the top of the graph, we can click on New State Machine to return to our state machine. Now when we’re on the run forwards animation we should also be able to transition back to the idle animation. Create a transition to do just that.
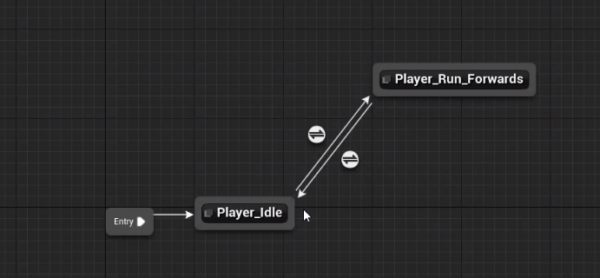
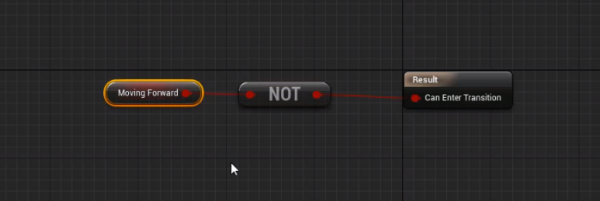
Open up that transition so we can create the transition. This is going to be if we’re not moving forwards.
We then want to create the two transitions for moving backwards. They’re basically what we’ve done already, but with the moving backwards variable.
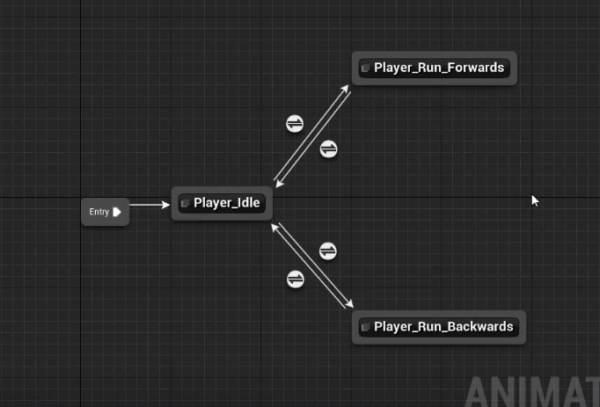
We’ll be continuing on with the state machine in the next lesson.
Animating the Player – Part 2
Continuing With Our Animations
Let’s continue where we left off. We want to move between our forwards and backwards animations, so let’s create a transition from forwards to backwards.
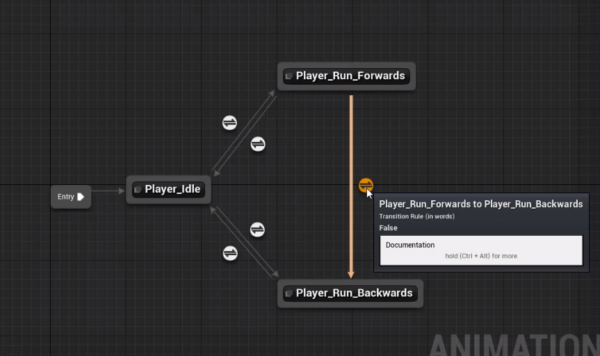
You’ll notice that this transition is going to the backwards animation. We’ve already got a transition that goes to backwards with the same condition that we would have for the new one. In this case, we can create a shared transition.
Select the transition going from idle to backwards and in the Details panel, click on Promote To Shared. Call this To Back. You’ll see the transition now has a color.
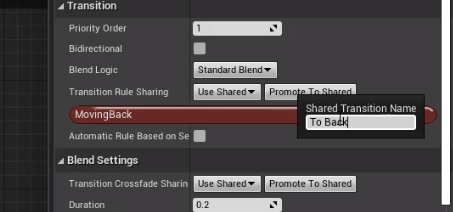
Now we can select our recently created transition and set it’s Transition Rule Sharing to To Back.
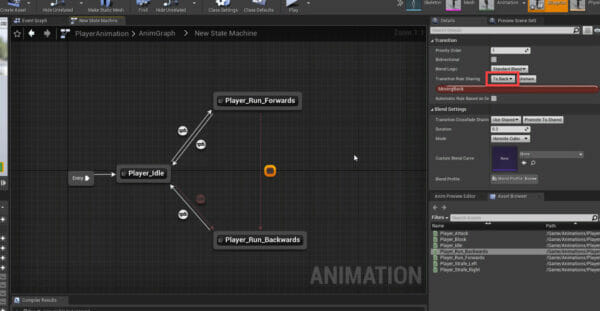
Let’s do the same for a transition from backwards to forwards. Let’s also create a transition rule for this called To Forward.
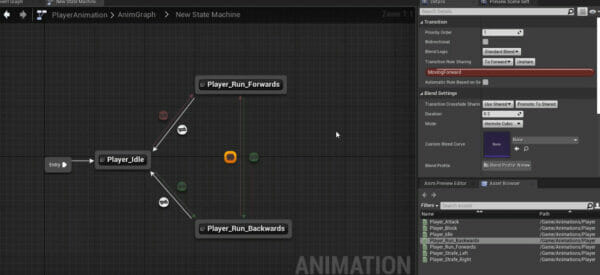
Next, we can add in our strafe left animation. We want to create a transition from all 3 existing animations. The condition is going to check if moving left is true.
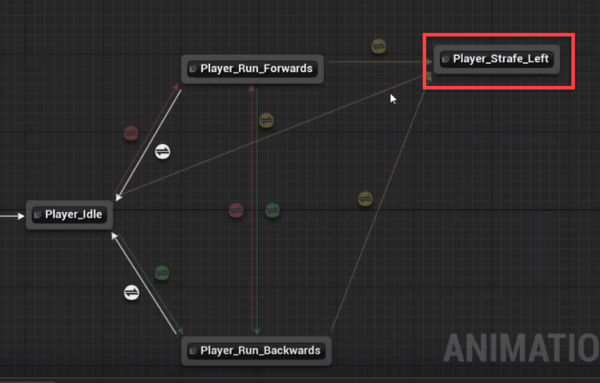
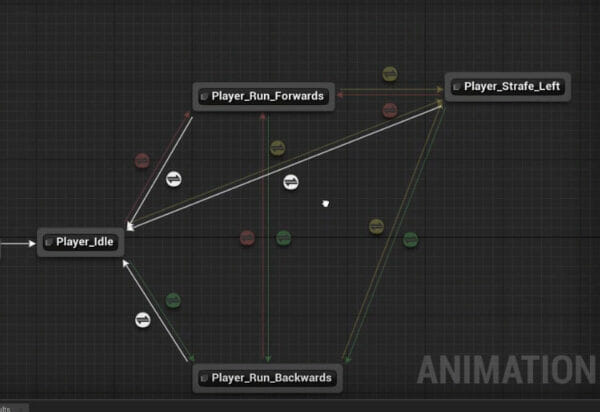
We can then create a transition from the strafe left animation to all others.
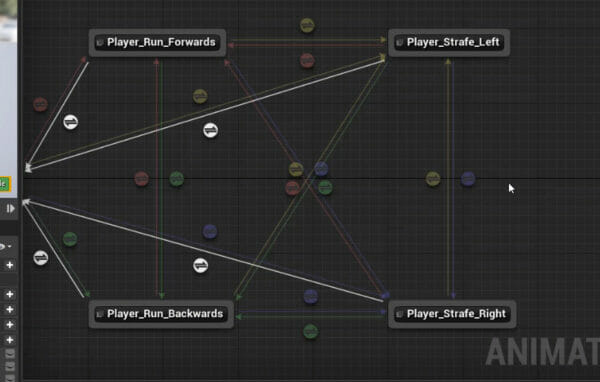
Let’s do the same for strafe right.
In the next lesson, we’ll be connecting this to our blueprint.
Animating the Player – Part 3
Connecting it Together
Inside of our player animation window, let’s go over to the Event Graph tab. Here, we want to set our 4 boolean variables based on what’s happening in the Player blueprint.
So first, we need to cast our pawn owner to a Player class.
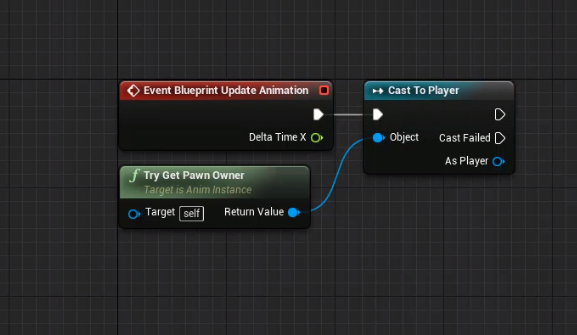
Coming from the cast node, we want to create a sequence node with 4 pins. Each pin will be setting one of the 4 boolean variables like so.
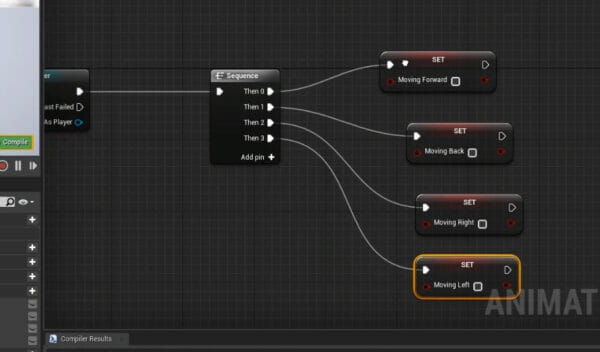
From here, we want to get the player’s velocity as that will allow us to determine which animation we should play.
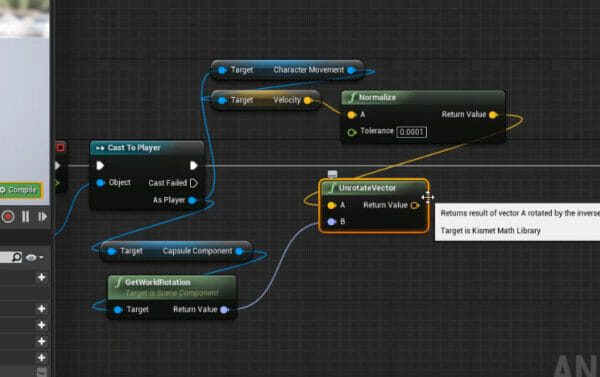
Here are the conditions we’re going to check:
- If X velocity is greater than 0, we’re moving forwards.
- If X velocity is less than 0, we’re moving backwards.
- If Y velocity is greater than 0, we’re moving right.
- If Y velocity is less than 0, we’re moving left.
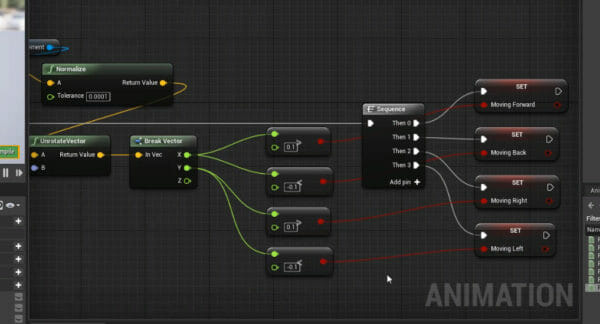
Click compile, save and return to the Player blueprint.
Select the Mesh component and set the Anim Class to PlayerAnimation.
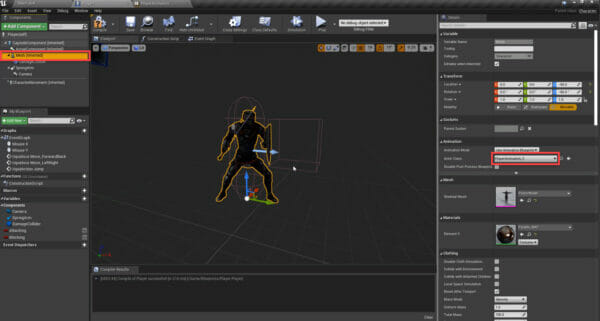
Now we can press play and the animations will play!
Conclusion
And this concludes our tutorial on animating a player character in Unreal Engine 5. By now, you should have a solid understanding of how to create an Animation Blueprint, set up a State Machine, and connect it with your Player Blueprint. Moreover, your character should now have smooth transitions between various animations depending on the movement direction.
Don’t stop here! You can continue to explore Unreal Engine 5 and enhance your game projects by adding more complex animations, or incorporating AI-driven NPCs with their animated behaviors. You may also be interested in exploring other aspects of game development, such as physics, level design, or audio integration. Good luck, and happy game making!
Want to learn more? Try our complete BUILD AN ACTION RPG IN UNREAL ENGINE course.
Did you come across any errors in this tutorial? Please let us know by completing this form and we’ll look into it!
FINAL DAYS: Unlock coding courses in Unity, Godot, Unreal, Python and more.
