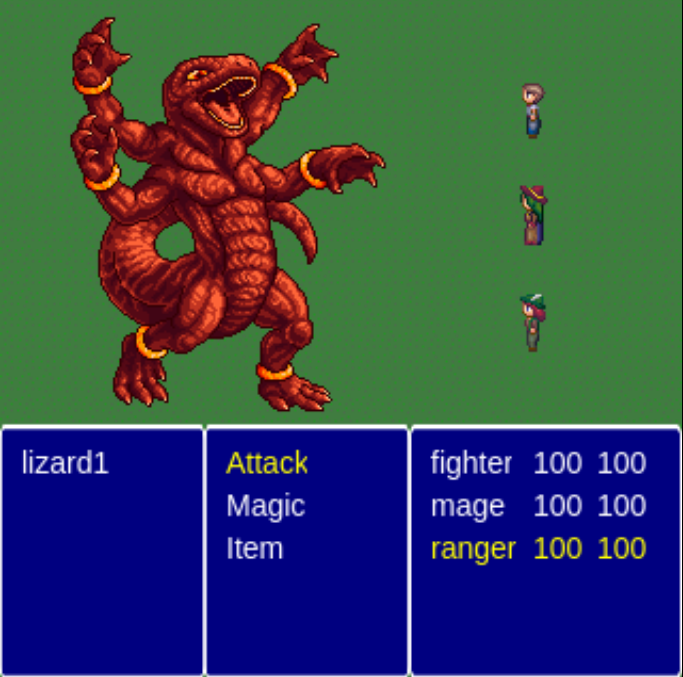
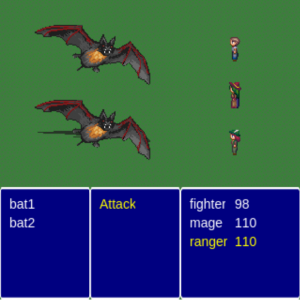
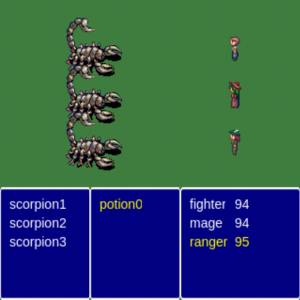
In the last tutorial we added a WorldState where the player can navigate and linked it with the BattleState created in the first tutorial. Now, we are going to improve our BattleState, to include the following:
- Battle reward including experience and items
- A level system based on an experience table
- The possibility of using items during the battle
- Magic attacks along with the current physical attacks
To read this tutorial, it is important that you are familiar with the following concepts:
- Javascript and object-oriented concepts.
- Basic Phaser concepts, such as: states, sprites, groups and arcade physics
- Creating maps using Tiled
Table of contents
Learn Phaser by building 15 games
If you want to master Phaser and learn how to publish Phaser games as native games for iOS and Android feel free to check Zenva‘s online course The Complete Mobile Game Development Course – Build 15 Games.
Assets copyright
The monsters assets used in this tutorial are available in http://opengameart.org/content/2d-rpg-enemy-set and were created by the following artists: Brett Steele (Safir-Kreuz), Joe Raucci (Sylon), Vicki Beinhart (Namakoro), Tyler Olsen (Roots). The characters assets are available in http://opengameart.org/content/24×32-characters-with-faces-big-pack and were created by Svetlana Kushnariova (email: [email protected]). All assets are available through the Creative Commons license.
Source code files
You can download the tutorial source code files here.
Adding the battle reward
We will start by adding a battle reward for each enemy encounter. To simplify things, the reward will be always the same, but you can add multiple rewards with different probabilities using a strategy similar to the enemy encounters.
The reward will be described in the level JSON file with the enemy encounters data, as shown below. Notice that we are describing the experience, which will be used to increase the player units levels and the items that will be obtained from that encounter.
"enemy_encounters": [
        {"probability": 0.3,
         "enemy_data": {
            "lizard1": {
                "type": "enemy_unit",
                "position": {"x": 100, "y": 100},
                "properties": {
                    "texture": "lizard_spritesheet",
                    "group": "enemy_units",
                    "stats": {
                        "attack": 30,
                        "defense": 10,
                        "health": 50,
                        "speed": 15
                    }
                }
            }
         },
         "reward": {
            "experience": 100,
             "items": [{"type": "potion", "properties": {"group": "items", "health_power": 50}}]
         }
        },
        {"probability": 0.5,
         "enemy_data": {
            "bat1": {
                "type": "enemy_unit",
                "position": {"x": 100, "y": 90},
                "properties": {
                    "texture": "bat_spritesheet",
                    "group": "enemy_units",
                    "stats": {
                        "attack": 10,
                        "defense": 1,
                        "health": 30,
                        "speed": 20
                    }
                }
            },
            "bat2": {
                "type": "enemy_unit",
                "position": {"x": 100, "y": 170},
                "properties": {
                    "texture": "bat_spritesheet",
                    "group": "enemy_units",
                    "stats": {
                        "attack": 10,
                        "defense": 1,
                        "health": 30,
                        "speed": 20
                    }
                }
            }
         },
         "reward": {
            "experience": 100,
             "items": [{"type": "potion", "properties": {"group": "items", "health_power": 50}}]
         }
        },
        {"probability": 1.0,
         "enemy_data": {
            "scorpion1": {
                "type": "enemy_unit",
                "position": {"x": 100, "y": 50},
                "properties": {
                    "texture": "scorpion_spritesheet",
                    "group": "enemy_units",
                    "stats": {
                        "attack": 15,
                        "defense": 1,
                        "health": 20,
                        "speed": 10
                    }
                }
            },
            "scorpion2": {
                "type": "enemy_unit",
                "position": {"x": 100, "y": 100},
                "properties": {
                    "texture": "scorpion_spritesheet",
                    "group": "enemy_units",
                    "stats": {
                        "attack": 15,
                        "defense": 1,
                        "health": 20,
                        "speed": 10
                    }
                }
            },
            "scorpion3": {
                "type": "enemy_unit",
                "position": {"x": 100, "y": 150},
                "properties": {
                    "texture": "scorpion_spritesheet",
                    "group": "enemy_units",
                    "stats": {
                        "attack": 15,
                        "defense": 1,
                        "health": 20,
                        "speed": 10
                    }
                }
            }
         },
         "reward": {
            "experience": 100,
             "items": [{"type": "potion", "properties": {"group": "items", "health_power": 50}}]
         }
        }
Increasing the player units experience
We will use the same experience table for all player units, which will define the necessary experience to reach each level and the correspondent stats increase. This table is defined in a JSON file as shown below. Notice that I used the same stats increase for all levels without considering the game balance, but you should use the ones you find best.
[
    {"required_exp": 100, "stats_increase": {"attack": 1, "defense": 1, "speed": 1, "health": 10} },
    {"required_exp": 200, "stats_increase": {"attack": 1, "defense": 1, "speed": 1, "health": 10} },
    {"required_exp": 300, "stats_increase": {"attack": 1, "defense": 1, "speed": 1, "health": 10} },
    {"required_exp": 400, "stats_increase": {"attack": 1, "defense": 1, "speed": 1, "health": 10} },
    {"required_exp": 500, "stats_increase": {"attack": 1, "defense": 1, "speed": 1, "health": 10} },
    {"required_exp": 600, "stats_increase": {"attack": 1, "defense": 1, "speed": 1, "health": 10} }
]
This experience table must be loaded in the “preload” method of BattleState, and initialized in its “create” method, as shown below.
.BattleState.prototype.preload = function () {
    "use strict";
    this.load.text("experience_table", "assets/levels/experience_table.json");
};

// save experience table
    this.experience_table = JSON.parse(this.game.cache.getText("experience_table"));
To add experience and levels to the player units we will add a “receive_experience” method for the PlayerUnit prefab. This method is shown in the code below and increases the unit experience. Then it checks if the current experience is enough to reach the next level. This is done using the experience table loaded in the game state. When a new level is reached, the stats are increased according to what is defined in the experience table. Also, the experience is reset to zero when a new level is reached.
RPG.PlayerUnit.prototype.receive_experience = function (experience) {
    "use strict";
    var next_level_data, stat;
    // increase experience
    this.stats.experience += experience;
    next_level_data = this.game_state.experience_table[this.stats.current_level];
    // if current experience is greater than the necessary to the next level, the unit gains a level
    if (this.stats.experience >= next_level_data.required_exp) {
        this.stats.current_level += 1;
        this.stats.experience = 0;
        // increase unit stats according to new level
        for (stat in next_level_data.stats_increase) {
            if (next_level_data.stats_increase.hasOwnProperty(stat)) {
                this.stats[stat] += next_level_data.stats_increase[stat];
            }
        }
    }
};
Finally, we must add the experience reward from each encounter in the “end_battle” method, as shown below. This can be done by dividing the experience for each player unit, and calling the “receive_experience” method for each one.
RPG.BattleState.prototype.end_battle = function () {
    "use strict";
    var received_experience;

    // receive battle reward
    received_experience = this.encounter.reward.experience;
    this.groups.player_units.forEach(function (player_unit) {
        // receive experience from enemy
        player_unit.receive_experience(received_experience / this.groups.player_units.children.length);
        // save current party stats
        this.party_data[player_unit.name].properties.stats = player_unit.stats;
    }, this);

    // go back to WorldState with the current party data
    this.game.state.start("BootState", true, false, "assets/levels/level1.json", "WorldState", {party_data: this.party_data});
};
Now, you can already try playing and check if the player units are receiving the correct amount of experience during the battles.
Adding items and an inventory
We will create Inventory and Item prefabs to represent the game items the player can carry and use during the battles. After we finish creating the items, we will add menus to the BattleState to allow the player to use those items.
First, the Inventory prefab is shown below. It will have a list of items and methods to collect and use items. The “collect_item” receives an object with the item type and properties, and instantiate the appropriate item prefab, adding it to the list. The “use_item” method consumes the item, removing it from the items array.
var RPG = RPG || {};

RPG.Inventory = function (game_state, name, position, properties) {
    "use strict";
    RPG.Prefab.call(this, game_state, name, position, properties);

    this.item_classes = {
        "potion": RPG.Potion.prototype.constructor
    };

    this.items = [];
};

RPG.Inventory.prototype = Object.create(RPG.Prefab.prototype);
RPG.Inventory.prototype.constructor = RPG.Inventory;

RPG.Inventory.prototype.collect_item = function (item_object) {
    "use strict";
    var item;
    // create item prefab
    item = new this.item_classes[item_object.type](this.game_state, item_object.type + this.items.length, {x: 0, y: 0}, item_object.properties);
    this.items.push(item);
};

RPG.Inventory.prototype.use_item = function (item_name, target) {
    "use strict";
    var item_index;
    // remove item from items list
    for (item_index = 0; item_index < this.items.length; item_index += 1) {
        if (this.items[item_index].name === item_name) {
            this.items[item_index].use(target);
            this.items.splice(item_index, 1);
            break;
        }
    }
};
Now, we are going to create the item prefabs. First, we will create a generic Item prefab, which all items will extend. Initially, this prefab will only have an “use” method which destroys itself.
var RPG = RPG || {};

RPG.Item = function (game_state, name, position, properties) {
    "use strict";
    RPG.Prefab.call(this, game_state, name, position, properties);
};

RPG.Item.prototype = Object.create(RPG.Prefab.prototype);
RPG.Item.prototype.constructor = RPG.Item;

RPG.Item.prototype.use = function () {
    "use strict";
    // by default the item is destroyed
    this.kill();
};
After creating the Item prefab, we can create a Potion prefab, as shown below. The potion will have a health power, and must implement the “use” method to increase the health of the target player unit.
var RPG = RPG || {};

RPG.Potion = function (game_state, name, position, properties) {
    "use strict";
    RPG.Item.call(this, game_state, name, position, properties);

    this.health_power = properties.health_power;
};

RPG.Potion.prototype = Object.create(RPG.Item.prototype);
RPG.Potion.prototype.constructor = RPG.Potion;

RPG.Potion.prototype.use = function (target) {
    "use strict";
    RPG.Item.prototype.use.call(this);
    target.stats.health += this.health_power;
};
Finally, in the “end_battle” method we must collect the items obtained from defeating the enemies. This can be done by iterating through all the items in the reward and calling the “collect_item” from the inventory.
RPG.BattleState.prototype.end_battle = function () {
    "use strict";
    var received_experience;

    // receive battle reward
    received_experience = this.encounter.reward.experience;
    this.groups.player_units.forEach(function (player_unit) {
        // receive experience from enemy
        player_unit.receive_experience(received_experience / this.groups.player_units.children.length);
        // save current party stats
        this.party_data[player_unit.name].properties.stats = player_unit.stats;
    }, this);


    this.encounter.reward.items.forEach(function (item_object) {
        this.prefabs.inventory.collect_item(item_object);
    }, this);

    // go back to WorldState with the current party data
    this.game.state.start("BootState", true, false, "assets/levels/level1.json", "WorldState", {party_data: this.party_data, inventory: this.prefabs.inventory});
};
Now, you can already try playing and check if the items are being correctly collected. Since there are no gameplay difference yet, you would have to print some information in the console to check this.
Using the items during the battle
To use the items, we will add an item action to the actions menu. When it is selected, it will show the available items to be used. Since we must alternate through menus, we will add methods to hide and show in the Menu prefab, as shown below.
RPG.Menu.prototype.show = function () {
    "use strict";
    this.menu_items.forEach(function (menu_item) {
        menu_item.visible = true;
    }, this);
};

RPG.Menu.prototype.hide = function () {
    "use strict";
    this.menu_items.forEach(function (menu_item) {
        menu_item.visible = false;
    }, this);
};
Now, we must create the items menu and add the Item action in the actions menu. The items menu will be created in the Inventory prefab, by iterating through all its items to create menu items, in a similar way as done to create the units menus. To add the Item action, we must change the “show_player_actions” method in BattleState to add it, as shown below.
RPG.Inventory.prototype.create_menu = function (position) {
    "use strict";
    var menu_items, item_index, item, menu_item, items_menu;
    // create units menu items
    item_index = 0;
    menu_items = [];
    for (item_index = 0; item_index < this.items.length; item_index += 1) {
        item = this.items[item_index];
        menu_item = new RPG.ItemMenuItem(this.game_state, item.name + "_menu_item", {x: position.x, y: position.y + item_index * 20}, {group: "hud", text: item.name, style: Object.create(this.game_state.TEXT_STYLE)});
        menu_items.push(menu_item);
    }
    // create units menu
    items_menu = new RPG.Menu(this.game_state, "items_menu", position, {group: "hud", menu_items: menu_items});
    items_menu.hide();
};

RPG.BattleState.prototype.show_player_actions = function (position) {
    "use strict";
    var actions, actions_menu_items, action_index, actions_menu;
    // available actions
    actions = [{text: "Attack", item_constructor: RPG.AttackMenuItem.prototype.constructor},
               {text: "Item", item_constructor: RPG.InventoryMenuItem.prototype.constructor}];
    actions_menu_items = [];
    action_index = 0;
    // create a menu item for each action
    actions.forEach(function (action) {
        actions_menu_items.push(new action.item_constructor(this, action.text + "_menu_item", {x: position.x, y: position.y + action_index * 20}, {group: "hud", text: action.text, style: Object.create(this.TEXT_STYLE)}));
        action_index += 1;
    }, this);
    actions_menu = new RPG.Menu(this, "actions_menu", position, {group: "hud", menu_items: actions_menu_items});
};
Notice that in those menus we used two new menu item prefabs: ItemMenuItem, used to select items to use and IventoryMenuItem, used to select the Item action. Both prefabs are shown below. The ItemMenuItem must disable the items menu and enable the player units menu to select the player unit in which the selected item will be used. On the other hand, the InventoryMenuItem must disable and hide the actions menu, while showing and enabling the items menu. Notice that the IventoryMenuItem can be selected only when there are remaining items.
var RPG = RPG || {};

RPG.ItemMenuItem = function (game_state, name, position, properties) {
    "use strict";
    RPG.MenuItem.call(this, game_state, name, position, properties);
};

RPG.ItemMenuItem.prototype = Object.create(RPG.MenuItem.prototype);
RPG.ItemMenuItem.prototype.constructor = RPG.ItemMenuItem;

RPG.ItemMenuItem.prototype.select = function () {
    "use strict";
    // disable actions menu
    this.game_state.prefabs.items_menu.disable();
    // enable player units menu so the player can choose the target
    this.game_state.prefabs.player_units_menu.enable();
    // save selected item
    this.game_state.current_item = this.text;
};
var RPG = RPG || {};
RPG.InventoryMenuItem = function (game_state, name, position, properties) {
"use strict";
RPG.MenuItem.call(this, game_state, name, position, properties);
};
RPG.InventoryMenuItem.prototype = Object.create(RPG.MenuItem.prototype);
RPG.InventoryMenuItem.prototype.constructor = RPG.InventoryMenuItem;
RPG.InventoryMenuItem.prototype.select = function () {
"use strict";
// select only if there are remaining items
if (this.game_state.prefabs.inventory.items.length > 0) {
// disable actions menu
this.game_state.prefabs.actions_menu.disable();
this.game_state.prefabs.actions_menu.hide();
// enable enemy units menu so the player can choose the target
this.game_state.prefabs.items_menu.show();
this.game_state.prefabs.items_menu.enable();
}
};There are still some more things we must change. First, we must change the PlayerMenuItem “select” method to use the current selected item. Second, we must implement the “kill” method from the Item prefab to remove it from the items menu. Both modifications are shown below.
RPG.PlayerMenuItem.prototype.select = function () {
    "use strict";
    var player_unit;
    // get selected player unit
    player_unit = this.game_state.prefabs[this.text];
    // use current selected item on selected unit
    this.game_state.prefabs.inventory.use_item(this.game_state.current_item, player_unit);

    // show actions menu again
    this.game_state.prefabs.items_menu.disable();
    this.game_state.prefabs.items_menu.hide();
    this.game_state.prefabs.actions_menu.show();
    this.game_state.prefabs.actions_menu.enable();
};

RPG.Item.prototype.kill = function () {
    "use strict";
    Phaser.Sprite.prototype.kill.call(this);
    var menu_item_index, menu_item;
    // remove item from the menu
    menu_item_index = this.game_state.prefabs.items_menu.find_item_index(this.name);
    menu_item = this.game_state.prefabs.items_menu.remove_item(menu_item_index);
    menu_item.kill();
};
Finally, we must keep the inventory through the BattleState and WorldState. This can be done by adding a new parameter in the “init” method of both states that saves the inventory and which will be used in every state transition. In addition, if there is no inventory created yet (at the beginning of the game), we must create an empty one in the “create” method of BattleState.
Now, you can already try playing using items. Remember to check if all menus are working correctly and if the item rewards are being updated properly.
Adding magic attacks
Our last modification will add a new possible attack for each unit, called magic attack. Those attacks will be based on a new stat and will have increased damage, but will consume mana.
To do that, first we must change our attack code to put it in a new Attack prefab, as shown below. The Attack prefab will have an owner unit, which represents the unit which is attacking and initially contains a “show_message” method, which will show the attack message, as we were already doing. Now, we are going to create a PhysicalAttack and a MagicAttack prefabs which will extend this one and implement a “hit” method. This method will execute the attack.
var RPG = RPG || {};

RPG.Attack = function (game_state, name, position, properties) {
    "use strict";
    RPG.Prefab.call(this, game_state, name, position, properties);

    this.owner = this.game_state.prefabs[properties.owner_name];
};

RPG.Attack.prototype = Object.create(RPG.Prefab.prototype);
RPG.Attack.prototype.constructor = RPG.Attack;

RPG.Attack.prototype.show_message = function (target, damage) {
    "use strict";
    var action_message_position, action_message_text, attack_message;
    // show attack message
    action_message_position = new Phaser.Point(this.game_state.game.world.width / 2, this.game_state.game.world.height * 0.1);
    action_message_text = this.owner.name + " attacks " + target.name + " with " + damage + " damage";
    attack_message = new RPG.ActionMessage(this.game_state, this.name + "_action_message", action_message_position, {group: "hud", texture:     "rectangle_image", scale: {x: 0.85, y: 0.2}, duration: 1, message: action_message_text});
};
The code for both PhysicalAttack and MagicAttack is shown below. The first one is exactly the attack we already had. It calculates attack and defense multipliers based on the attack and defense stats, respectively, and apply the correct damage. On the other hand, the MagicAttack has three main differences: 1) it has a mana cost; 2) the attack multiplier is based in a magic attack stat; 3) The attack multiplier is higher, which results in increased damage.
var RPG = RPG || {};

RPG.PhysicalAttack = function (game_state, name, position, properties) {
    "use strict";
    RPG.Attack.call(this, game_state, name, position, properties);
};

RPG.PhysicalAttack.prototype = Object.create(RPG.Attack.prototype);
RPG.PhysicalAttack.prototype.constructor = RPG.PhysicalAttack;

RPG.PhysicalAttack.prototype.hit = function (target) {
    "use strict";
    var damage, attack_multiplier, defense_multiplier, action_message_position, action_message_text, attack_message;
    // calculate random attack and defense multipliers
    attack_multiplier = this.game_state.game.rnd.realInRange(0.8, 1.2);
    defense_multiplier = this.game_state.game.rnd.realInRange(0.8, 1.2);
    // calculate damage
    damage = Math.max(0, Math.round((attack_multiplier * this.owner.stats.attack) - (defense_multiplier * target.stats.defense)));
    // apply damage
    target.receive_damage(damage);

    this.show_message(target, damage);
};
var RPG = RPG || {};
RPG.MagicAttack = function (game_state, name, position, properties) {
"use strict";
RPG.Attack.call(this, game_state, name, position, properties);
this.mana_cost = properties.mana_cost;
};
RPG.MagicAttack.prototype = Object.create(RPG.Attack.prototype);
RPG.MagicAttack.prototype.constructor = RPG.MagicAttack;
RPG.MagicAttack.prototype.hit = function (target) {
"use strict";
var damage, attack_multiplier, defense_multiplier, action_message_position, action_message_text, attack_message;
// the attack multiplier for magic attacks is higher
attack_multiplier = this.game_state.game.rnd.realInRange(0.9, 1.3);
defense_multiplier = this.game_state.game.rnd.realInRange(0.8, 1.2);
// calculate damage using the magic attack stat
damage = Math.max(0, Math.round((attack_multiplier * this.owner.stats.magic_attack) - (defense_multiplier * target.stats.defense)));
// apply damage
target.receive_damage(damage);
// reduce the unit mana
this.game_state.current_unit.stats.mana -= this.mana_cost;
this.show_message(target, damage);
};Now, we are going to change the Attack menu item to instantiate an Attack prefab and create the Magic menu item. The modification in AttackMenuItem is shown below. Instead of calling the “attack” method in the current unit it simply create a new Attack prefab. The MagicAttackMenuItem code is shown below. It can be selected only when the current unit has enough mana and create a new MagicAttack prefab. Notice that I’m using the same mana cost for all units, but you can change that if you want.
var RPG = RPG || {};

RPG.AttackMenuItem = function (game_state, name, position, properties) {
    "use strict";
    RPG.MenuItem.call(this, game_state, name, position, properties);
};

RPG.AttackMenuItem.prototype = Object.create(RPG.MenuItem.prototype);
RPG.AttackMenuItem.prototype.constructor = RPG.AttackMenuItem;

RPG.AttackMenuItem.prototype.select = function () {
    "use strict";
    // disable actions menu
    this.game_state.prefabs.actions_menu.disable();
    // enable enemy units menu so the player can choose the target
    this.game_state.prefabs.enemy_units_menu.enable();
    // save current attack
    this.game_state.current_attack = new RPG.PhysicalAttack(this.game_state, this.game_state.current_unit.name + "_attack", {x: 0, y: 0}, {group: "attacks", owner_name: this.game_state.current_unit.name});
};
var RPG = RPG || {};
RPG.MagicAttackMenuItem = function (game_state, name, position, properties) {
"use strict";
RPG.MenuItem.call(this, game_state, name, position, properties);
this.MANA_COST = 10;
};
RPG.MagicAttackMenuItem.prototype = Object.create(RPG.MenuItem.prototype);
RPG.MagicAttackMenuItem.prototype.constructor = RPG.MagicAttackMenuItem;
RPG.MagicAttackMenuItem.prototype.select = function () {
"use strict";
// use only if the current unit has enough mana
if (this.game_state.current_unit.stats.mana >= this.MANA_COST) {
// disable actions menu
this.game_state.prefabs.actions_menu.disable();
// enable enemy units menu so the player can choose the target
this.game_state.prefabs.enemy_units_menu.enable();
// save current attack
this.game_state.current_attack = new RPG.MagicAttack(this.game_state, this.game_state.current_unit.name + "_attack", {x: 0, y: 0}, {group: "attacks", mana_cost: this.MANA_COST, owner_name: this.game_state.current_unit.name});
}
};In the next step we must change the HUD to show those new features. First, we change the “show_player_action” method in BattleState to add the Magic menu item, as shown below. Then, we change the PlayerMenuItem prefab to show its remaining mana, and not only its health.
actions = [{text: "Attack", item_constructor: RPG.AttackMenuItem.prototype.constructor},
               {text: "Magic", item_constructor: RPG.MagicAttackMenuItem.prototype.constructor},
               {text: "Item", item_constructor: RPG.InventoryMenuItem.prototype.constructor}];
Finally, now you can define the initial mana and magic attack stats for each unit and try playing the game with all its contents. Try using different attacks to see if everything is working properly.
And now, we finished this tutorial series! To learn more about game development Phaser, please support our work by checking out our Phaser Mini-Degree.
