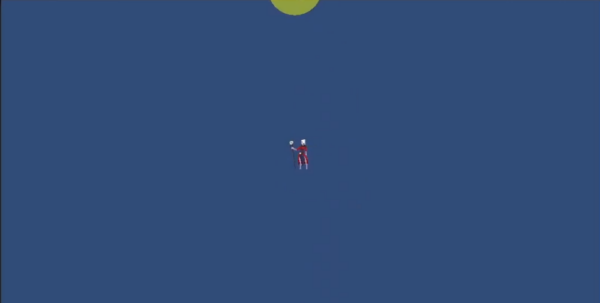
Unity 2D player movement is only part of making a controllable character: its animations also need to respond when you start and stop. Zenva brings its experience helping a community of over one million learners and developers gain digital skills to that practical next step in this walkthrough: replacing a moving placeholder with a pixel-art character for a bullet hell game.
This tutorial assumes you have Unity and the supplied project assets ready, with a placeholder Player object, a Rigidbody2D, and the Player Input component and movement actions already configured.
Download Project Files
The files and full project are available through the course included in the Unity Game Development Mini-Degree if you want the complete guided path. You can keep reading this free tutorial to build the movement script, prepare sprite animations, and connect idle and run transitions.
Set Up Unity 2D Player Movement
Begin with the circle placeholder so you can test input and movement before changing the character’s visuals.
Creating the PlayerMovement Script
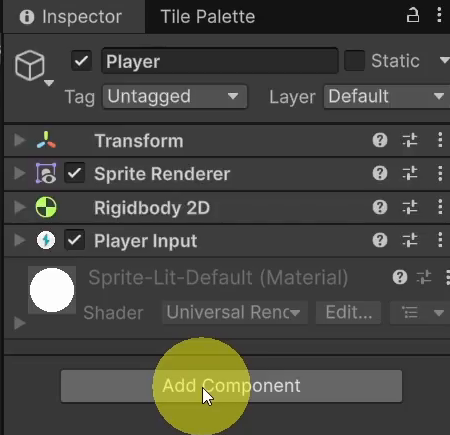
Select Player in the Hierarchy. In the Inspector, choose Add Component, search for PlayerMovement, and select New script. Name it PlayerMovement and place it in a new Scripts folder under Assets. Double-click the script to open it in your code editor.
Declaring Movement Variables
Declare the movement speed, Rigidbody2D reference, and input vector inside the class:
using UnityEngine;
using UnityEngine.InputSystem;

public class PlayerMovement : MonoBehaviour
{
    [SerializeField] private float _movementSpeed;
    private Rigidbody2D _rb;
    private Vector2 _movementInput;
}_movementSpeedcontrols how fast the player moves.[SerializeField]keeps the field private while exposing it in the Inspector._rbstores the player’s Rigidbody2D component._movementInputstores the two-dimensional direction received from the Input System.
Keep fields private unless another script needs to access them. The underscore prefix distinguishes these private fields.
Save the script, return to Unity, and set Movement Speed on the Player Movement component to an initial value such as 5. The remaining methods will make that value affect movement.
Getting the Rigidbody2D Reference
Cache the Rigidbody2D in Start so the script can change its physics properties during gameplay:
void Start()
{
    _rb = GetComponent<Rigidbody2D>();
}
Applying Velocity in Update
Add the movement logic inside Update:
void Update()
{
    _rb.linearVelocity = _movementInput * _movementSpeed;
}
Each frame, this sets linearVelocity to the input direction multiplied by the movement speed.
Reading Input with the Move Method
Add a public callback for the Input System:
public void Move(InputAction.CallbackContext context)
{
    _movementInput = context.ReadValue<Vector2>();
}
InputAction.CallbackContext carries information about the input action. Calling context.ReadValue<Vector2>() reads a two-dimensional value, such as WASD or a gamepad stick, and stores it in _movementInput.
To connect the callback in Unity:
- Select Player and expand Events on its Player Input component.
- Under the Default map, add an event entry for movement with the plus button.
- Drag the Player object into the entry’s object slot.
- Choose PlayerMovement > Move from the dynamic callback context list.
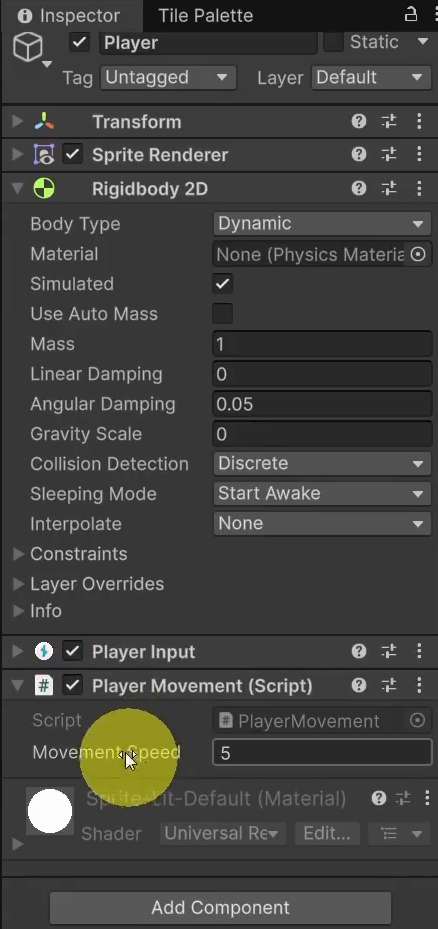
The movement action can now call Move and update the input vector used by Update.
Testing Movement
Enter Play Mode and move the white circle with the controls you configured. Adjust Movement Speed in the Inspector while the game is running to find a suitable value.
Set the Game view to Full HD (1920×1080) and adjust its scale to suit your screen while testing.
Runtime Inspector Values
Inspector changes made during Play Mode apply immediately but revert when you stop. For example, changing Movement Speed to 10 makes the character faster during that test, then restores the previous value when you exit Play Mode. The same applies to properties such as the Rigidbody2D’s Gravity Scale.
Prepare the Pixel-Art Idle Animation
With the placeholder moving, you can bring in the wizard sprite and correct its import settings before transferring the player components.
Importing the Idle Sprite
Locate IdleR under Assets/CourseAssets/Female Wizard in the Project panel. Drag it into the Scene view to create a character object. Unity generates an animation clip and an Animator Controller.
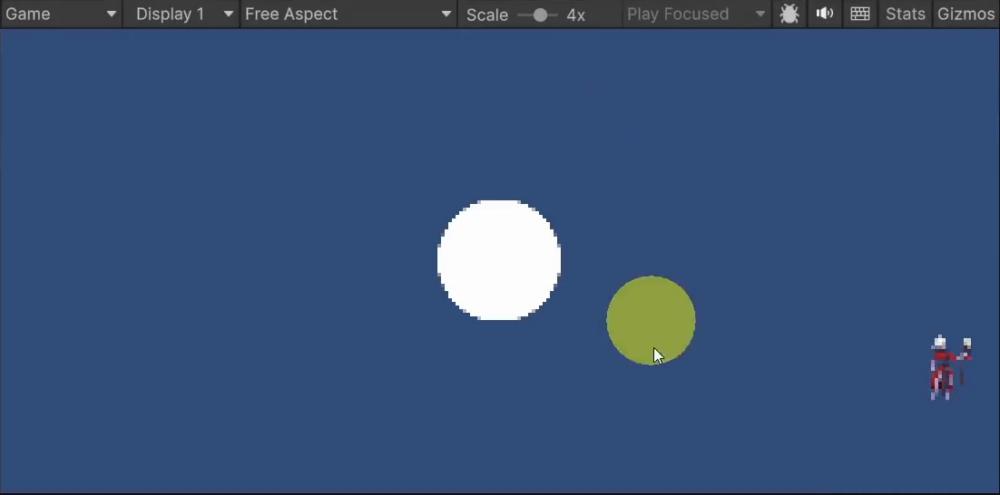
Create an Animations folder under Assets and save the new clip there as player_anim_idle_right. On the first preview, the wizard may appear small, blurry, or distorted because its texture settings still need adjustment.
Configuring Sprite Import Settings
Select the IdleR asset. Set Sprite Mode to Multiple because the sheet contains several frames, and set Pixels Per Unit to 60. Pixels Per Unit controls how many sprite pixels correspond to one world unit.
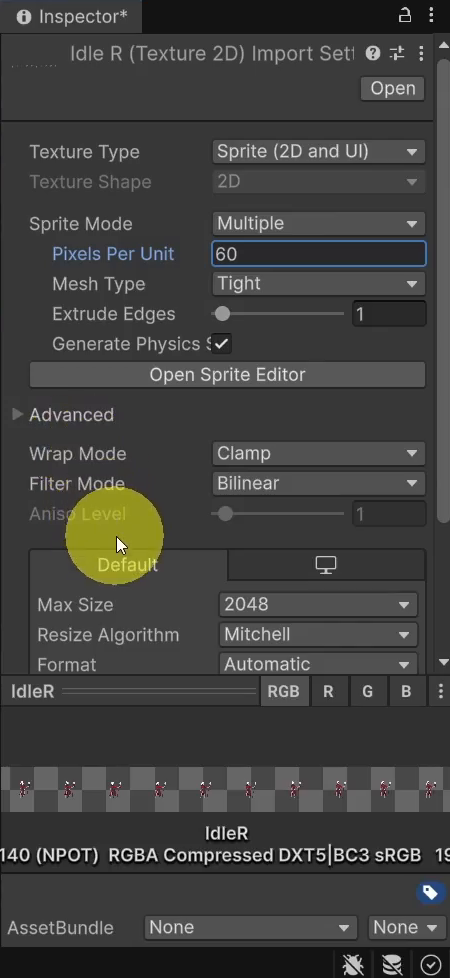
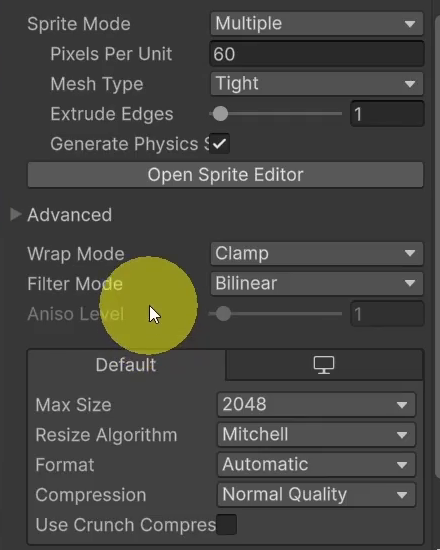
Change Filter Mode from Bilinear to Point (no filter) so Unity does not smooth the pixel edges. Set Compression to None, and click Apply after making the changes.
Slicing the Sprite Sheet
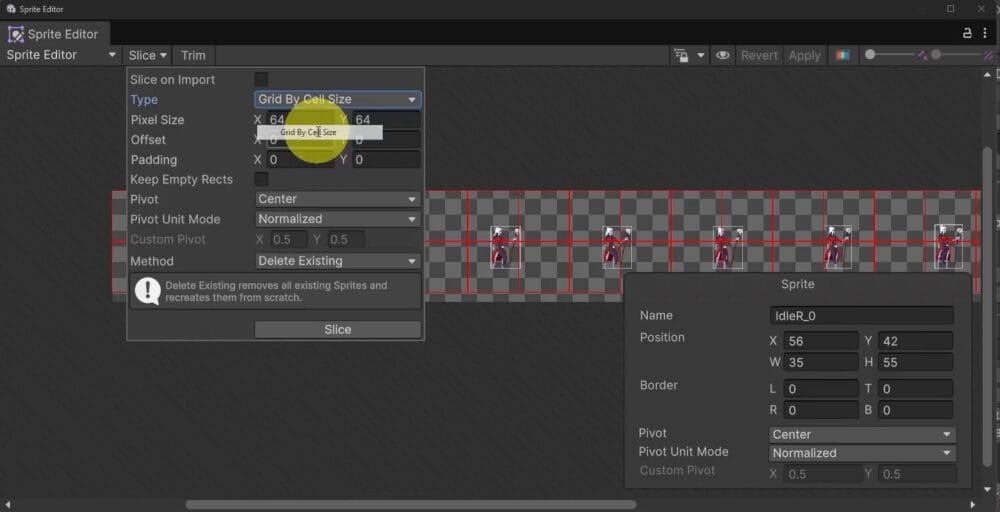
If the animation shifts or jumps, the automatically detected frame boundaries may be uneven. Open Sprite Editor, then change Slice > Type from Automatic to Grid By Cell Size.
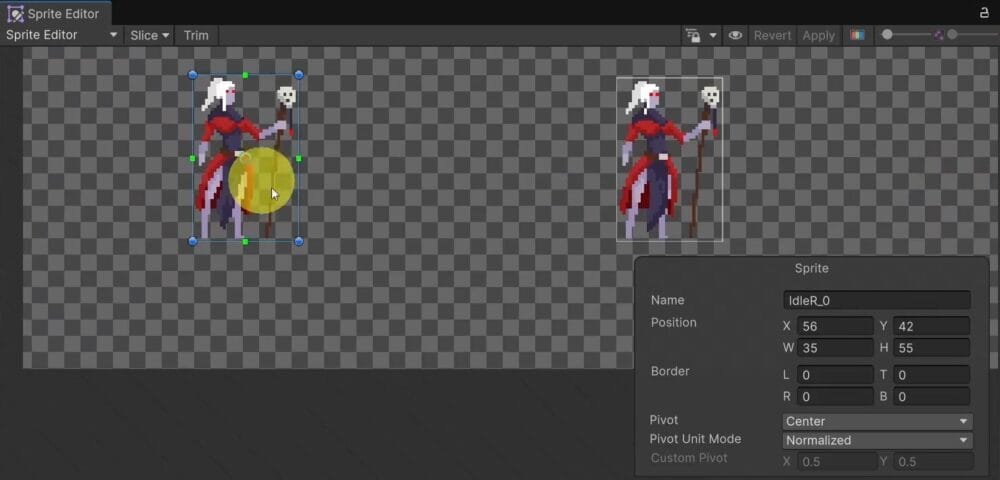
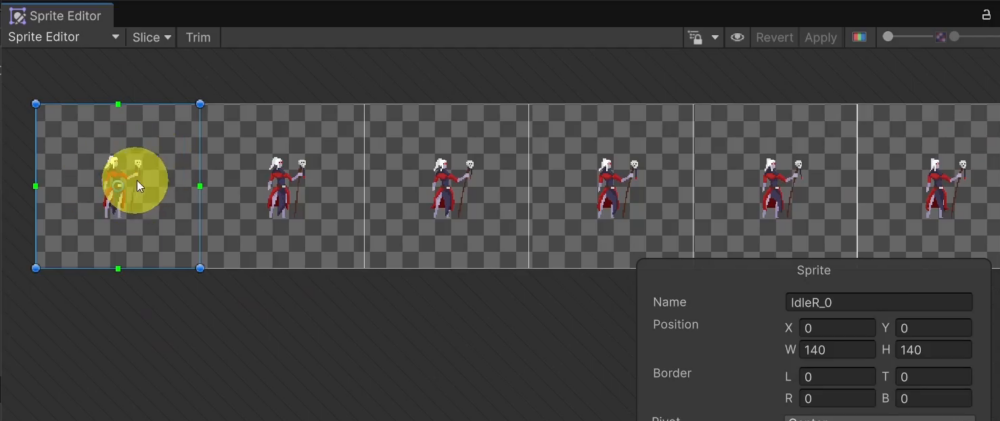
The supplied idle sheet is 1400 pixels wide with 10 frames, giving a cell width of 140 pixels. Its single row is also 140 pixels high. Enter 140 by 140 in the Pixel Size fields, then click Slice and Apply.
The evenly sized frames keep the animation from shifting as it plays.
Viewing the Result
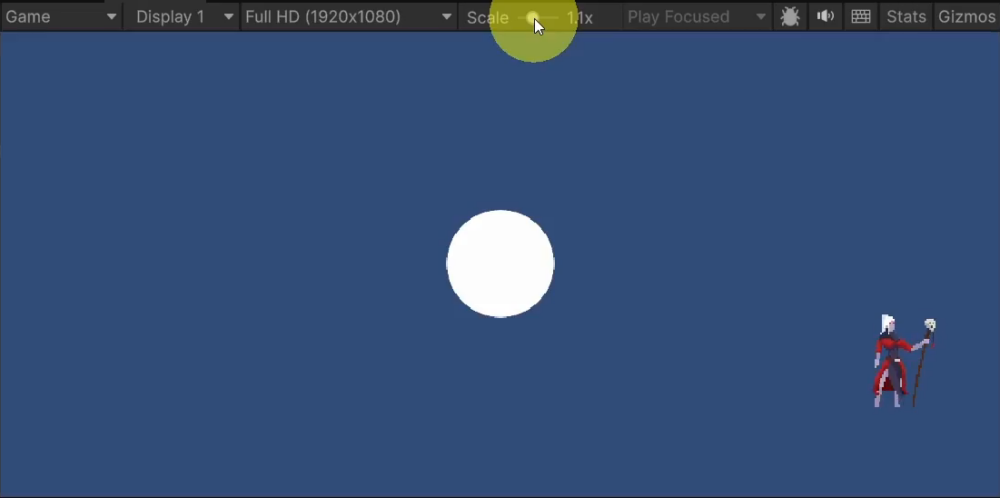
Press Play to preview the idle animation. Check the Game view’s Full HD (1920×1080) setting and scale slider if the display still looks wrong. The wizard should now have a smooth idle animation with crisp pixel art.
Challenge
Try replacing the player circle with the animated character by transferring the components it needs to move. For now, concentrate on getting the idle sprite moving; its facing direction will be handled separately. The next section walks through the component transfer.
Add the Run Animation to the Player
Setting Up the Player Components
The new character already has a Transform, Sprite Renderer, and Animator. Copy the following components from the circle placeholder:
- Rigidbody 2D
- Player Input
- Player Movement
For each component, open its gear menu on the circle and select Copy Component. On the character, use Paste Component As New. This preserves the component settings, including Gravity Scale.
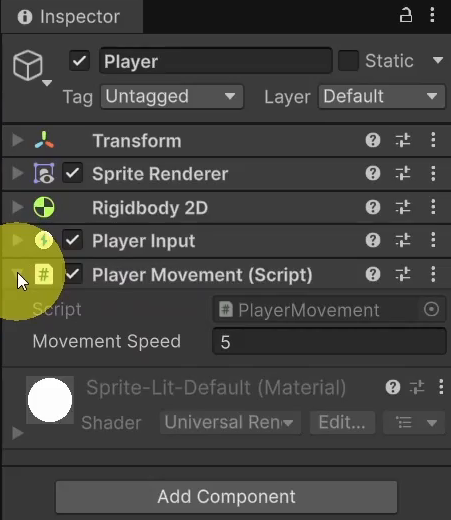
Fixing the Movement Bug
If the character does not move after the transfer, check the copied Player Input events. The Move event still points to the circle’s Player Movement component. Replace that reference with the new character’s Player Movement > Move callback.
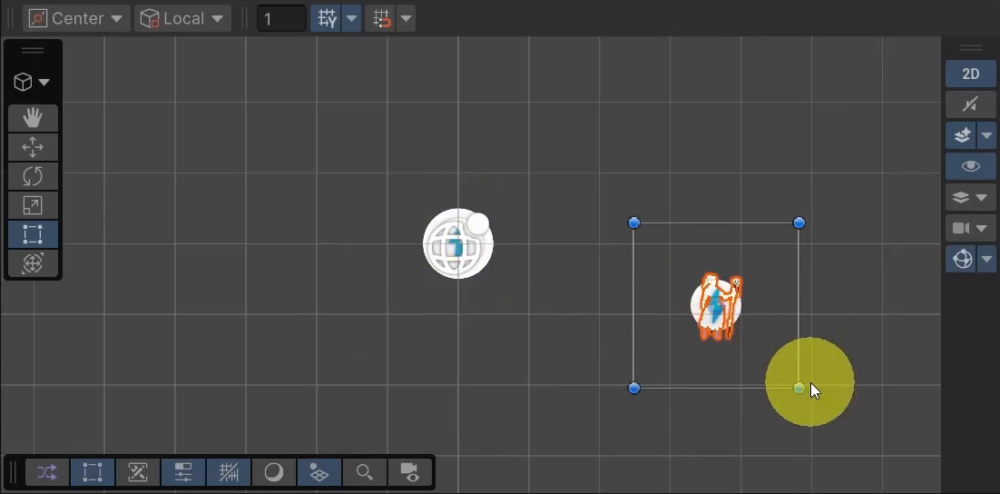
Once both objects respond correctly, delete the circle placeholder, rename the character Player, and reset its Transform to center it in the scene. You can turn off scene gizmos if they are distracting.
Preparing the Animator Controller
Select the character and find its controller in the Animator component. Rename the generated IdleR_0 controller to a clearer name such as PlayerAnimController. Double-click it to open the Animator window and see the existing idle state.
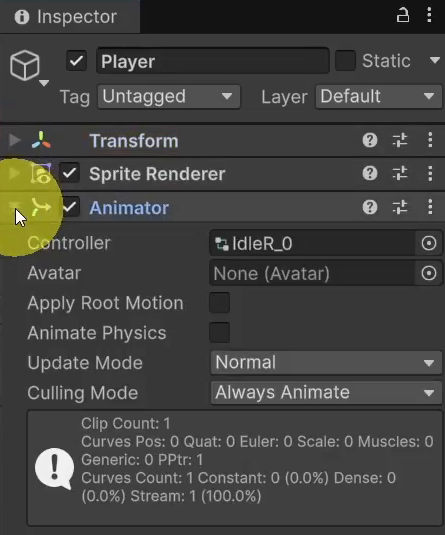
Creating the Run Animation Clip
Open Window > Animation > Animation and dock the window. With Player selected, choose Create New Clip from the clip dropdown and save the clip as PlayerAnimRun in your animation folder.
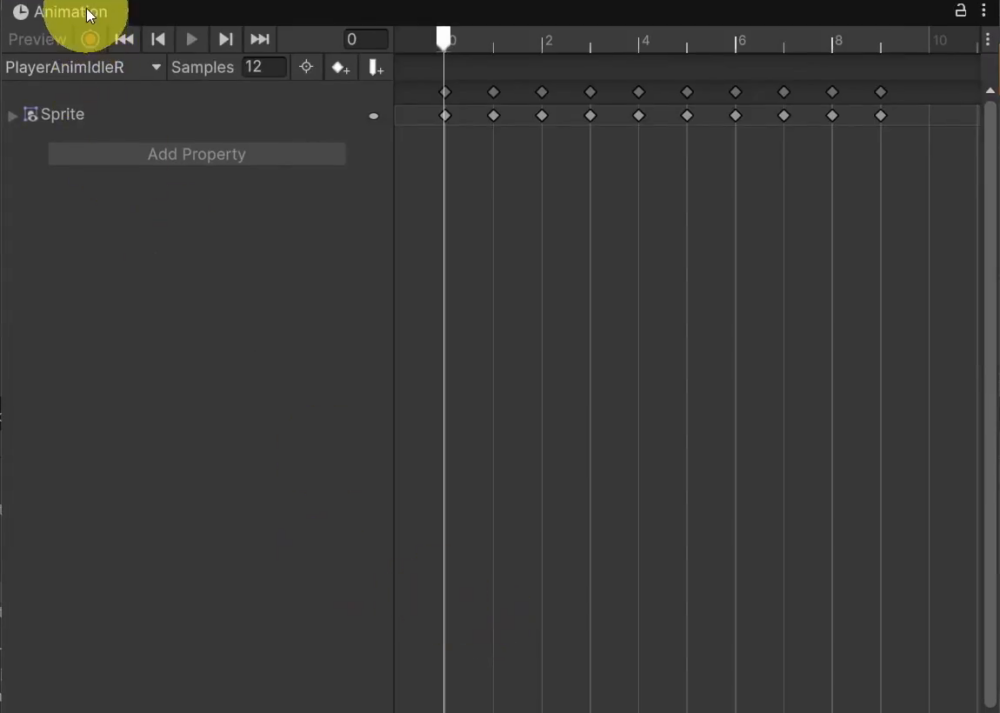
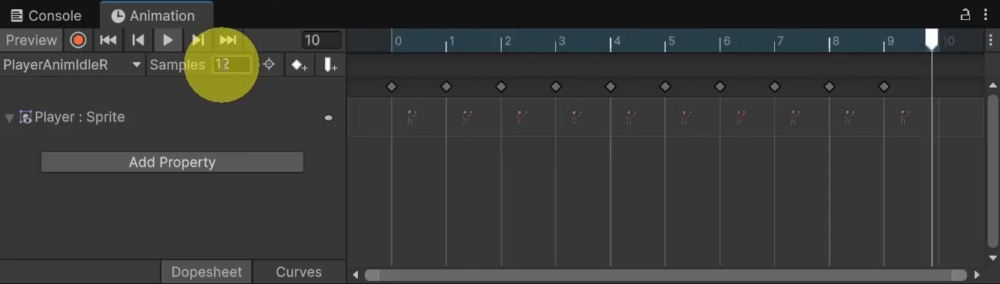
The screenshot labels the existing right-idle clip PlayerAnimIdleR; this is the role of the player_anim_idle_right clip you created above.
Adding Run Sprites to the Clip
In the Animation window, choose Add Property > Sprite Renderer > Sprite. Select all the run sprites under CourseAssets > Female Wizard > RunR and drag them into the dope sheet to create the sprite keyframes.
Adjusting the Sample Rate
The default sample rate of 60 can make the clip play too quickly. Change Samples to 12 to match the idle animation’s speed. If the field is hidden, open the Animation window’s three-dots menu and enable Show Sample Rate.
Fixing Blurry Sprites
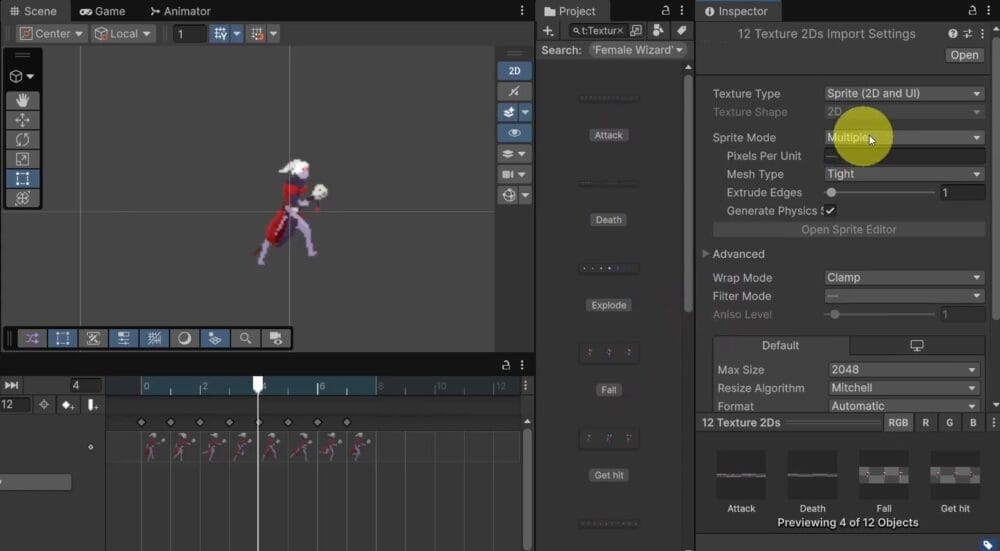
Select all the female wizard sprite textures in the Project panel. Set Pixels Per Unit to 60, Filter Mode to Point (no filter), and Compression to None, then click Apply.
Aligning the Sprite Frames
If the run animation shifts, select RunR, make sure Sprite Mode is Multiple, and open the Sprite Editor. Choose Slice > Type: Grid By Cell Size with the same cell dimensions used for the idle sprites, then click Slice and Apply.
Next Challenge
Try making Run Left and Idle Left clips with the same workflow. You can also experiment with the death animation for extra practice. Next, you will complete the directional clips and connect idle and run in the Animator Controller.
Connect Idle and Run with Animator Blend Trees
Creating the Left and Right Animation Clips
Select Player and create a clip in the Animation window named PlayerAnimIdleL. Save it in Animations, drag in the left-idle sprites, and set Samples to 12. Then create PlayerAnimRunL, add the left-run sprites, and set its sample rate to 12 as well.
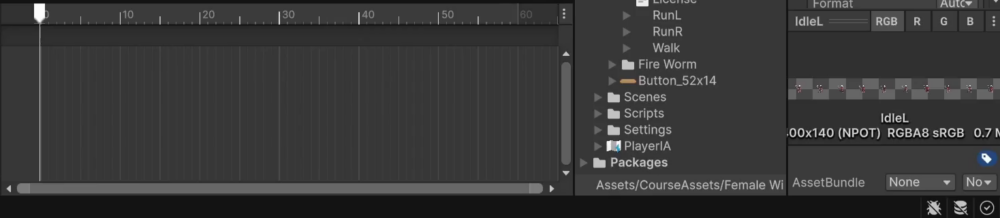
Creating clips in the Animation window produces animation assets without generating another Animator Controller. Dragging sprites directly into the scene is also valid, but it creates both the clips and a controller. Here, you will use the existing controller.
Rebuilding the Animator Controller with Blend Trees
Open the Animator Controller assigned to Player. The following examples call it PlayerAC; if you used PlayerAnimController above, continue with that controller. In the Animator window, scroll to zoom and use the middle mouse button to pan. A two-column Project panel can also make the animation assets easier to scan.
Delete the existing animation states to clear the controller. The player’s Animation window temporarily showing no clip is expected at this stage.
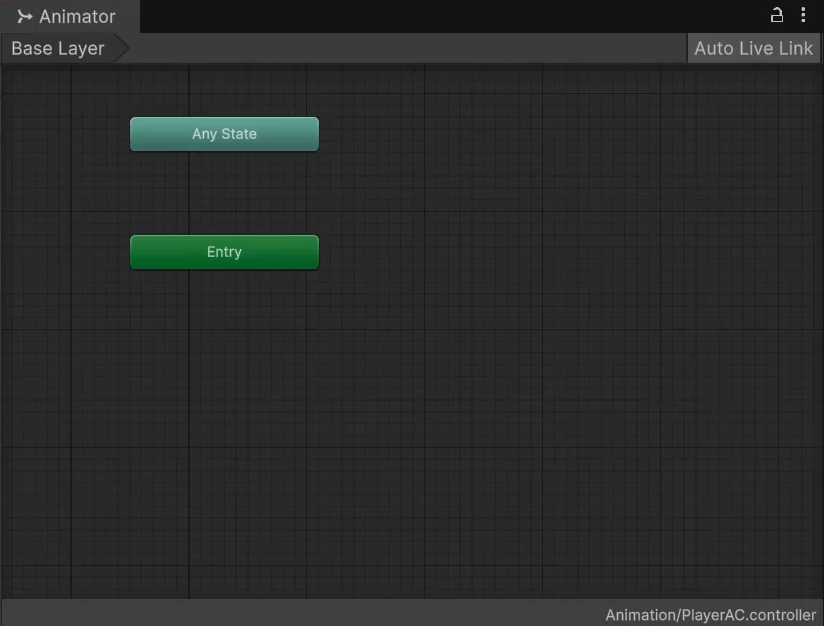
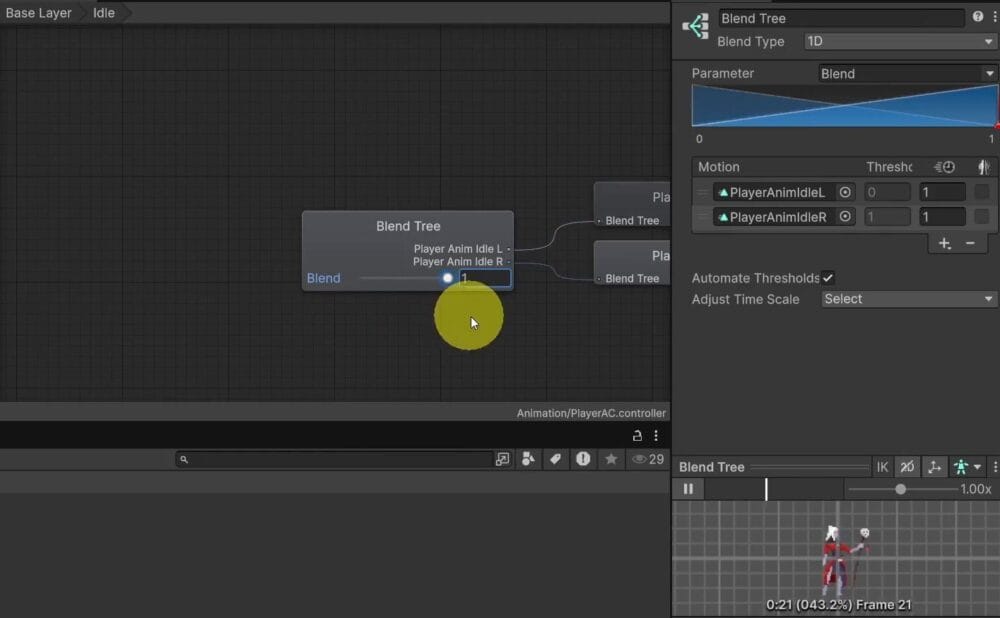
Right-click in the graph, create a state of type Blend Tree, and name it idle. Double-click it and add two Motion fields in the Inspector:
- First motion:
PlayerAnimIdleL, the left-idle clip. - Second motion: the right-idle clip, labeled
PlayerAnimIdleRin the controller example.
Keep the default Blend parameter and Automate Thresholds enabled. Preview the tree in the Animator and move its blend slider to see the character switch between left and right.
Create a second blend tree named run. Add PlayerAnimRunL as its first motion and the right-run clip as its second. The controller examples call that right-run clip PlayerAnimRunR; use the right-facing PlayerAnimRun clip you created earlier.
Save and preview the run tree, adjusting Blend to check its two directions. You can test facing with the slider now, but driving this parameter from movement code is a later step.
Setting Up Transitions Between Idle and Run
Return to the controller’s main graph. Right-click idle, choose Make Transition, and connect it to run. Select the transition arrow and set:
- Has Exit Time: unchecked
- Fixed Duration: unchecked
- Transition Duration:
0
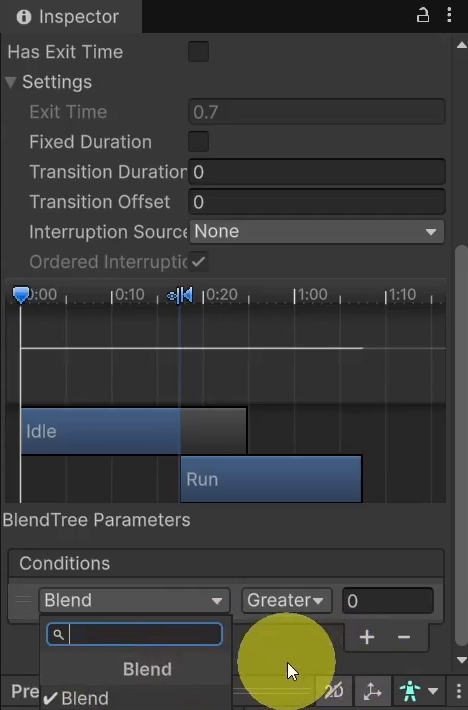
These settings let the animation switch without waiting for the current clip to finish or blending over a transition duration.
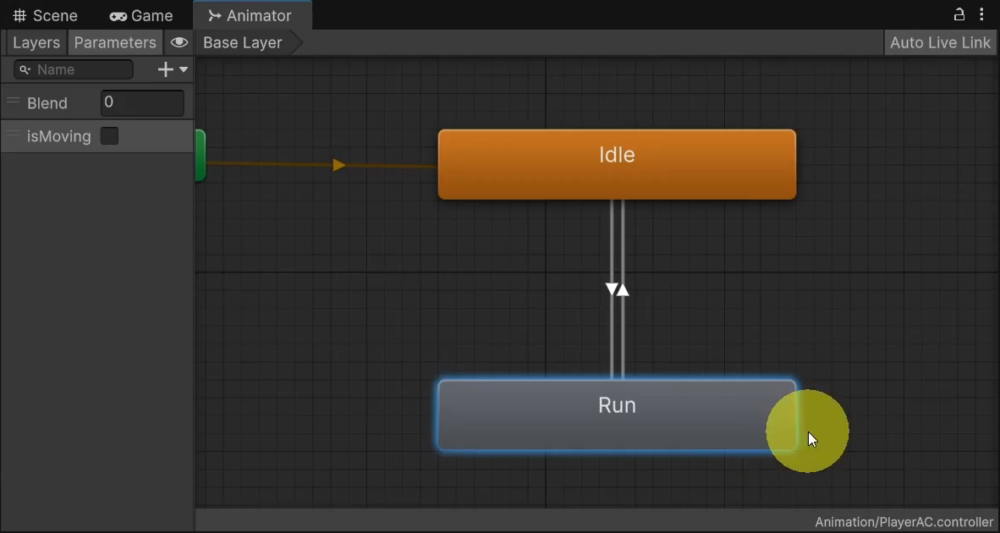
In Parameters, add a bool named isMoving. Add it to the idle-to-run transition’s Conditions and set it to true. Keep this separate from Blend, which controls left and right facing.
Create a transition from run back to idle. Apply the same timing settings, but set its isMoving condition to false.
Driving the Transitions from PlayerMovement
Open PlayerMovement. Add a private Animator field and cache it in Start alongside the Rigidbody2D reference. The fields and movement portion of the script now look like this:
using UnityEngine;
using UnityEngine.InputSystem;

public class PlayerMovement : MonoBehaviour
{
    [SerializeField] private float _movementSpeed;
    private Rigidbody2D _rb;
    private Vector2 _movementInput;

    private Animator _animator;

    void Start()
    {
        _rb = GetComponent<Rigidbody2D>();
        _animator = GetComponent<Animator>();
    }

    void Update()
    {
        _rb.linearVelocity = _movementInput * _movementSpeed;
    }
}
Next, update the Move callback in the same class. Start by setting isMoving to true. When the action is released, context.canceled identifies that cancellation so you can set the boolean back to false:
public void Move(InputAction.CallbackContext context)
{
    _animator.SetBool("isMoving", true);

    if (context.canceled)
    {
        _animator.SetBool("isMoving", false);
    }

    _movementInput = context.ReadValue<Vector2>();
}
The order matters: the callback first assumes movement, then overrides that value if the action was canceled. Finally, it stores the movement vector that Update uses. Without the cancellation check, the Animator would switch to running but never return to idle.
Testing in Play Mode
Save the script and enter Play Mode. With no movement input, the character should stay in the idle blend tree. Hold a movement key to switch to run, then release it to return to idle. The zero-duration transitions and disabled exit time make that switch immediate.
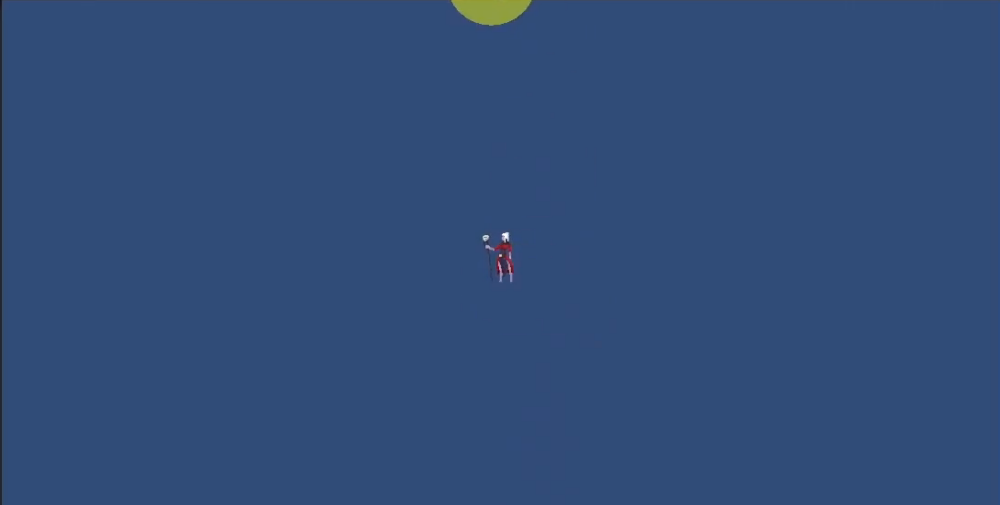
The character still faces left regardless of its movement direction. That is expected here because the Blend parameter has not yet been connected to input in code.
Challenge: Face the Right Direction
As your next challenge, use the horizontal component of _movementInput to decide which direction the sprite should face. The hint is to set the Animator’s Blend parameter from code, just as you have set isMoving. The facing-direction implementation comes after the movement and transition setup covered here.
Recap and Next Steps
You have replaced a moving circle with a pixel-art wizard whose idle and run animations respond to input. Your setup now includes:
- A movement callback that reads a
Vector2and uses it to set Rigidbody2D velocity. - Sprite import settings and grid slicing for crisp, consistently aligned frames.
- Player components transferred to the animated character with the input event reference corrected.
- Directional idle and run blend trees, with an
isMovingboolean controlling immediate transitions.
You can now work on the facing-direction challenge to connect the blend parameter to movement. Continue building the project with the Unity Game Development Mini-Degree for the full guided course and its next steps.
Did you come across any errors in this tutorial? Please let us know by completing this form and we’ll look into it!
FINAL DAYS: Unlock coding courses in Unity, Godot, Unreal, Python and more.