Want more Python content? Explore the INTERMEDIATE PYTHON – VIRTUAL PET WITH PYGAME where you can find a comprehensive, project-based curriculum on it!
Welcome to this detailed guide on creating a Pygame virtual pet project using Python programming language. In this tutorial, we will explore how to implement an ‘Item’ class which will serve as an item or an item button in our game. We will learn how to set up essential fields for the class, import images and draw buttons onto the button bar. Additionally, understanding class diagrams using a Unified Modeling Language (UML) diagram will also be covered.
To follow along with this tutorial at your own pace, make sure you are comfortable with:
- Basic Python programming.
- Concepts related to object-oriented programming.
- Pygame library fundamentals.
Table of contents
Virtual Pet – Project Files
The images and scripts used in this tutorial are available for download at the link below. These project files will enable you to better understand the operations and follow the tutorial easily.
Download Project Files Here
Project Implementation – Part 3a – Item Class
We have a Pygame virtual pet project set up and ready to use, so in this lesson, we will move on to implementing our Item class. This will be a custom class that represents either an item or an item button in our game to take care of the virtual pet. To set this up, we will:
- Setup the class’s initial fields
- Import images
- Draw buttons onto the buttons bar
As with the Game class, we have constructed a UML Diagram for the Item class that we will be creating.
Item
- x
- y
- health
- happiness
- image
- image_rect
We will need an x and y position for our item on the screen. Each item will have its own health and happiness value to be applied to the virtual pet. Finally, each item will also have its own image and an image_rect rectangle to handle the proportions and position of the image on the screen.
|
Our item will only contain its initializer method to set up the values for the item.
Implementing the Item Class
It is now time to write some more code, in the last lesson we set up our Game class which contains the code needed to create a screen, run the game loop, and draw to the screen (though we haven’t created the virtual pet itself yet). We will now create a class called Item with an __init__ initializer method. This initializer will contain the variables we defined in the UML Diagram as parameters, and we will use an image_name variable to load the image into the class.
class Item:
    def __init__(self, x, y, health, happiness, image_name):
From here, we need to set up our primary variables, by assigning our parameters to the item’s self value.
class Item:
    def __init__(self, x, y, health, happiness, image_name):
        self.x = x
        self.y = y
        self.health = health
        self.happiness = happiness
Next, we want to load the images. We don’t need to store the image_name, but we will use it alongside Pygame’s image loading methods to load an image and store it. We also want to create an image_rect so that when we click on the screen, we can place the item centered on the cursor’s position, by default Pygame would place the image’s top left corner at the click position, which goes again the game feel we want for our virtual pet game.
class Item:
    def __init__(self, x, y, health, happiness, image_name):
        ...
        self.image = pygame.image.load(image_name)
        rect = self.image.get_rect()
        self.image_rect = pygame.Rect(x - rect.width / 2, y - rect.height / 2, rect.width, rect.height)
To generate our image_rect value, we use the rect generated by Pygame when importing the image, then shift our image_rect half of the width and height to the left. This makes sure that our image is exactly centered in the image_rect while keeping the full size of the image. It would be possible to work with the coordinate space without doing this, but doing it this way helps a lot in the long run. In the next lesson, we will load the images into our project and display those as buttons.
We have our items for our virtual pet, but we now need to conquer how to add them to the game and interact with them.
Project Implementation – Part 3b – Creating Buttons
In the previous lesson, we set up our Item class which will be used for managing on-screen items and the item buttons that help us interact with our virtual pet. We also handled loading our item images, which we will make use of in this lesson where we will implement our buttons.
Creating the Button Bar
The first step in creating the buttons is to create a button bar, which is the rectangle at the top of the game screen that will house the buttons. We will do this in the Game class’s initializer and begin by creating two extra variables for the button_bar_height and button_bar_colour.
class Game:
    def __init__(self):
        ...
        self.buttons_bar_height = 100
        self.buttons_bar_colour = "orange"
        ...
To draw the button bar, we need to define its position and size using a Pygame Rect, which we can then draw inside our draw_everything method. We will use the pygame.draw.rect method, which will take the screen, buttons_bar_colour , and a new Rect that defines the size and position of the bar.
class Game:
    def draw_everything(self):
        self.screen.fill(self.background_colour)

        pygame.draw.rect(self.screen, self.buttons_bar_colour, Rect(0, 0, self.width, self.button_bar_height))

        pygame.display.update()
It is also important to note, that the order in which we draw things is the order they will be placed on the screen. This means that the last thing we draw will be on top of everything else (this includes the virtual pet too). We also need to make sure we draw nothing after we update the display, otherwise, this will not be displayed. For most games, we want to always start with clearing the screen (screen.fill), then draw everything to the screen, then finally call display.update.
With this done, if you Run the game, you will see an orange buttons bar exactly where it should be.

Importing Images
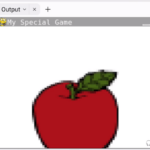
For this part of the lesson, we are going to use three .png image files (one for each of our items). We recommend using the files supplied in our Course Files for this. However, if you want your virtual pet to have different item images, that’s ok too!
Once you have extracted the Project Files, drag and drop the images into your project’s folder. If you are using Replit, simply drag the files into the browser window.

We will store the image names as an array in the Game class initializer.
class Game:
    def __init__(self):
        ...
        self.image_names = ["apple.png", "icecream.png", "toy.png"]
Creating the Buttons
With the item images for the virtual pet imported, we now want to create our buttons. For this, we will use the Item class and create three separate variables for each button. We will position each button at each quarter along the bar respectively.
class Game:
     def __init__(self):
          ...
          self.apple_button = Item(self.width / 4, self.buttons_bar_height / 2, 0, 0, self.image_names[0])
For this lesson, we will only create the apple_button so that you have a chance to create the remaining buttons yourself. We now need to draw our buttons on the bar, which we will do in the draw_everything method, using Pygame’s blit method.
class Game:
    def draw_everything(self):
        ...
        self.screen.blit(self.apple_button.image, self.apple_button.image_rect)
        ...
Now, when you press Run you will see that an apple is drawn in our buttons bar.

As a challenge, try implementing the ice cream and the toy buttons, in the middle and on the right (3/4 point) respectively. In the next lesson, we will cover a solution to this and finish off creating the items for our virtual pet.
Project Implementation – Part 3c – Challenge Solution
In the previous lesson, we set a challenge to create the final two-item buttons that will help us care for our virtual pet. In this lesson, we will cover the solution to this. The first step is to create the Item instances for each button. The only changes are the x position of each button and the index in the image_names array that is used.
class Game:
    def __init__(self):
        ...
        # Button Variables
        self.apple_button = Item(self.width / 4, self.buttons_bar_height / 2, 0, 0, self.image_names[0])
        self.ice_cream_button = Item(self.width / 2, self.buttons_bar_height / 2, 0, 0, self.image_names[1])
        self.toy_button = Item(self.width * (3 / 4), self.buttons_bar_height / 2, 0, 0, self.image_names[2])
You will also notice a line at the top with a # in front of it. This is a comment and allows you to leave notes for yourself that would be read by Python when the code is run. Feel free to place comments throughout your code to make sure you understand it if you come back to it, along with helping organize the code as it gets bigger.
The next step is to use the blit method inside the draw_everything method to draw the extra buttons to the screen.
class Game:
    def draw_everything(self):
        ...
        #Buttons
        self.screen.blit(self.apple_button.image, self.apple_button.image_rect)
        self.screen.blit(self.ice_cream_button.image, self.ice_cream_button.image_rect)
        self.screen.blit(self.toy_button.image, self.toy_button.image_rect)
        ...
With everything set up, if you now press Run you will see all three buttons appear on the button bar, evenly spaced.

And that’s it – our items our implemented for our virtual pet.
Conclusion
This brings us to the end of our comprehensive on making items for virtual pets tutorial. Congratulations on making it this far! You have successfully implemented an ‘Item’ class in your Pygame virtual pet project, managed to import images and drew buttons onto the button bar. By mastering these essential steps, you have taken a significant leap in your Python game development journey.
Now, it’s time to use these learnings and venture into creating more complex game features. You could enhance the project by introducing more item classes and more complex game rules. Remember, the more you experiment, the more you learn.
Aside from project enhancements, we also encourage you to explore Zenva’s extensive catalog of Python and Pygame courses. You can expand your Python knowledge with online courses covering various topics such as Artificial Intelligence, Data Science, and many more. Happy Coding!
Get industry-ready with the INTERMEDIATE PYTHON – VIRTUAL PET WITH PYGAME! Perfectly suited to any skill level, you’ll get the tools you need to succeed while building a slew of projects!
Did you come across any errors in this tutorial? Please let us know by completing this form and we’ll look into it!

FINAL DAYS: Unlock coding courses in Unity, Godot, Unreal, Python and more.