Table of contents
Introduction
Imagine this, you’ve just gotten a puzzle for Christmas. You don’t read the writing on the box and just toss it aside as you begin to construct this masterpiece. You pride your self on the fact that you’re almost done and it only took about 40 minutes. You get up to take a better look at your completed puzzle only to find out that it is not completed! How do you know this? Because it is a three-piece puzzle but you only have two pieces. You need to find the third piece.
In this tutorial, that is what we are doing, finding the last piece in a three-part puzzle. More specifically, we will be making our game mobile compatible and optimizing it as such. We will be adding a sort of scoring system, and we also will get a bonus section on how to make shattered glass. Let’s get started!
Did you come across any errors in this tutorial? Please let us know by completing this form and we’ll look into it!

FINAL DAYS: Unlock coding courses in Unity, Godot, Unreal, Python and more.
Check out the other tutorials in this series!
This is the final part in a three-part tutorial series on Game Dev Academy. Check out the other tutorials here:
Since we are going to be building a mobile game, we need some hardware i.e., a mobile device; more specifically, a device that you can build to directly from Unity. This is because we are going to be doing a lot of testing, testing things that will only run on a mobile device. If you don’t have a device that you can build to directly, I suggest that you get one. They’re actually really inexpensive. I just use an Amazon Fire Tablet which is about $50 (usually less when you can get them on sale). Seriously, it is a very helpful asset. So, grab your favourite “build-to” device and let’s start building!
Save the executable!
At this point, if you like your game the way it currently is, build it to the desktop as an executable. We’re going to be changing lots of different things that are going to make this game unplayable on a desktop computer. If you’d like, you could make a copy of the project folder. That way you’d always have a backup desktop version. It’s up to you. Once you’re done, say goodbye to all desktop related parts of your game as we begin to convert this to mobile.
Converting it to Mobile
Building it in the current state
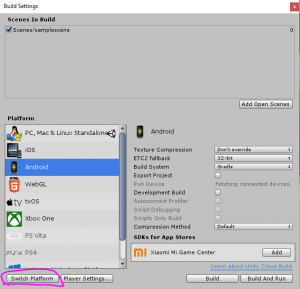
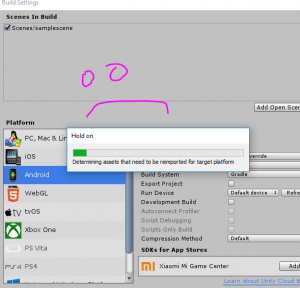
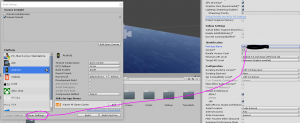
Let’s just go ahead and build to our device to see what actually needs to be done. I am using the Android platform so I’ll just go ahead and switch the platform.
This took a really long time, probably because of the sample scene which has a lot of complex shaders.
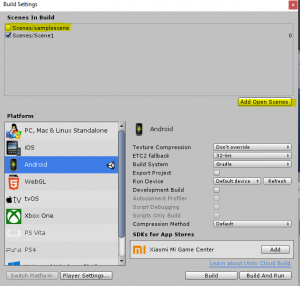
Now, we need to “Add Open Scenes” to the “Scenes in Build”, uncheck the sample scene since we aren’t using it and it will only be using up space on our device.
For Android, I had to supply a Bundle Identifier before I could build it, go ahead and do this if you haven’t already.
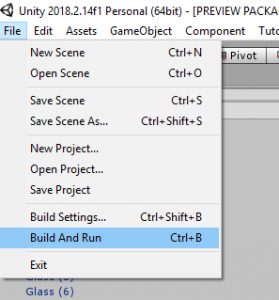
Alright! With your device connected and recognized, let’s hit Build and Run to see what it looks like.

Right off the bat, it seems to be running fine. We can spawn balls on touch and interact with our UI. But when we try and use more that one finger to spawn balls, i.e spawn two balls by tapping with two fingers, it only spawns one in between our two fingers.
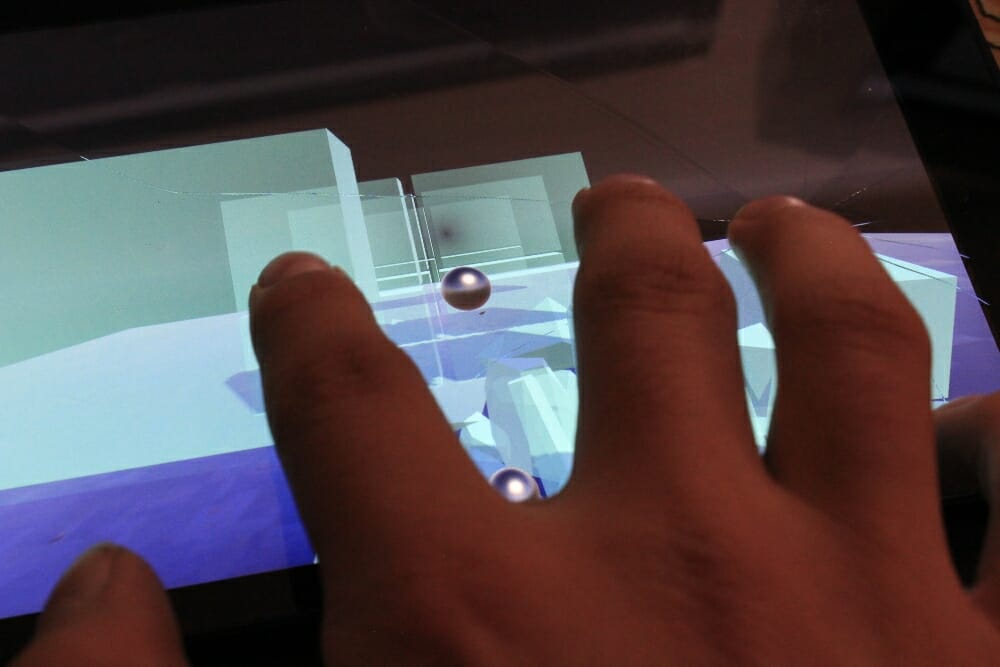
Also, my device was suffering from a lot of lag, this may not be the case with your’s but I think it is worth addressing. Let’s start by fixing the performance issues.
Fixing the performance issues
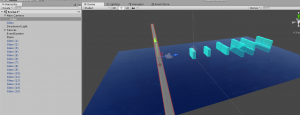
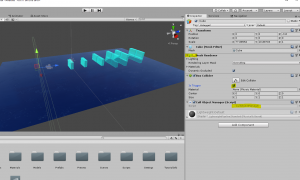
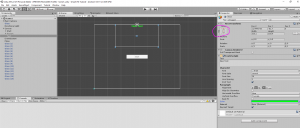
The reason we are doing this first is that it makes easier to fix the spawning balls issue when we don’t have any lag. As for performance, there are a few things that we can do: First, and most effective, was having a collider that deletes any glass that goes out of the view of the camera. Think about, we can’t see the shards but Unity is still doing Rigidbody calculations. This is extremely taxing so let’s fix this. Click on your Main Camera and create a cube that is large enough to cover all of the ground.
Then disable the Mesh Renderer and set the Collider to trigger. Next, we need to create a new script on this object called “CullObjectManager”.
This is the code for the script:
using System.Collections;
using System.Collections.Generic;
using UnityEngine;

public class CullObjectManager : MonoBehaviour {

	// Use this for initialization
	void Start () {

	}

	// Update is called once per frame
	void Update () {

	}
    private void OnTriggerEnter(Collider other)
    {
        if (other.tag != "Untagged") {
            Destroy(other.gameObject);
        }
    }
}
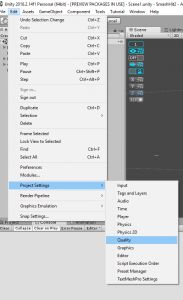
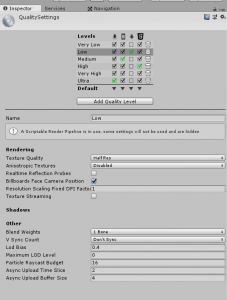
This will delete everything except for our ground planes which have a tag called “Untagged”. If you run this on your device you should see a noticeable improvement to the frame rate. At this point, we should have some workable circumstances. It may still be lagging a little (as it was with my device) so I did a few other things. First, I went to the Quality settings (Edit -> Project Settings -> Quality)
and I changed the settings to the following:
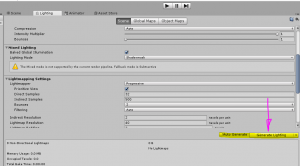
I then went to the Lighting window and disabled “Auto Generate” and simultaneously clicked “Generate Lighting.
When I built this to my device I noticed a slight improvement. If it is still lagging (especially when the ball collides with the glass) there is a final thing we can do which we will come to in a later section. For now, I think we have a high enough frame rate to create a better way to spawn balls.
Fixing the spawning issue
When fixing this issue, we need to understand the difference between MousePosition (what we’re currently using) and TouchPosition (what we’re going to use). MousePosition does return the position of your finger but only if you’re using one. If you use more than one it returns the average position. TouchPosition on the other hand, not only keeps track of each finger’s position but also how many fingers are currently on the screen. With this knowledge, let’s go to our CameraCharacter script (the script where we spawn the balls) and change it to implement TouchPosition. In the script, delete this logic statement:
if (Input.GetMouseButtonDown(0) && camMoving)
        {
            GameObject ballRigid;
            ballRigid = Instantiate(ball, BallInstantiatePoint, transform.rotation) as GameObject;
            ballRigid.GetComponent<Rigidbody>().AddForce(Vector3.forward * ballForce);
        }
At this point, let’s go ahead and create a static integer called “BallCount” with the default set to 15.
public static int ballCount = 15;
Now, let’s implement TouchPosition. First, we need to make sure the player is actually touching the screen by replacing the old logic statement with this:
 //checks if the player is touching the screen and the camera is moving
if (Input.touchCount > 0 && camMoving)
        {
}
Next, we need to make sure we haven’t shot out all our balls.
 if (Input.touchCount > 0 && camMoving)
        {
            if (ballCount != 0)
            {
}
}
Third, we need to loop through each touch and grab its position. Then we need to spawn a ball at that position.
 if (Input.touchCount > 0 && camMoving)
        {
            if (ballCount != 0)
            {
                for (int i = 0; i < 2; i++)
                {
                    float mousePosx = Input.GetTouch(i).position.x;
                    float mousePosy = Input.GetTouch(i).position.y;
                    if (Input.GetTouch(i).phase == TouchPhase.Began)
                    {
                        GameObject ballRigid;
                        Vector3 BallInstantiatePoint = _cam.ScreenToWorldPoint(new Vector3(mousePosx, mousePosy, _cam.nearClipPlane + spawnHelper));
                        ballRigid = Instantiate(ball, BallInstantiatePoint, transform.rotation) as GameObject;
                        ballRigid.GetComponent<Rigidbody>().AddForce(Vector3.forward * ballForce);
                        ballCount--;
                    }
                }
            }
So that’s it! We have now implemented TouchPosition and we can shoot balls with more than one finger. Not only that, but we can actually limit the number of fingers the player can use. You can do this by changing the conditional on the for loop. You can set it to i < 3 or i < 4 if you’d like, I have it set so that the player can only use two fingers. Before we build this to the device, go through the CameraCharacter script and delete any references to MousePosition. Save the script, allow Unity to compile, and then hit Build and Run.

Huzzah! It works! We have now successfully converted it to mobile!
Tying up loose ends
We’ve got our game working on mobile, now we just need to tweak a few things. The first is to use “BallCount” to give the game a more competitive edge. We can do this by adding more balls whenever the player destroys a pane of glass. This is done simply by going to the “GlassShatter” script and adding in a line that increments “Ballcount” in “OnTriggerEnter”.
private void OnTriggerEnter(Collider other)
    {
        if (other.CompareTag("destructive"))
        {
            //picks a random gameobject in the array
            int objectIndex = Random.RandomRange(0, shatteredObject.Length);
            Instantiate(shatteredObject[objectIndex], transform.position, shatteredObject[objectIndex].transform.rotation);

            //By using a static variable, we can access the variable directly
            CameraCharacter.ballCount += destructionReward;
            Destroy(gameObject);
        }
    }
But we can actually improve upon this. Let’s have a public variable called “destructionReward” that we can change in the inspector so that we can make certain panes of glass worth more.
public int destructionReward = 2;
And then changing the syntax of the incrementation line:
CameraCharacter.ballCount += destructionReward;
Now we just need a UI that will tell us how many balls we have left. Go to your CameraCharacter script and add in a public variable of type “Text” called “ballText”:
public Text ballText;
Next, in the update function, we make this text always display “ballCount”:
ballText.text = CameraCharacter.ballCount.ToString();
This part is optional, but I did an “if-else” for this logic statement that displays a message when we run out of ammo:
 if (ballCount != 0)
            {
                 //This comment represents all the code that goes here :-)
}else
            {
                 //This part is what I added
                 ballText.text = "We're out of ammo!";
}
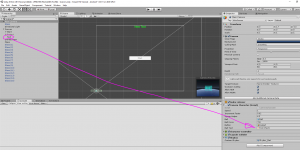
Now we just need to create some UI text in the editor. I made my text green, fairly large, and anchored to the top.
Assign this to the “Ball Text” field on the CameraCharacter script
and then click build and run!
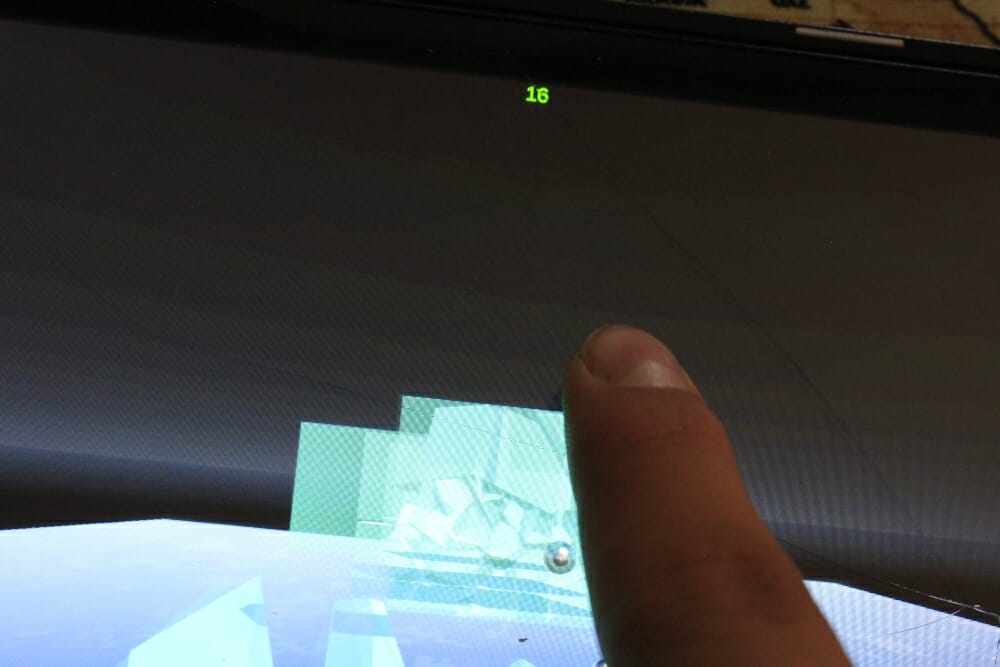
It works! Huzzah! The last loose end that we need to tie up is just making sure that our “ballCount” always resets everytime we restart the game. This is done in the Start method on the CameraCharacter script:
void Start () {
        ballCount = 15;
        cameraChar = gameObject.GetComponent<CharacterController>();
        _cam = GetComponent<Camera>();
	}
And that’s it! All loose ends are tied up, all balls are spawning in the right place, and now we can move on to the bonus section!
Bonus: Creating shattered glass in Blender
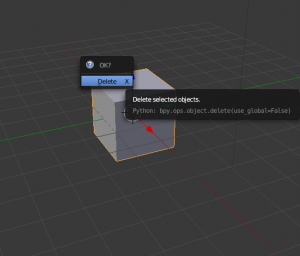
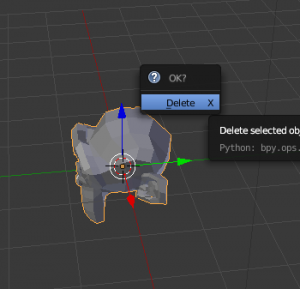
We have a pretty good game. It’s challenging enough so that it remains fun. But what would take this game from being pretty good to AMAZING? What would give this game the extra punch that it needs? The answer: variety. Think about it, all we’ve got is a sort of monotonous smashing of pesky glass. If we could change the look or shape of the glass, it would leave lot’s of room for creativity and make it more aesthetically and dynamically pleasing. That’s what we’re doing in this section. If you’re a game developer, chances are you already have Blender installed. If you don’t, you can download it for free at https://www.blender.org/. Open it up and delete the default cube.
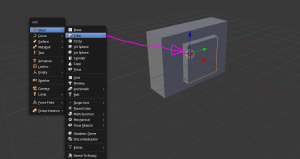
For the sake of example, go ahead and create a Monkey Head.
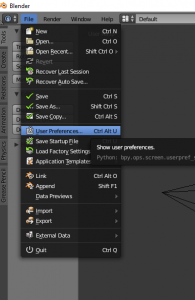
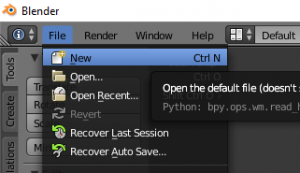
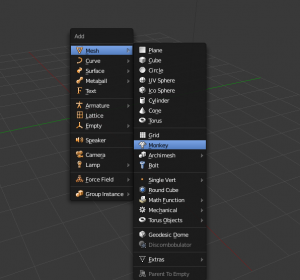 Next, navigate to File -> User Preferences.
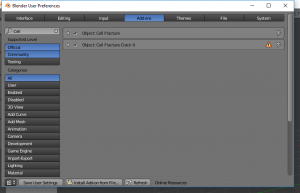
Then go to Addons and search “Cell Fracture”.
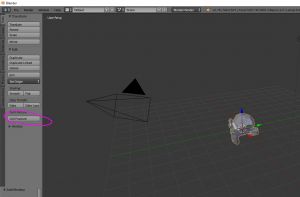
Enable this addon then close the window. You should see a new button titled “Cell Fracture” in the toolbar.
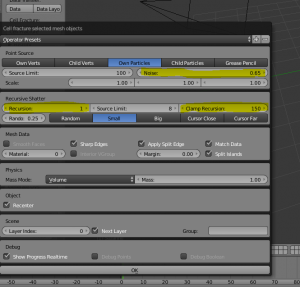
If you click on this, it will open a new window.
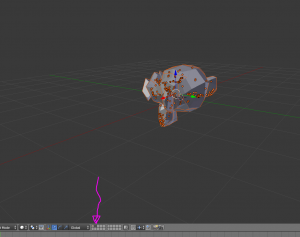
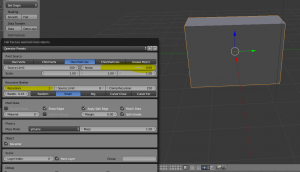
This is how you can make Blender “shatter” objects for you. I suggest that you investigate the settings for yourself but I can give you a few general guidelines for making a glass-like shatter. First, you’ll want more than 0.5 noise, this will help randomize the look. Second, don’t have too much recursion, this will greatly increase the size and complexity of your model. Once you’ve found a good set of settings, hit OK. After a little while, it will be finished and you’ll find your shattered model on the next layer.
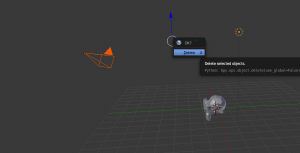
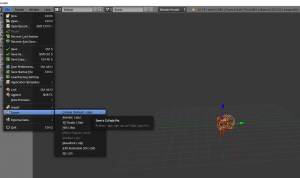
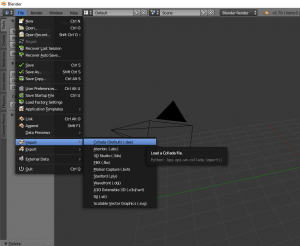
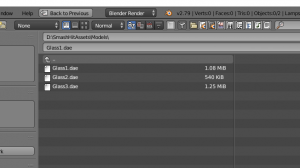
Next, you can delete the whole model and export the shattered as a Collada (or .dae) and import it into Unity. You usually want to delete the default light and camera in Blender before you export.
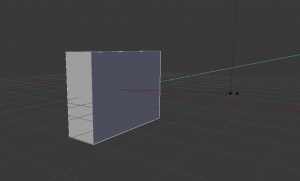
Also, this is how you can fix some of the lag. You can import the whole cube and re-fracture it with a much lower recursion.
This will lower the number of fractured pieces which will increase the frame rate in the game because Unity doesn’t have as many shards to calculate physics for. This, coupled with our “CullObjectManager”, is what mostly improved the lag on my device.
The Scripts we changed
Here is the entire code for the CameraCharacter script:
using System.Collections;
using System.Collections.Generic;
using UnityEngine;
using UnityEngine.SceneManagement;
using UnityEngine.UI;

public class CameraCharacter : MonoBehaviour
{
    public float speed = 1;
    public float incrementFactor = 0.02f;
    public float spawnHelper = 4.5f;
    public GameObject ball;
    public float ballForce = 700;
    public GameObject button;
    public Text ballText;

    public static int ballCount = 15;

    //We use this when we implement UI
    public static bool camMoving = false;

    private CharacterController cameraChar;
    //A boolean whose value will be determined by OnTriggerEnter
    private bool collision = false;
    private Camera _cam;


    // Use this for initialization
    void Start()
    {
        ballCount = 15;
        cameraChar = gameObject.GetComponent<CharacterController>();
        _cam = GetComponent<Camera>();
    }

    // Update is called once per frame
    void Update()
    {
        ballText.text = CameraCharacter.ballCount.ToString();
        Debug.Log("Speed is " + speed);

        //This checks if we have collided
        if (!collision && camMoving)
        {
            cameraChar.Move(Vector3.forward * Time.deltaTime * speed);
            //This is so that the camera's movement will speed up
            speed = speed + incrementFactor;
        }
        else if (collision || !camMoving)
        {
            cameraChar.Move(Vector3.zero);
        }
        //checks if the player is touching the screen and the camera is moving
        if (Input.touchCount > 0 && camMoving)
        {
            if (ballCount != 0)
            {
                for (int i = 0; i < 2; i++)
                {
                    float mousePosx = Input.GetTouch(i).position.x;
                    float mousePosy = Input.GetTouch(i).position.y;
                    if (Input.GetTouch(i).phase == TouchPhase.Began)
                    {
                        GameObject ballRigid;
                        Vector3 BallInstantiatePoint = _cam.ScreenToWorldPoint(new Vector3(mousePosx, mousePosy, _cam.nearClipPlane + spawnHelper));
                        ballRigid = Instantiate(ball, BallInstantiatePoint, transform.rotation) as GameObject;
                        ballRigid.GetComponent<Rigidbody>().AddForce(Vector3.forward * ballForce);
                        ballCount--;
                    }
                }
            }
            else
            {
                //This part is what I added
                ballText.text = "We're out of ammo!";
            }
        }
    }
    private void OnTriggerEnter(Collider other)
    {
        if (other.CompareTag("glass"))
        {
            collision = true;
            Debug.Log("Collided with glass!! Man down!!");
            camMoving = false;
            button.SetActive(true);
        }
    }
    public void StartCam()
    {
        camMoving = !camMoving;
    }
    public void Reset()
    {
        SceneManager.LoadScene("Scene1");
    }

}
And the entire code for the GlassShatter script:
using System.Collections;
using System.Collections.Generic;
using UnityEngine;

public class GlassShatter : MonoBehaviour {
    public GameObject[] shatteredObject;
    public int destructionReward = 2;
    // Use this for initialization
    void Start()
    {

    }

    // Update is called once per frame
    void Update()
    {

    }
    private void OnTriggerEnter(Collider other)
    {
        if (other.CompareTag("destructive"))
        {
            //picks a random gameobject in the array
            int objectIndex = Random.RandomRange(0, shatteredObject.Length);
            Instantiate(shatteredObject[objectIndex], transform.position, shatteredObject[objectIndex].transform.rotation);

            //By using a static variable, we can access the variable directly
            CameraCharacter.ballCount += destructionReward;
            Destroy(gameObject);
        }
    }
}
If you were confused when we made changes to the scripts, here is the entire thing that you can copy and paste.
Conclusion
Congratulations! You’ve found the third piece to your puzzle and you can now complete your masterpiece. That is no small achievement, so you should be very pleased with yourself. I hope you found it helpful and instructive.
If you ever find yourself at your desk, staring at your computer because you have absolutely no video game ideas (every game developer has experienced this), then you know where to look for inspiration! Go to the app store, pick a game that you like to play, and then innovate upon its concepts in your own way. This way you can improve or change things about it, while learning and improving your game development skills. So again I encourage you:
Keep making great games!
