UnityEngine.Object – the base class and concept for every single object in Unity – is paramount to understand for your game dev journey.
Game development goes beyond just writing code, as real-time debugging and problem-solving play a crucial role in the process. It’s about understanding what’s not working, why it’s not working, and how to make it work. Recently, we encountered a seemingly intractable problem: despite appearing perfect, the collision in our game was not triggering as expected. Instead of increasing the player’s size and destroying the orb upon collision as intended, the player was passing through the orbs, with no sign of interaction. In this tutorial, we will delve into the depths of Unity’s collision system and illuminate the process we undertook to fix this issue.
Table of contents
Project Files
You can download a personal reference for this debugging exercise via the link below. However, we also encourage you to seek out the UnityEngine.Object documentation for your personal reference as well.
Download Project Files Here
Challenge 3 – UnityEngine.Object Problem
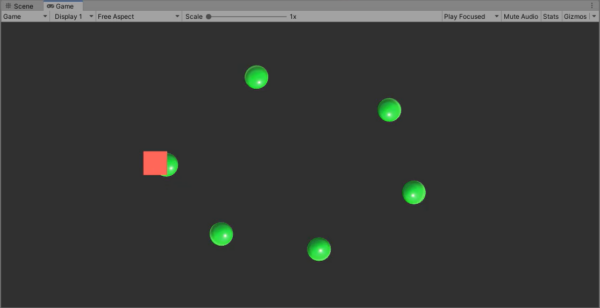
In a recent game development tutorial, we had built a simple game where a player moves around to collect green orbs. On collision with one of these orbs, the player was supposed to increase in size and destroy the orb. However, as it is often with coding, we faced an issue where the game was not performing as intended. Our player was simply passing through the green orbs, with no collisions happening. In this article, we will discuss the steps undertaken to debug this issue – which involves looking very closely at the UnityEngine.object set up.
Checking for Colliders
The first step we took was to check if the player and the orbs were set up correctly. This was done by checking whether the Player had a “box collider” with “is trigger” enabled and each of the orbs had a “sphere collider” also with “is trigger” enabled. It turned out that these were indeed correctly set up.
BoxCollider player = GetComponent();
player.isTrigger = true;
SphereCollider orb = GetComponent();
orb.isTrigger = true;
Examining the Code
Next, we looked at the code. We wanted to make sure we had a script for player movement and a function for triggering collisions. The player movement was controlled by a variable called ‘move speed’ and was working perfectly.
float moveSpeed;
void Update() {
    float h = Input.GetAxis("Horizontal");
    float v = Input.GetAxis("Vertical");
    Vector2 movement = new Vector2(h, v);
    transform.Translate(movement * moveSpeed * Time.deltaTime);
}
The function for triggering collisions was ‘on trigger enter’. This function is supposed to get called when the player enters the trigger of another object, increasing the player’s scale and destroying the object colliding with (using a common static method from the UnityEngine.object class). However, this was what was not working.
void OnTriggerEnter(Collider other) {
    transform.localScale += new Vector3(0.1F, 0.1F, 0.1F);
    Destroy(other.gameObject);
}
Debugging
To debug this, we added a console log statement in the ‘on trigger enter’ function. This would print out a message every time a collision happened. It was observed that no message was printed, which confirmed that the function was indeed not running for our UnityEngine.object.
void OnTriggerEnter(Collider other) {
    Debug.Log("Hit");
    transform.localScale += new Vector3(0.1F, 0.1F, 0.1F);
    Destroy(other.gameObject);
}
Conclusion
Adding a console log helped us realize that the ‘on trigger enter’ function was not running as it was supposed to. The next step was to dive deeper and debug the issue. We encouraged users to seek help from Unity’s documentation if they encountered any difficulty.
This exercise was a good reminder that development is more than writing code; half the job is debugging and fixing issues. Remember, the key to efficient debugging is a systematic approach – check the setup, examine the code, and utilize debugging tools.

Challenge 3 – Solution
In this tutorial, you will learn how to effectively detect collisions using the Unity physics engine, especially when there are no console errors in the code. We will explore the role of the rigid body component and demonstrate how to associate it with objects for successful collisions. This issue typically arises when the code seems perfect with no errors but the desired output isn’t achieved, laying the blame on the setup of our components rather than the coding.
Understanding Collisions and Unity Physics
In Unity, handling collisions and making a UnityEngine.object interact seamlessly involves using the physics engine. Notably, for an object to detect a collision, at least one of the trigger or colliding objects requires a rigid body component.
Adding a Rigid Body Component
Here’s how to add a Rigid Body component:
- Select the object. In this case, we’ll use our player object which currently doesn’t have a rigid body, just like our pickups objects that only use Collider components.
- Scroll down to the “Add Component” section.
- Search for “Rigid Body” and select it.
Since our player isn’t being moved by modifying the rigid body, we can disable the physics by enabling the ‘is kinematic’ function. Disabling the physics is important in our case since we are modifying the player directly in the code. Adding the Rigid Body component without adjusting physics can lead to unpredictable game physics behaviour.
// Codewise, assuming 'player' is the GameObject we want to modify:
Rigidbody rb = player.AddComponent();
rb.isKinematic = true;
Checking the Result
When you press play and collide with the spheres, they should get destroyed, and your player character size should increase. Also, the debug log we added should be called. This is because the rigid body component allows the registration of collisions.
Learning More About Unity Physics
To better understand Unity physics and the role of rigid body and Collider components, consider checking out the following resources:
- The Unity scripting API for the OnTriggerEnter function
- The Collider documentation
- Documentation about the Rigidbody component
These resources offer valuable insights into Unity physics and more extensive understanding of how game objects interact.
Conclusion
Successful debugging of code often requires a blend of critical thinking skills, broad approach, and apt knowledge of debugging tools. In this tutorial, we navigated through an issue, carried out effective debugging, and shed light on the nuances of Unity’s collision detection and physics. Remember, practicing debugging skills and developing a systematic approach towards problem-solving can significantly elevate your coding proficiency. Your introduction to Unity Physics should not end here. We encourage you to explore more and dig deeper into the complex world of Unity with online resources, tutorials and Unity’s own extensive documentation.
In this vast tabletop of game development, never shy away from turning over every stone and challenge yourself to collaborate more with the community.
We hope this tutorial has given you valuable insights and the confidence to tackle such issues in your projects. Good luck with your journey in Unity game development!
Want to learn more? Try our complete DEBUGGING FOUNDATIONS FOR UNITY course.
Did you come across any errors in this tutorial? Please let us know by completing this form and we’ll look into it!

FINAL DAYS: Unlock coding courses in Unity, Godot, Unreal, Python and more.


