In my previous GearVR tutorial, we learned to set up Unity, the Android SDK, and a phone for Gear VR development. We also created a simple scene with basic shapes and gaze-based interaction.
In this tutorial, we will use this knowledge to create a shooting game. We will be replacing the basic shapes with more complex models for a more realistic look, and we will be adding click-based interaction to simulate shooting. We’ll also get more practice working with reticles.
Table of contents
Source Code Files
You can download the complete project here. I created this project in Unity 5.6.1.
Did you come across any errors in this tutorial? Please let us know by completing this form and we’ll look into it!

FINAL DAYS: Unlock coding courses in Unity, Godot, Unreal, Python and more.
Creating the Project
We will be creating a first person, space-themed shooting game based on the classic arcade game Asteroids. The player is floating almost helplessly in a pod in an asteroid belt, with asteroids coming at her from all directions. All she can do is aim and shoot asteroids to destroy them before they hit her.
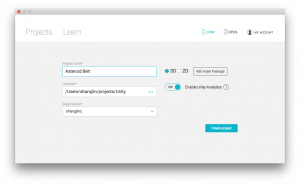
First, let’s create our project. Open Unity, and select “NEW.” Under “Project Name,” enter a name for your game. I’m using the name “Asteroid Belt.” Make sure 3D is selected, and click the “Create Project” button.
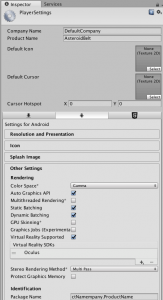
Once the project is open, navigate to File->Build Settings. Make sure Android is selected as the target platform. Click the “Player Settings” button to load Player Settings in the Inspector tab. Check “Virtual Reality Supported”. If Oculus is not listed as a Virtual Reality SDK, click the “+” sign and select it. This will let you build your project for Gear VR.
You will also need to copy your Oculus signature file into your project, in the Assets/Plugins/Android/assets folder. In the Project tab, you should be able to select this folder and see an oculussig file.
This oculussig file is unique to your phone. You can find the instructions to create a new oculussig file at this link. You will need to sign up for an Oculus account.
Game Assets
In game development, game assets can refer to graphics, icons, sound effects, and scripts. To make our shooter game appealing, the main assets we will need are models for asteroids that look more realistic than basic Unity shapes. We can make our own models in programs like Blender and import them into Unity, or we can use assets that have already been created. The Unity Asset Store, available within Unity, offers both free and paid asset packages that you can use in your own games. We will be using the free Asteroids Pack, which includes a few different asteroid prefabs and a skybox that we can use as a background.
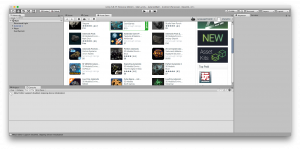
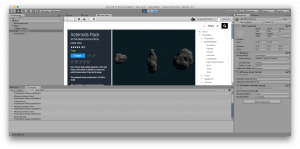
In Unity, click on the Asset Store tab. The label is next to the Game view. Once the Asset Store has connected, enter “asteroids” into the search box. Scroll down until you find the free Asteroids Pack, and click on it.
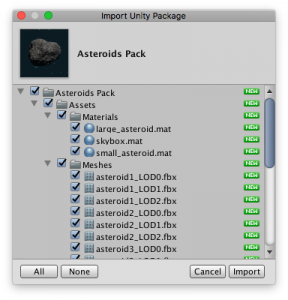
Then click the “Import” button to import the package into your project. A new window will open showing all the assets in this package. Click the Import button in this window.
“Asteroids Pack” will now appear in your Assets folder, visible in the Project view. Open Asteroids Pack/Assets/Prefabs. You’ll see three different asteroid prefabs. These are what we will be dragging into the hierarchy view or scene view to create asteroids. Each prefab is already set up with a rotation script, Asteroids Pack/Assets/Scripts/RandomRotator.cs, that makes the asteroid rotate with a random angular velocity.
Setting Up the Prefabs
To handle collisions with the asteroids, including with the reticle, we will need to add colliders.
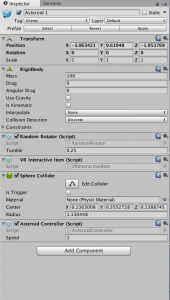
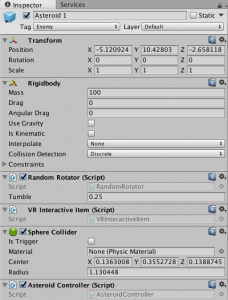
Select Assets/Asteroids Pack/Assets/Prefabs in the Project panel, and click on Asteroid 1 to load the prefab in the Inspector. Click “Add Component” and enter and select “Sphere collider.”
Now we need to resize the collider. Drag the Asteroid 1 prefab from Project window to the Scene window to temporarily create an asteroid. Click “Edit Collider” in the Inspector. A green sphere will appear, outlining the collider. Drag the tabs on the outline of the sphere to resize the collider. If the collider is too small, the reticle will only be detected when it overlaps with the exact center of the asteroid. Make it too large, and the reticle will be detected even when it isn’t really on the asteroid. We’re going to resize the collider to encompass the entire asteroid. In the Inspector, click the Apply button next to the word “Prefab” to apply these changes to the prefab. This means that the next you create an asteroid from the Asteroid 1 prefab, it will have a sphere collider with the size you set.
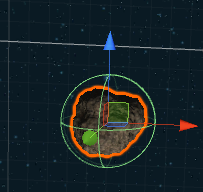
Remove the asteroid from the scene. We added it only to resize the collider. Repeat the above steps with the Asteroid 2 and Asteroid 3 prefabs.
We will also add a new script to the prefabs. In the Project window, select Assets/Scripts. Right click and select Create->C# Script. Name your new script AsteroidController.cs. For now, don’t add anything to the source code yet. Just add AsteroidController.cs as a component to each of the asteroid prefabs. Also add the script VRInteractiveItem.cs from Assets/VRStandardAssets/Scripts. Without this script, we would not be able to interact with the asteroids through the reticle, which will be covered in the next section.
The Reticle
In VR, you are the camera, and a reticle, or targeting crosshair, shows you precisely where you are looking. In my last tutorial, we used the reticle from VR Samples, a package of useful assets for VR apps from the Unity Asset Store. We will use the same assets in this project, but organized a bit better, and we’ll put together the camera ourselves with the scripts from VR Samples instead of dragging and dropping the prefab. This will help us understand what’s going on.
The project included with this tutorial already contains all the needed VR Samples files in the folder Assets/VRStandardAssets. Copy VRStandardAssets directly into your own project’s Assets folder.
Because the player is the camera, create an empty game object in the hierarchy view called Player. Nest the Main Camera under the Player object by dragging it to Player in the hierarchy window.
Reset the positions of both Player and Main Camera to the origin by clicking the gear icon next to “Transform” in the Inspector Panel and selecting “Reset.” Since Main Camera is nested under Player, the coordinates of Main Camera are relative to Player and not to the world.
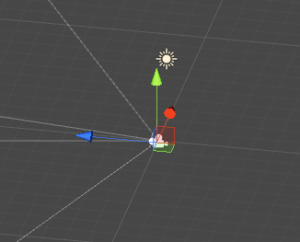
Add the following scripts to the Main Camera: VREyeRayCaster.cs, VRInput.cs, VRCameraUI.cs, and Reticle.cs. These scripts are all part of VR Samples and are located in Assets/VRStandardAssets/Scripts. Also add the script DragCamera.cs from the Assets/Scripts folder.
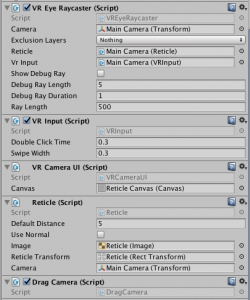
When you run your game in Play mode in the Unity editor, this script lets you can hold down the right mouse button and drag to move the reticle around the scene. Testing becomes easier because you no longer need to load your game onto a phone to move the reticle. If you look in the code, you’ll see that most of the code is enclosed between “#if UNITY_EDITOR” and #endif”. This means the code will only run in the Unity Editor, not when the app is run on an actual Gear VR.
Now right click in the Hierarchy window and select UI->Image to create a new Image. The Image is automatically nested under a new Canvas object. Drag the Canvas onto Main Camera to nest it under Main Camera. Rename the Image to Reticle, and Canvas to Reticle Canvas.
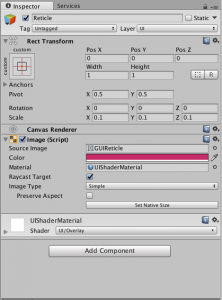
Click on Reticle to load it in the Inspector pane. In the Image section, click the circle next to “Source Image” and select GUIReticle, which is one of the sprites that came with VR Samples. This is the image that will represent the reticle. Click the Color field to choose a color for the reticle. Click the circle next to material and choose UIShaderMaterial. This is a shader that came with VR Samples and will prevent the reticle from being blocked by other objects.
Resize the width and height of the reticle to 1. Otherwise, the reticle image will be very large.
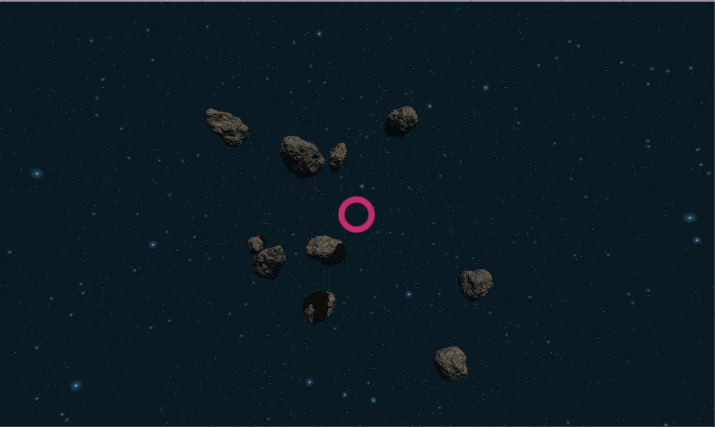
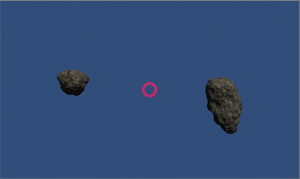
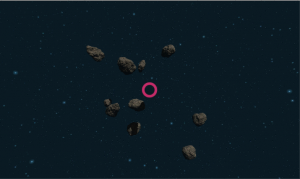
Drag some asteroid prefabs into the scene, and press the play button to preview the game. If the player/camera is at the origin, set your asteroids’ coordinates to between (-5, 0, 10) and (5, 0, 10) will ensure they are within view. The red circle is the reticle.
Shooting and Scoring
When the reticle is aimed at an asteroid and the touchpad button is clicked, we want the asteroid to disappear and a score to be updated. We’ll need additional scripts to accomplish this.
To understand what we’re going to do, let’s take a look at the code of VRInteractiveItem.cs, which we added to our asteroid prefabs. Note the following code:
 public event Action OnClick;

// Additional code ....

 public void Click()
 {
   if (OnClick != null)
       OnClick();
 }
When a VRInteractiveItem is clicked, the Click() method is called, which calls OnClick() like a method. We’re going to add a method to AsteroidController that subscribes to OnClick(), which means that this method will be called whenever OnClick() is called.
Let’s add code code to AsteroidController.cs so that it looks like this:
public class AsteroidController : MonoBehaviour {


  VRInteractiveItem vr;
 // Initialize the GameController
                        // and VRInteractiveItem.


  void Awake() {
    // When this object is created, assign the VRInteractiveItem
    // component to vr.
    vr = GetComponent<VRInteractiveItem> ();

  }

   void OnEnable() {
     // HandleClick() subscribes to vr.OnClick.
     vr.OnClick += HandleClick;

   }


   void OnDisable() {
     // Unsubscribe when this AsteroidController is disabled.
     vr.OnClick -= HandleClick;

   }


   // <a class="wpil_keyword_link" href="https://gamedevacademy.org/how-to-submit-forms-and-save-data-with-react-js-and-node-js/" target="_blank" rel="noopener" title="React" data-wpil-keyword-link="linked">React</a> to a click by destroying this asteroid.

   void HandleClick() {

     Destroy (gameObject);

   }


}
When an asteroid is clicked, HandleClick() calls the Destroy function to destroy the game object. When an asteroid is enabled, HandleClick() is subscribed to the VRInteractiveItem’s OnClick event. Every subscription must have an unsubscribe when the object is disabled.


So far, our code destroys an asteroid when it is clicked (i.e. shot), but it doesn’t keep score. We will need to add a game controller that keeps track of game-wide state, such as score, and modify AsteroidController.cs to call the game controller whenever an asteroid is destroyed.
In the Hierarchy window, right click and select Create Empty. Name the empty object GameController. In the Project panel, create a new C# script in Assets/Scripts called GameController.cs, and add this script to the GameController object. Just for consistency, reset GameController’s position to the origin. GameController is an empty object with no physical manifestation. In the Inspector, tag the object as GameController.
Open GameController.cs in MonoDevelop. Create an integer data member, score, that is initialized to 0. Create a public method called UpdateScore that accepts an integer point value as an argument and increments score by this value, and a method DestroyHazard that calls it. DestroyHazard will have more logic added later. Here is my code:
public class GameController : MonoBehaviour {


    int score = 0;


    public void UpdateScore(int incrValue = 1) {
        score += incrValue;

    }


    public void DestroyHazard(int points = 1) {
        UpdateScore(points);
        ShowScore();
    }

    public void ShowScore() {

        Debug.Log (score);

    }

    public int GetScore() {
        return score;

    }

}
ShowScore() logs the score in the console and the footer of the Unity editor. GetScore() allows other objects to access the score.
Each instance of AsteroidController will need a reference to GameController. In AsteroidController.cs, add a data member:
GameObject controller;
In the Awake() method, add code to assign the controller.
// Initialize the GameController and VRInteractiveItem.
void Awake() {
    vr = GetComponent<VRInteractiveItem> ();

    // Since the GameController is not part of the Asteroid prefab,
    // we will need to find the GameController object first. We had
    // tagged it as GameController when we created it.
    GameObject controllerObject = GameObject.FindGameObjectWithTag ("GameController");
    if (controllerObject != null) {
	// Then we get the GameController script component.
	controller = controllerObject.GetComponent<GameController> ();
    }
    else {
	Debug.Log ("Failed to get GameController object");
    }

    if (controller == null) {
        Debug.Log ("failed to get GameController");
We are using the tag we put on the GameController object to locate it, and we are getting the GameController component, which refers to an instance of the class defined in GameController.cs.
Modify HandleClick() to call the GameController.DestroyHazard method, which will increment the score.
void HandleClick() {
    if (controller != null) {
        controller.DestroyHazard (pointValue);
    }
    else {
        Debug.Log ("Controller is null");
    }
    Destroy (gameObject);
}
Spawning Asteroids
We’ve been dragging asteroids manually into the scene, but we really would like the asteroids to spawn automatically and move on their own.
In GameController.cs, add two new public data members: an array of GameObjects that will contain the prefabs we can spawn, and the number of objects we want to spawn. We will be able to set these values in the Inspector panel.
// The hazards that can be spawned.
public GameObject[] hazards;

// The number of hazards to spawn.
public int numHazards = 5;
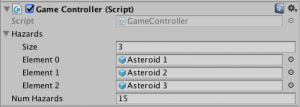
In the Inspector panel, drag the asteroid prefabs to the fields for hazards, and set the size of the hazards array to 3. Set numHazards to whatever you want.
Create a SpawnHazards() method that is called in the Start() method:
void Start () {
    SpawnHazards ();
}

public void SpawnHazards() {
    for (int i = 0; i < numHazards; i++) {
        // Randomly choose a hazard to spawn.
        GameObject hazard = hazards[Random.Range(0, hazards.Length)];

	Quaternion rotation = Quaternion.identity;
	Instantiate (hazard, new Vector3(Random.Range(-10, 10), Random.Range(-10, 10), Random.Range(0, 50)), Quaternion.identity);
    }
}
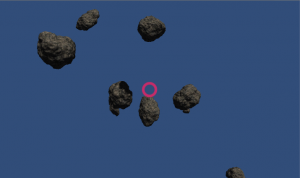
SpawnHazards() runs a loop numHazards times to spawn hazards (asteroids in our case). A random prefab is chosen from the hazards array. Unity’s Instantiate method is called to clone the prefab object at a random coordinate. I’ve set the range of x and y values to be between -10 and 10, and the z range to be from 0 to 50. The player is located at a z value of 0.
Now, let’s make the asteroids move. In AsteroidController.cs, add the following data members and methods:
public float speed = 0.25f;
public float maximumDistanceToPlayer = 50;

// Update each frame.
// Move the asteroid. If an asteroid moves out of range, destroy it.
void Update() {
    MoveAsteroid();
    CheckRange ();
}

// Check if the asteroid is beyond a certain distance from the player.
// If it is, destroy it to avoid having the asteroid stick around.
void CheckRange() {
    if (GetDistanceToPlayer() > maximumDistanceToPlayer) {
        Debug.Log ("Out-of-range asteroid self destructing.");
	// Tell the controller to destroy the hazard, but don't
	// increase the score.
	controller.DestroyHazard (0);
	Destroy (gameObject);
    }
}

// Compute the distance between this asteroid and the player.
    float GetDistanceToPlayer() {
    GameObject playerObject = GameObject.FindGameObjectWithTag ("Player");
    if (playerObject != null) {
	return Vector3.Distance (playerObject.transform.position, transform.position);
    }
    else {
	Debug.Log ("Could not find Player object.");
	return -1;
    }
}

// Move the asteroid along the z-axis.
void MoveAsteroid() {
    transform.Translate (-1 * Vector3.forward * speed * Time.deltaTime, Space.World);
}
Every frame, we moving the asteroid along the z-axis with a speed. We are also checking how far the asteroid is from the player. If the distance exceeds maximumDistanceToPlayer , the asteroid destroys itself automatically without incrementing the score. This prevents asteroids from existing forever as they drift into space.
Adding a Skybox
Right now, our game looks unrealistic with asteroids flying out of a solid bluish sky. Let’s add backgrounds that will make our game look like we are in space.
Games achieve the effect of 3D environments by using a skybox, a cube that encloses the camera. Each of the six faces of the cube has a texture on it. Combined, the textures make us feel we are in a real scene, whether it’s a beach, a jungle, or deep space.
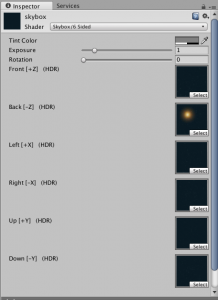
The Asteroids Pack includes a space-themed skybox. In the Project window, select Asteroid Pack/Assets/Materials/skybox. In the Inspector window, you’ll see six textures, one for each face. If you click on a texture, the Project window will switch to and highlight the texture file.

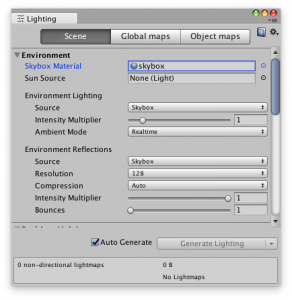
To add a skybox to your scene, open Window->Lighting->Settings by clicking the Window menu at the top of your screen. Make sure the Scene tab is highlighted. Under Environment, click the circle next to Skybox Material, and select skybox.
Try playing the game. Now you see a dark sky background with stars instead of the default Unity ground and sky.
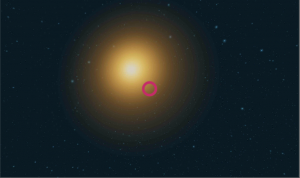
If you turn 180 degrees with your headset on, you’ll see a bright sun.
To make the lighting more realistic, change the coordinates of Directional Light to a positive z-value so that the light is coming from the general direction of the sun.
Ending the Game
When all the asteroids have been destroyed, or the remaining asteroids have traveled out of range, we need to let the player know the game has ended. We will do this by displaying the words “GAME OVER” and the score.
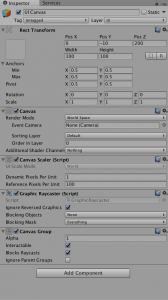
In the Hierarchy panel, right click and create a Canvas. Rename it to UI Canvas. Click the “Add Component” button and choose “Canvas Group”. Set Render Mode to “Screen Space – World”. This will assign the canvas to a fixed plane in space, instead of attaching it to the camera. I found that the other render modes did not work in VR. I also set the coordinates of the canvas to (0, -10, 200). This location is approximately centered over the starting position of the reticle.
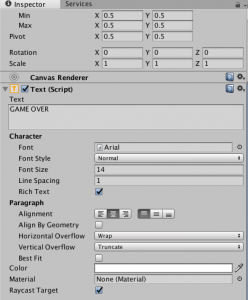
Now, right click the UI Canvas in the Hierarchy panel and choose UI->Text. Name this object Game Over Text. In the Inspector panel, set the text to “GAME OVER,” and set the color the white. A darker color will not be visible on our space background. Set the font size to 14, and set alignment to centered by clicking the middle button by the word “Alignment.”
In GameController.cs, add additional data members for the UI canvas, the text field, and the canvas group:
public Canvas uiCanvas;
public Text gameOverText;
CanvasGroup canvasGroup;
uiCanvas and gameOverText are assigned in the Inspector because they are public. Create an Awake() that assigns canvasGroup and sets its transparency to 0 make all the elements in the canvas group invisible:
void Awake() {
    canvasGroup = uiCanvas.GetComponent<CanvasGroup>();
    canvasGroup.alpha = 0;
}
We do not want the text to be visible until the end of the game.
Create an additional method to be called when the game ends:
public void EndGame() {
    gameOverText.text += "\n" + System.String.Format ("Score: {0}", score);
    canvasGroup.alpha = 1;
}
The score is added to gameOverText on a new line. System.String.Format lets you insert numbers and formatting into a string. The “+” operator concatenates strings. canvasGroup.alpha is set to make the text visible.
In DestroyHazard() , add additional logic to decrement the number of hazards every time it is called. If the number of hazards decreases to 0, call EndGame() .
public void DestroyHazard(int points) {
    UpdateScore (points);
    ShowScore ();
    if (numHazards > 0) {
        numHazards--;
    }

    if (numHazards == 0) {
        EndGame ();
    }
}
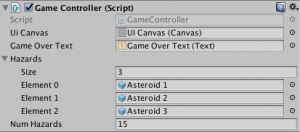
Finally, load GameController in the Inspector, and drag UI Canvas to the “Ui Canvas” field and GameOverText to the “Game Over Text” field.
Now that you have a way to end the game, you have completed a playable VR space shooter game.
