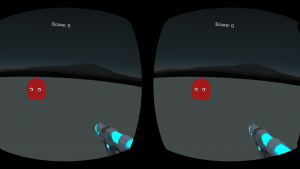
In our first A-Frame tutorial, we learned how to use the A-Frame framework to develop WebVR scenes and created a game that responds to mouse clicks. In this tutorial, we will make the game fire bullets and try to use the Gear VR controller to control a gun. When the scene is run in a desktop browser, pressing the Space key fires bullets. This tutorial uses A-Frame 0.7.0.
The code for firing bullets comes from the A-Frame-Gun project, which is a rewrite of the gun code from A-Blast to use the A-Frame physics component. A-Blast is an Open Source first-person shooter created by the authors of A-Frame. A-Blast implements its own collision system without using the physics component, but I found it too complex to port.
Did you come across any errors in this tutorial? Please let us know by completing this form and we’ll look into it!

FINAL DAYS: Unlock coding courses in Unity, Godot, Unreal, Python and more.
Table of contents
Setup
The code for this project can be downloaded here.
The Javascript files are in the src folder, with custom A-Frame components in src/components. Models are included in assets/models. The src/lib, src/bullets, and src/systems folders are modified files from the A-Frame-Gun project, as are src/index.js, package.json, and the following files in src/components: bullet.js, collision-helper.js, gun.js, headset.js, json-model.js, shoot-controls.js, and weapon.js.
assets/images contains image files for the gun and bullets, and assets/models contains models from the previous tutorial that we will be reusing.
If you want to create your own version of this project, create a working directory with subfolders build/, src/bullets, src/components, src/lib, src/system, assets/images, and assets/models, and copy the files listed above.
The file package.json lists the Node packages needed by this project. Install Node.js on your computer to install npm, the Node Package Manager. Run
npm install
to install the packages listed in package.json into the folder node_modules. The packages we will be using are Budo, a web server, and Browserify, a package that bundles Javascript files into a single Javascript file. The files to be bundled by Browserify are all listed in src/index.js and will be bundled into build/build.js. Our web pages will then only need to include build/build.js in <script></script> tags instead of all the Javascript files in the src folder.
The command
npm run-script build
will generate build/build.js.
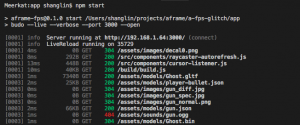
npm start
starts a local web server on port 3000 that we can use to test our code.
Creating a Skeleton
Let’s start by creating an HTML skeleton that will demonstrate basic controller functionality. In a file named index.html, type the following code:
<!DOCTYPE html>

<html>
    <head>
      <meta http-equiv="Cache-Control" content="no-cache">
      <script src="https://aframe.io/releases/0.7.0/aframe.min.js"></script>
      <script src="src/components/cursor-listener.js?v=0.12"></script>
      <script src="src/components/raycaster-autorefresh.js"></script>
      <script src="https://unpkg.com/[email protected]/dist/aframe-particle-system-component.js"></script>
      <script src="https://unpkg.com/[email protected]/dist/aframe-physics-system.js"></script>
      <script src="https://unpkg.com/[email protected]/dist/aframe-animation-component.js"></script>

       </head>

  <body>
    <a-scene>
       <a-assets>
        <img id="skyTexture" src="https://cdn.aframe.io/a-painter/images/sky.jpg" crossorigin="anonymous">
        <a-asset-item id="ghost" src="assets/models/Ghost.gltf"></a-asset-item>
       </a-assets>

       <a-entity light="type: ambient"></a-entity>
       <a-sky src="#skyTexture" theta-length="90" radius="30"></a-sky>

       <a-entity id="ground" type="background" static-body
                 geometry="primitive: cylinder; radius: 30; height: 0.1"
                 position="0 0 0"
                 material="shader: flat; color: #424949">
       </a-entity>

       <a-entity id="player"
		 camera="userHeight: 1.6"
		 wasd-controls
		 look-controls
		 restrict-position
       >
       </a-entity>
       <a-text id="textField" position="0 5 -2" value="Hello World"></a-text>
    </a-scene>
  </body>
</html>
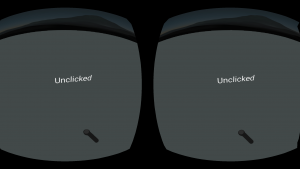
Run npm start to start a local web server. Once you open the page in your browser, you’ll see a scene with the same appearance as in the previous tutorial’s project, but with text saying, “Hello World.” We’re going to make the text change in response to clicks. Add the following code between the <head></head> tags:
<script>
   AFRAME.registerComponent('click-listener', {
     init: function() {
       var clicked = false;
       this.el.addEventListener('click', function(evt) {
       var textField = document.querySelector("#textField");
       clicked = !clicked;
       if (clicked) {
         pos = camera.getAttribute("position").toString();
         textField.setAttribute('text', {"value": "Clicked"});
       }
       else {
         textField.setAttribute('text', {"value": "Unclicked"});
       }

     });
   }
 });
</script>
Click-listener is a custom A-Frame component that adds an event listener to detect clicks. When a click is detected, the value of the element with the id “textField” is changed to “Clicked.” If the text is already “Clicked,” it is changed to “Unclicked.” Add the click-listener component to the <a-scene> tag so that it looks like:
<a-scene click-listener>
If you view this scene in a browser in Gear VR, pulling the trigger on the controller has the same effect as a click. If you want to see the controller, add the line:
<a-entity gearvr-controls></a-entity>
somewhere between the <a-scene></a-scene> tags. Now when you view the scene using the Gear VR, you’ll see a Gear VR controller that you move with your actual controller.
The code for this skeleton scene is included in the project as index0.html.
Creating a Gun
In the real version of our game, we will not be using click-listener or gearvr-controls, so remove that code from index.html. Instead, we will be using code from A-Frame-Gun to create a controller model that looks like a gun, not the standard Gear VR controller.
Add the following line between the <head></head> tags:
<script src="build/build.js"></script>
Add the following assets between the <a-asset></a-asset> tags:
<a-asset-item id="ghost" src="assets/models/Ghost.gltf"></a-asset-item>
<a-asset-image src="assets/images/gun_diff.jpg" crossOrigin="anonymous"></a-asset-image>
<a-asset-image src="assets/images/gun_spec.jpg" crossOrigin="anonymous"></a-asset-image>
<a-asset-image src="assets/images/gun_normal.png" crossOrigin="anonymous"></a-asset-image>
<a-asset-image src="assets/images/decal0.png" crossOrigin="anonymous"></a-asset-image>
<a-asset-item id="playerBullet" src="assets/models/player-bullet.json"></a-asset-item>
<img id="bulletDecal" src="assets/images/decal0.png" crossOrigin="anonymous">
Ghost.gltf is the enemy used in the last tutorial . The other assets come from the A-Frame-Gun project and represent the gun and bullets.
Now add these lines somewhere between the <a-scene></a-scene> tags:
<a-entity id="leftHand" shoot-controls="hand: left" weapon shoot></a-entity>
<a-entity id="rightHandPivot">
  <a-entity id="rightHand" shoot-controls="hand: right" weapon shoot></a-entity>
</a-entity>
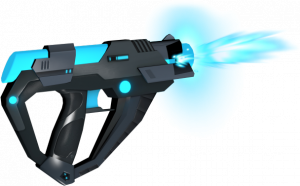
The shoot-controls, weapon, and shoot components from A-Frame-Gun allow the gun to be displayed and to shoot.
Modify the player entity with the following attribute:
shoot="direction: 0 0 -1; spaceKeyEnabled: true”
so that the entity looks like:
<a-entity id="player"
    camera="userHeight: 1.6"
    wasd-controls
    look-controls
    restrict-position
    shoot="direction: 0 0 -1; spaceKeyEnabled: true">
</a-entity>
When the scene is loaded in a desktop browser, “spaceKeyEnabled: true” causes bullets to be fired when the space key is pressed.
Run
npm run-script build
to create build/build.js from the files listed in src/index.js. Run
npm start
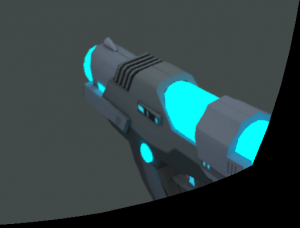
to start a local web server. When you load the scene in a VR headset, you should see a gun that moves when you move your controller. When you pull the trigger of your controller, bullets are fired.
Game Logic
In the previous tutorial, we implemented game logic in a component called game-manager. We will also use game-manager in this tutorial, but instead of generating a row of enemies like we did last time, we will generate enemies by one-by-one. We will also add scoring.
First, create a global variable to keep track of game state. In src/index.js, add the following code at the top:
window.AFPS = {
  gamestate: {
    score: 0,
    currentEnemyId: 0
  }
};
The window.AFPS object, accessible in other files simply as AFPS, contains another object, gamestate, that tracks score and the ID of the current enemy.
Next, create a new file, src/components/game-manager.js. Add GameManagerUtils, an object that contains functions for creating enemy entities.
// Helper functions for the game-manager component.
var GameManagerUtils = {
  generateRandomNumber: function (min, max) {
    return Math.floor(Math.random() * max + min);

  },

  chooseRandomPosition: function () {
    var xPos = this.generateRandomNumber(-5, 5);
    var yPos = 1.6;
    var zPos = this.generateRandomNumber(-5, -10);
    return { 'x': xPos, 'y': yPos, 'z': zPos};
  },

  // Create a new enemy entity.
  createEnemy: function (enemyNumber) {
    var enemyId = "enemy" + enemyNumber.toString();
    var newEnemy = document.createElement('a-entity');
    newEnemy.setAttribute('gltf-model', '#ghost');
    newEnemy.setAttribute('enemy', {'health': 1});
    newEnemy.setAttribute('static-body', '');
    newEnemy.setAttribute('id', enemyId);
    newEnemy.setAttribute('type', 'enemy');
    var position = this.chooseRandomPosition();
    var positionStr = position.x.toString() + ' ' + position.y.toString() + ' ' + position.z.toString();
    newEnemy.setAttribute('position', position);
    var destinationStr = '0 ' + position.y.toString() + ' 0';
    return newEnemy;
  }
};
This code is very similar to what we used in the previous tutorial. A difference is that the enemies are created with the “enemy” component, which we will implement later. Enemies also have the static-body component assigned, making them a static body in the A-Frame physics framework. This allows collisions to be detected with the bullets, which are dynamic bodies.
Now create the game-manager component itself:
AFRAME.registerComponent('game-manager', {
  init: function () {
    var sceneEl = this.el;
    var enemy = GameManagerUtils.createEnemy(AFPS.gamestate.currentEnemyId);
    sceneEl.addEventListener('loaded', function () {
      sceneEl.appendChild(enemy);
    });
    sceneEl.addEventListener('targetdestroyed', function(e) {
      var targetEl = e.target;
      targetEl.parentNode.removeChild(targetEl);
      AFPS.gamestate.score++;
      AFPS.gamestate.currentEnemyId++;
      this.appendChild(GameManagerUtils.createEnemy(AFPS.gamestate.currentEnemyId));
    });
  }
});
game-manager.init() is called when the game-manager component is first initialized. In game-manager.init() , the variable sceneEl is assigned to the element to which game-manager is attached. This is meant to be the <a-scene> element. A new enemy is created by calling GameManagerUtils.createEnemy() . The current enemy ID in AFPS.gamestate is used to initialize the ID of the enemy.
In Javascript, elements can send events to notify other elements. The function call sceneEl.addEventListener() attaches a listener to sceneEl that reacts to the targetdestroyed event, a custom event that be generated when an enemy is destroyed. We will create this event in the next section. addEventListener() accepts two arguments: the event and a callback function that runs when the event is detected. The argument of this function, e, is an object whose target field contains the element that emitted the event. In this case, the target element is the destroyed enemy.
When an enemy emits the targetdestroyed event, the callback function removes the destroyed enemy from its parent node. This essentially destroys the enemy and renders it invisible. Then, both the score and the current enemy ID in AFPS.gamestate are incremented, and the new ID is used to generate a new enemy.
The Enemy Component
In GameManagerUtils.createEnemy() , we added the “enemy” component to the newly created entities. Now we’re going to create the enemy component.
Create a new Javascript file, src/components/enemy.js, and add the following code:
AFRAME.registerComponent('enemy', {
  schema: {
    'health': {type: 'int', default: 1}
  },

  init: function() {
    var el = this.el;
  },

  hit: function() {
    var el = this.el;
    this.data.health--;
    if (this.data.health <= 0) {
      this.el.emit('targetdestroyed');
    }
  }
});
This code registers the enemy component. The schema dictionary defines values that can be passed to the component as CSS-style selectors. The enemy component accepts one value, health, so you can create an entity like:
<a-entity enemy=“health: 5”></a-entity>
with a default health of 5. If no health is specified, it defaults to 1.
enemy.hit() is a function called by a bullet when it hits an entity that is assigned the enemy component. Every time an enemy is hit, its health decreases by 1. If the health reaches 0, the targetdestroyed event is generated using the emit() function.
Adding a Scoreboard
Our original HTML skeleton had an a-text entity that displayed “Hello World.” We’ll change this entity into the scoreboard for the game. Change the ID of this entity to “scoreboard” and the default value to “Score: 0”.
<a-text id="scoreboard" position="0 5 -2" value="Score: 0"></a-text>
In game-manager.js, add the following code in the addEventListener() block after incrementing AFPS.gamestate.score:
var scoreEl = document.getElementById('scoreboard');
scoreEl.setAttribute('value', 'Score: ' + AFPS.gamestate.score);
The a-text entity with the ID “scoreboard” is assigned to the variable scoreEl, and the value of the a-text is updated with the new score whenever an enemy is destroyed.

