Have you ever wondered how open worlds in video games work performance-wise?
In this tutorial series, we’re going to explore just how video games deal with huge worlds and make the best use of the processing power and memory available to the computer.
For this first part of our huge world tutorial, we’re specifically going to focus on how to process terrains, split them, and write scripts that will hide them when the player is too far away. In Part 2, we’ll circle back to how to deal with other objects, like trees, and also cover fog so you can easily hide your environment manipulations.
If you’re ready to learn the tools necessary for building open-world environments, let’s get started!
Table of contents
Source code files & Requirements
You can download the tutorial source code files (the Standard Assets folder was not included to reduce the file size) here.
Additionally, please note that this tutorial does assume you already know the basics of Unity and C#. If this is your first time venturing into Unity, we recommend pausing and taking some beginner-friendly courses first to explore the fundamentals you’ll need to jump in.

Creating the world
Before starting the tutorial, create a new Unity project.
There are different ways to create the world map of your game. Since the focus of this tutorial is on how to handle such world map, and not on how to create it, we are going to use an automated tool to create the map.
The tool we are going to use is called L3DT. This tool allows you to generate huge world maps which you can import in Unity later. Start by downloading and installing the program. Then, open it and select File -> New project.

We are going to create a Designable map. Select the map size you prefer.
In this tutorial, I’m going to generate a map with size 512×512. You can leave the other parameters in their default values.

In the calculation queue window, select all maps to be created. In the end, we are only going to use the height map and the texture map, but generating the other maps will add information to the texture map in the end. For each map, you can leave the default parameters.

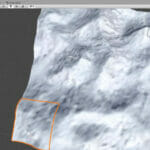
In the end, l3dt will generate a map like this one.

What we need to do now is exporting the height map and the texture map, so that we can import them later in Unity. In order to export the height map, select the heightfield tab, then right-click on the map and select Export. Unity only imports RAW, so we need to export it in this format. I’m going to create a folder called L3DT in the Assets folder of my Unity project, so that I can export the L3DT files there.

The texture map can be exported in a similar way. Select the texture map tab, right-click on the map and select Export. We are going to export it in the PNG format.

Importing the map in Unity
Now, let’s import this map in Unity. First, open the Unity project you have created. In this project add a new Terrain object (right-click on the hierarchy and select 3D Object -> Terrain). This will create a new object with the Terrain component.

Now, we are going to import the height map and the texture map into this terrain. In order to import the height map, select the terrain settings, go to the Heightmap section and click on Import Raw. Then, select the height map you have export from L3DT. It is important to set the Terrain Size to be the same as the L3DT map size (512×512). The size in the Y axis defines the height of the mountains, so you can try different values until you find the one that looks better in your game. I’m going to use a Y size of 100.

In order to import the texture map, you need to select the Paint texture option in the Terrain component. Then, click Edit textures to add a new texture.
Select the exported L3DT texture and set its size to be the L3DT map size (512×512). However, notice that, due to different coordinate systems between L3DT and Unity, the Y size must be negative (-512).

After doing so, you should have your map imported in Unity. Now, our next step will be to slice this map into tiles.

Slicing the map into tiles
As I mentioned, we are going to activate the map regions that are close to the player, while deactivating those far away from it. In order to do so, we need to slice our world map into tiles. Instead of writing our own code to slice the map, we are going to use a solution available online.
Here you can download a Unity package to split terrains. After downloading it, just open it and it will import itself into your project. This will add a tab called Dvornik in your Unity project. By selecting it you can split the create terrain into four tiles.
However, once you do this, you will see that the terrain texture is being repeated for each tile.

You can fix that by clicking on edit texture and adding the following offsets for the tiles:
- Terrain 0: offset x = 0, offset y = 0
- Terrain 1: offset x = 0, offset y = 256
- Terrain 2: offset x = 256, offset y = 0
- Terrain 3: offset x = 256, offset y = 256
We can repeat the process for each created tile, further dividing the terrain into sixteen tiles. Again, after splitting each tile, we need to adjust the offsets accordingly. However, instead of adding an offset of 256, now we need to add an offset of 128. For example, the offset of the new tiles created from Terrain 1 are:
- Terrain 1 0: offset x = 0, offset y = 256
- Terrain 1 1: offset x = 0, offset y = 384
- Terrain 1 2: offset x = 128, offset y = 256
- Terrain 1 3: offset x = 128, offset y = 384
In the end you should have a map with 16 tiles. Now that we have our world tiles, let’s start coding the script which will activate and deactivate terrain tiles according to the player proximity.
Deactivating distant tiles
We want our game to keep track of the player position and, when the player is far away from a given tile, to deactivate this tile from the game in order to improve performance. This way, this tile won’t be rendered, and our game won’t be wasting CPU and memory on such distant tiles.
The first thing we need is creating a HideTilesScript. This Script will be added to the Player object, and it will keep track of the distant terrains in order to hide them. In order to do so, we need the following attributes in this script:
- tileTag: the tag of the tile objects, so that we can identify them.
- tileSize: the size of each tile (128×128 in our case).
- maxDistance: the maximum distance the player can be from the tile before it is deactivated.
- tiles: the array of tiles in the game.
using System.Collections;
using System.Collections.Generic;
using UnityEngine;

public class HideTiles : MonoBehaviour {

	[SerializeField]
	private string tileTag;

	[SerializeField]
	private Vector3 tileSize;

	[SerializeField]
	private int maxDistance;

	private GameObject[] tiles;

	// Use this for initialization
	void Start () {
		this.tiles = GameObject.FindGameObjectsWithTag (tileTag);
		DeactivateDistantTiles ();
	}

	void DeactivateDistantTiles() {
		Vector3 playerPosition = this.gameObject.transform.position;

		foreach (GameObject tile in tiles) {
			Vector3 tilePosition = tile.gameObject.transform.position + (tileSize / 2f);

			float xDistance = Mathf.Abs(tilePosition.x - playerPosition.x);
			float zDistance = Mathf.Abs(tilePosition.z - playerPosition.z);

			if (xDistance + zDistance > maxDistance) {
				tile.SetActive (false);
			} else {
				tile.SetActive (true);
			}
		}
	}

	void Update () {
		DeactivateDistantTiles ();
	}

}
Then, in the Start method we use the FindGameObjectsWithTag method to retrieve the tiles in our game using the tileTag. Those tiles are saved in the tiles array, so that we can call the DeactivateDistantTiles method.
The DeactivateDistantTiles method, by its turn, will check the distance from the player to each tile in the game. Notice that the tile position is added with half of the tile size. That’s because we want to measure the distance from the player to the center of the tile, and not its bottom left corner. If the sum of the distances in the X and Z indices is greater than the maximum distance, we deactivate the Tile. Otherwise, we activate it. Finally, this method must also be called in the Update method, so that we keep updating the tiles status.
Now, in order to test our Script we need to add a Tile tag and a Player object. In order to add the Tile tag, select an object, click on the Tag menu and select Add Tag. Then, create a new Tag called Tile. Finally, you can assign this Tag to all the tile objects.

In order to create the Player object, we are going to import a Unity package. So, in the Assets menu select “Import Package -> Characters”. You can import all the Assets from the package.

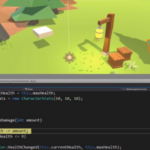
This will create a Standard Assets folder inside the Assets folder of your project. Drag and drop the FPSController (Standard Assets/Characters/Prefabs/ FPSController) prefab into your game. This will be the player in our game, so let’s rename it to Player and add the HideTiles Script to it. Remember to properly set the Script attributes. In this tutorial I’m going to set 256 as the maxDistance attribute.

Now, you can try playing the game to see if the distant tiles are being properly deactivated. You can put the Scene view in the left side of the Unity Editor (alongside the Object Hierarchy) so that you can see its content while moving the player in the game.

And that concludes this tutorial. In the next one, we are going to add more stuff to our world, as well as adding a fog to hide the distant tiles that are being deactivated.
In the meantime, you can further expand your skills by learning about sound design for 3D worlds as well – another must-have feature to create the right atmosphere! You can also expand your Unity skills in general with online courses for both individuals or classroom settings, since one needs a game project to make use of a game world.
Did you come across any errors in this tutorial? Please let us know by completing this form and we’ll look into it!

FINAL DAYS: Unlock coding courses in Unity, Godot, Unreal, Python and more.