You can access the full course here: REAL-TIME STRATEGY GAME WITH GODOT 4
Have you ever thought about adding animations or effects like a sprite flash as a simple and effective means of demonstrating combat in your game? Well, look no further!
This tutorial is designed with the aspiring game developer in mind. We aim to enhance the player’s gaming experience by introducing visual indicators of damage received by game characters. We will focus on the implementation of a sprite flash feature using the Godot game engine to show not only how something simple like this enhances the game feel, but helps provide combat feedback.
You will need basic proficiency in GDScript and a fundamental understanding of the Godot game engine to effectively follow this lesson. By the end of the tutorial, you will have gained practical skills that will enable you to make your game characters visually respond to damage in real-time. You can also review our full course, Real-Time Strategy Game with Godot 4 which covers these concepts more in-depth.
Let’s dive in and render our sprite flash.
Table of contents
Project Files
Regardless of your proficiency level in game development, the files provided for this tutorial will enable a seamless learning experience. Download the assets through the link below:
Download Project Files Here
Sprite Flash for Damage
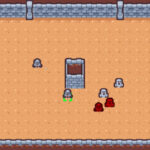
In our example Godot RTS game, we have already implemented the functions to command our Player Units, allowing them to attack the Enemy Units. This works well, but we currently have no way of telling when the Units are attacking each other, they just disappear when one loses.
One easy method to show damage is by making the Unit’s Sprite node flash when it takes damage. We will do this by modifying the Modulate property of the sprite when a damage event occurs. We can easily implement this within the Unit.gd script.
We will add the code in the take_damage function, below the existing functionality. The first step is to set the modulate property of the sprite variable to the red color. This will apply a red tint on top of the Sprite texture.
func take_damage(damage_to_take):
    ...
    sprite.modulate = Color.RED
Before changing the modulate value back, we want to add a small delay. This is made easy in Godot using timers.
func take_damage(damage_to_take):
    ...
    await get_tree().create_timer(0.1).timeout
This code will create a Timer node on the node tree with a wait time of 0.1, and then wait for the timer to run the timeout event. Here the await keyword means the code will pause until the timeout event occurs. Finally, we can switch the modulate value back to white. This won’t set the sprite to white but will return the texture to default.
func take_damage(damage_to_take):
    ...
    sprite.modulate = Color.WHITE
We can test this code by playing the game and attacking the Enemy Unit, this will make the Enemy Unit‘s sprite flash red each time it is damaged.
Sprite Flash Wrap-Up
And that’s a wrap for our quick sprite flash tutorial! Now you can use the Godot game engine to highlight combat scenes by making your game sprites flash red whenever damage is inflicted. This might seem like a simple addition, but such features contribute significantly to enhancing the overall player experience and making the game more dynamic and engaging.
This knowledge will be helpful for a variety of projects in the future. You can take these concepts forward to more complex game interactions and mechanics. For those eager to learn more, further exploration of Godot could include implementing more advanced combat systems or other visual effects. We hope this tutorial was insightful, and we wish you the best in your game development journey!
Did you come across any errors in this tutorial? Please let us know by completing this form and we’ll look into it! FINAL DAYS: Unlock coding courses in Unity, Godot, Unreal, Python and more.
Transcript – Sprite Flash
Hey everyone. In this lesson, we are gonna be working on setting up our damage flash because right now if I get my playout and I go to chase after my enemy and they begin attacking, it’s hard to tell if they’re attacking or not.
So, a good way of setting this up is by making our Sprite flash a certain color. So for example, if I go over to the enemy unit here, I select their Sprite property, uh, or their Sprite. Uh, note I mean, and go into the inspector, go down to where we have visibility and then we have the modulate uh, property here. If we can modify that. And if I modify it, you can see that it changes the color of the Sprite. Okay? And if we can make that really bright red, as you can see, it damages them like so. Um, so I’m just gonna switch this back to white for now.
So pretty much what we’re gonna do is whenever our unit takes damage, it is going to change its color, for the fraction of a second, and then return back to its normal color right here. So let’s go over to our script. Go over to our unit script and down to the take damage function.
Now, in take damage here pretty much, let’s go to a new line and we are going to go sprite dot modulate equals color.red. Okay? And you can see there are a bunch of colors here that we can choose from. So color.red. Then what we want to do is switch it back, sorry Sprite dot modulate equals color dot white.
Now this doesn’t mean that it is gonna make it the Sprite white instead. This basically just means it’s gonna return it back to its normal color because the way the modulate property works is that it multiplies these color values by whatever the Sprite currently has. And if you multiply everything by one, well that just returns it to its normal state.
Now, we don’t wanna leave it like this because in the same frame, it’s gonna set it to red, then set it to white. So we’re not gonna notice any difference. So what we need to do is we need a way of basically pausing the function for a fraction of a second before switching the Sprite back to white. So how do we do that? Well, we can do that with timers.
So what I’m gonna do is I’m gonna go await get tree dot create timer. We can then give it a time of 0.1 seconds dot time out. So pretty much what we’re doing here is we are first of all using the keyword await. And await basically means that once it reaches this line of code, it is gonna pause the function until whatever comes after here has been completed. Okay? You can think about like an operation. Okay?
So once this line of code has done what it has to do, then it will continue on with the rest of the code. In our case, we are accessing the tree. So we are accessing basically, um, the node tree. We are then creating a new timer node and assigning it a timer of 0.1 seconds. And then dot time out.
Basically the timer. And once that timer is complete, then we move on to the next line of code, which is returning it to white.
So what we should see now is that when our player unit deals damage to the enemy, they flash red for 0.1 seconds, then return to white. So let’s save this. Let’s press play and see if it works. So I’ll select our player. I’ll right click on the enemy to target them, and we should see them flashing red. And as you can see, there we go. And then after their health reaches zero, they of course get destroyed.
So yeah, that is how we can set up our damage flash here inside of Gau by change, changing the Sprite modulate property, which is basically, uh, their color multiplier. Now in the next lesson, we are gonna make it so that our enemy units can start to attack us back. So when the player gets within range, they are then going to begin attacking. Okay? So thanks for watching and I’ll see you all then.
Interested in continuing? Check out our all-access plan which includes 250+ courses, guided curriculums, new courses monthly, access to expert course mentors, and more!


