Want more GODOT 4 content? Explore the EXPLORE MICRO-SURVIVAL GAMES WITH GODOT 4 where you can find a comprehensive, project-based curriculum on it!
Involve yourself with the Godot game engine and experience how to create an enthralling Godot Day Night Cycle for your games.
Creating a dynamic and immersive environment greatly enhances the feel of video games and adds to player engagement. One such feature that brings life to game-scapes is the Day Night Cycle. If you have ever fancied the twilight skies of ‘World of WarCraft’ or the soothing sunrises of ‘Minecraft’, this tutorial is just right for you. We will explore how to simulate sunrise and sunset, change the color and intensity of light, and manipulate shadows to paint striking day and night effects.
This tutorial is designed for beginners and experienced game developers alike. However, we recommend some familiarity with basic programming, Godot interface, and game development. If you’d like to learn more about these concepts, you can also review our full course, Explore Micro-Survival Games with Godot 4 which covers this process more in-depth.
Table of contents
Project Files
The project files contain a complete copy of the assets used in this Godot day night cycle tutorial. Equip these tools, follow the instructions, and create your very own Day-Night Cycle.
Download Project Files Here

Godot Day Night Cycle – Part 1
In this first part of our Godot day night cycle tutorial, we are going to start work on the day-night cycle feature for a survival game. The idea of this system is to replicate how days pass in real life, simulating a sunrise and a sunset, and changing the sky and the lighting of the world.
Adding a Sun
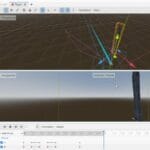
If your Main scene doesn’t already have one, you can begin by adding a new DirectionalLight3D node to the scene to act as the sun.

This node can be renamed to ‘Sun’ so that it can be identified later.

We can move this node upwards in the scene and rotate it to simulate the position of a real sun. The direction of the sun is visible by the white arrow drawn in the scene editor.

You will notice that as you rotate the directional light, the intensity of the light on the game world changes. This process will be the base of the day-night cycle system for this project, we will rotate the light over time to simulate the lighting of the sun. Finally, we will also tick the Enabled option in the Shadow drop-down to cast shadows on the terrain.

Adding a Moon
On Earth, the moon also reflects a dimmer blue-ish light from the sun. We want to simulate this in our game as well with our Godot day night cycle – so we will create another directional light node. To make this easier, we will duplicate the Sun node that we have created. You can access this menu by right-clicking on the Sun node.

We can rename this new node to ‘Moon’.

For the Moon node, we need to change the Sky Mode to Light Only. This will make sure the sun represented in the game’s sky is based on the direction of the Sun node, instead of the Moon.

Finally, we will toggle the visibility of the Moon node by clicking the eye icon in the Scene window.

Creating a Sky
We also want to create a custom sky for our Godot day night cycle. Currently, when we play the game the sky is a solid grey color, which isn’t very exciting or realistic. To change this we are going to create a new WorldEnvironment node.

We will then, assign the Environment property to a New Environment object.

If you open this object, you will find many properties that can be modified to change how the scene looks. The first one we will focus on is the Background where we can change the Mode to ‘Sky’.

This will make the sky in the scene change to a solid black, to fix this we will create a New Sky in the Sky property.

The new Sky object then needs a New ProceduralSkyMaterial object in the Sky Material property.

This sky object will be used to give us additional options in creating the sky effects for our Godot day night cycle, including changing the colors of the sky for the sunrises and sunsets. To make the sky a bit more interesting, we can modify this material’s properties to change how the sky looks. The main options to modify are the Top Color and the Horizon Color respectively, which will change the colors of the top half of the skybox.

However, these values don’t affect the ground color which will remain grey. The Bottom Color and the Horizon Color properties of the Ground section will change this. If we match these properties to the sky color properties, it should create a nice horizon effect for the skybox.

Day-Night Cycle Script
With our skybox set up, the next step in creating a Godot day night cycle is to make the directional lights move over time. We will begin by making a new Node3D node.

We can rename this node to ‘DayNightCycle’.

We can then take the Sun, Moon, and WorldEnvironment nodes and make them children of the new DayNightCycle node.

Next, add a New Script to the DayNightCycle node.

We can call this script ‘DayNightCycle.gd’ and press Create.

The most important variable in this script will be a variable called time, which will be of type float. This will be a number that ranges between 0 and 1 as the day passes in the game, where 0 is the beginning of the day, and 1 is the end of the day. We can then use this number to set everything for our Godot day night cycle – from the rotation of the sun to the colors of the sky.
For example, if time is 0, this means the sun will point directly upward (as it is midnight), and as time ticks up to 0.5, it will rotate to be facing directly downward (as 0.5 is midday); Then the light will continue to rotate back to midnight as the time continues on to 1.
var time : float
This script will also make use of a couple of other variables. The first will be the day_length variable, which will be of type float. This variable will have a default value of 20.0 which will mean that the game takes 20 seconds to perform a full day-night cycle. We will also use the export tag to make it editable in the Inspector window.
@export var day_length : float = 20.0
The start_time variable will be used to specify what value the time variable should start the game at. This will be of type float and have a default value of 0.3 which will mean the game starts in the early morning, around 5 am. This variable will also be exported.
@export var start_time : float = 0.3
The final time-related variable will be called time_rate and be of type float. This variable will be used to convert the day_length variable, into a value that can be added to the time value.
var time_rate : float
We will also need a variable to keep track of the sun node. This will be of type DirectionalLight3D so that we can edit the light’s settings through our script.
var sun : DirectionalLight3D
These are all of the variables we will need for now, so in the next part of our tutorial, we will be programming the functionality needed for our Godot day night cycle.
Godot Day Night Cycle – Part 2
In this section, we will continue implementing the Godot day night cycle script that we began work on previously. We will begin by setting up the systems to control the time variable, as this will be integral to the rest of the script. Our first step will be to set the time_rate value, which can be done in the _ready function.
func _ready():
    time_rate = 1.0 / day_length
Here we set the time_rate property to be the amount per second to increase the time value. “1.0 / day_length” means it will take the full day_length value (in seconds), to perform the full day-night cycle. We can also update the time property to match start_time, as _ready will run at the beginning of our game.
func _ready():
    ...
    time = start_time
In the ready function, we also want to store the Sun child node in the sun property.
func _ready():
    ...
    sun = get_node("Sun")
Finally, for our time property, we want to increase it over time in the _process function.
func _process(delta):
    time += time_rate * delta
By multiplying our time_rate value by delta we convert the per frame value to per second, this means that we will increase the time by a full time_rate once per second. However, we currently do not have a way of handling time going over 1, so to fix this we will use an if statement to check whether time is more than 1.0, and if it is, reset it to 0.0.
func _process(delta):
    ...
    if time >= 1.0:
        time = 0.0
This will ensure that our time variable will always loop back around from 1 to 0 as intended.
Rotating the Sun
We can now start to modify the elements of our Godot day night cycle scene based on the time variable. We will start by rotating the Sun node, as this will have the largest effect on the scene. We can do this by changing the rotation_degrees.x value of the sun to be equal “time x 360“. Because time is a value between 0 and 1, this multiplication will change the Sun’s rotation to match the time position, where 0 is 0% rotated and 1 is 100% rotated. For example, a time value of 0.25 would translate to the Sun rotating 90 degrees, which would be a sunrise.
func _process(delta):
    ...
    sun.rotation_degrees.x = time * 360
If you press play you can see this in action by looking at the skybox, where the sun-visual rises and sets over the horizon. This implementation isn’t perfect, however, as 0 is not at the bottom of the terrain, as would be expected. This means that our start_time isn’t where we would expect it to be, and could cause some further issues down the line. To fix this we will add an offset to our rotation. This can be easily done by adding 90 degrees to our rotation formula.
func _process(delta):
    ...
    sun.rotation_degrees.x = time * 360 + 90
Sun Color and Intensity
Currently, the sun goes up and goes down, but isn’t particularly dynamic for our Godot day night cycle. To fix this, we can change the color and intensity of the light coming from our Sun so that the color of the scene is a lot more dynamic. To implement this, we will first need to add two new variables to our script. The first will be called sun_color and have a type of Gradient. This will need to have the export tag so that it can be accessed in the Inspector.
@export var sun_color : Gradient
The next variable will be called sun_intensity and will be of type Curve, this will also be exported to the Inspector window.
@export var sun_intensity : Curve
We can then assign these properties in the Inspector, starting with the Sun Color gradient object.

This gradient can be edited to represent the stages of the sun’s light and Godot will automatically blend between these colors. We can change the colors of the gradient by adding and adjusting color points along the line. We can think about the gradient line as being from time=0 on the left of the line, to time=1 on the right of the line. This means that each far edge will represent midnight, and the center of the gradient will represent midday, so we can adjust the colors accordingly.

Here we use orange instead of black for the midnight points to create a sunset effect as the sun goes down. We won’t need to worry about the orange light affecting our scene at night, as the intensity of the light will be low at this point in the cycle. To make use of this variable we need to update the sun’s color to the latest value. We can do this by sampling the sun_color gradient at the given time and setting the Sun node’s light_color to this.
func _process(delta):
    ...
    sun.light_color = sun_color.sample(time)
You can press play to see this change. Along with the scene’s lighting, the sun’s visual representation will also change to a darker orange during sunrises and sunsets.

In the next part of our Godot day night cycle tutorial, we will make use of our sun_intensity variable, along with implementing the Moon and WorldEnvironment controls.
Godot Day Night Cycle – Part 3
In this part, we will begin by taking a quick break from our Godot day night cycle code to add some trees to our environment. This will be good to make our environment a bit more interesting and make the lighting changes more obvious. To begin with, we will create a new StaticBody3D node.

We can then rename this node to ‘Tree’.

We can then drag the treePine.obj asset into the scene to create a model of it.

We can rename this node to ‘Model’ and make it a child node of the Tree object.

We can then center the new Model node by setting its Position to (0, 0, 0).

To make it slightly larger, we can also set the Scale property to (4, 4, 4).

The Tree will also need a new CollisionShape3D node to specify the object’s collider.

We can set the Shape property, of this node, to a New CylinderShape3D node.

This can then be scaled along the trunk of the Tree model.

Finally, drag the Tree model into the FileSystem window to turn it into a scene. We can save this scene as ‘Tree.tscn’.

We can then duplicate (CTRL+D) this scene around the terrain to create a small forest on our island.

Changing the Sun Intensity
We can now continue work on the Godot day night cycle systems we were programming. In the previous section, we began work on the sun intensity system. To continue this we can add a New Curve object to the new Sun Intensity property on the DayNightCycle node.

This curve will work very similarly to our gradient from the previous lesson, where we add values along the timeline, and Godot automatically blends between the values given. However, instead of colors, a curve specifies float values at the time points. This is represented by a graph in the object editor, where the x-axis represents the time value and the y-axis represents the light’s intensity. To add a point to the graph, right-click and select Add Point.

We can then outline three points along the graph to specify the sun’s intensity across the day. The far edges will be at night time when the sun has an intensity of 0. The center point will be at midday when the sun has its highest intensity.

We can also move the middle point to the early morning, and place another node in mid afternoon at the 1 value. This will spread out the high-intensity light across the full day which would be more realistic. Of course, you can test these values later and try tweaking them to get the effect you would like.

To get more fine control of these values, you can always open the Points section of the Curve object. The next step is to update our Sun’s light intensity to match the values given by our Curve object. This can be done by adding a line to the _process function in the DayNightCycle script.
func _process(delta):
    ...
    sun.light_energy = sun_intensity.sample(time)
This script will update the Sun node’s light_energy property based on the curve we have just created. As we do this in the _process method this will be updated every frame, which means our sun’s intensity will always match the color property that we set up previously. You can then test this by pressing play and watching the sun travel through the sky. You will see that the lighting on the environment changes as the sun sets and goes beneath the terrain.
Moon Lighting Challenge
Currently, the nighttime lighting for our Godot day night cycle doesn’t look particularly great, which is because we haven’t implemented the Moon lighting. As a bit of a challenge, try setting this up for the next section! The steps needed to do this will involve:
- Creating a new moon variable.
- Creating a moon color gradient.
- Creating a moon intensity curve.
- Updating the Moon node’s values.
It’s important to keep in mind the Moon’s values should always be the opposite of the Sun’s. So when the sun is at midday, the moon should be at midnight and have 0 intensity. You may also need to update the Moon node’s visibility in the Scene window.
Godot Day Night Cycle – Part 4
Hopefully, you had a good go at the challenge we set in the previous section! To implement our moon system for our Godot day night cycle, we will first need to set up some variables similar to our sun system. The first will be the moon variable, that is of type DirectionalLight3D. Like with the sun variable, this will be used to store a reference to the Moon node in the scene.
var moon : DirectionalLight3D
We will also need a moon_color variable that is of type Gradient. This will be exported so that is is editable in the Inspector window.
@export var moon_color : Gradient
Finally, we will need a moon_intensity variable with a type of Curve, also exported.
@export var moon_intensity : Curve
As before, we need to assign the moon variable inside the _ready function.
func _ready():
    ...
    moon = get_node("Moon")
Updating the Moon
The next stage for our Godot day night cycle is to update the moon’s values to match the time variable. Like with the sun, this can be done in the _process function. The first stage is to update the moon’s rotation.
func _process(delta):
    ...
    moon.rotation_degree.x = time * 360 + 270
You will notice here, we add an offset of 270 instead of the 90 that the sun uses. This extra 180 degrees will place the moon opposite to the sun. For the color and intensity values we can copy exactly what we did for the sun variable.
func _process(delta):
    ...
    moon.light_color = moon_color.sample(time)
    moon.light_energy = moon_intensity.sample(time)
Like with the sun’s properties, our exported variables will be available for us to set in the Inspector window. We don’t want the moon’s color changing much over time, so for now we will set the moon_color gradient to a solid color, although you can of course change this to your own values as you see fit.

The moon_intensity can then be set to the opposite of the sun_intensity property.

Finally, we want to change the visibility of the Sun and the Moon node based on which node is currently in the sky. This can be done by checking whether the relevant light_energy value of each sun is greater than 0.
func _process(delta):
    ...
    sun.visible = sun.light_energy > 0
    moon.visible = moon.light_energy > 0
You can now test this by pressing play to see the effect of the Moon on the scene.
Updating the Sky
The final part of our Godot day night cycle is to update the custom skybox that we created in the first lesson. This will help match our sky visual to the current state of our lights, as currently, it looks a bit weird having a bright blue sky during the night. To do this we will first add a set of new variables. The first will be called environment and have a type of WorldEnvironment. This will be used to store a reference to our WorldEnvironment node in the scene.
var environment : WorldEnvironment
The next variable will be called sky_top_color and be of type Gradient. We will export this so that it can be edited in the Inspector. This will be used to define the color of the top of the sky as time passes.
@export var sky_top_color : Gradient
Similarly, the next variable will be called sky_horizon_color and also be of type Color. This will also be exported and will be used to define the color of the horizon at given times.
@export var sky_horizon_color : Gradient
We won’t need separate variables for the Ground colors, as we will reuse these gradients again. As with the sun and moon variables, we need to assign the environment variable to the WorldEnvironment node in the scene. This can be done in the _ready function.
func _ready():
    ...
    environment = get_node("WorldEnvironment")
With these variables in place, we can update our skybox to the correct colors in the _process function. To do this, we first need to get the sky object from our environment and set the relevant material property. To do this for the sky_top_color property we will use this line of code:
func _process(delta):
    ...
    environment.environment.sky.sky_material.set("sky_top_color", sky_top_color.sample(time))
This long line of code will set the top color of our sky box to the relevant color based on the current time. Luckily we can copy this line for each other property of our sky. The first one of these will be our sky_horizon_color.
func _process(delta):
    ...
    environment.environment.sky.sky_material.set("sky_horizon_color", sky_horizon_color.sample(time))
Once more, we can do the same thing for each of the ground skybox properties.
func _process(delta):
    ...
    environment.environment.sky.sky_material.set("ground_bottom_color", sky_top_color.sample(time))
    environment.environment.sky.sky_material.set("ground_horizon_color", sky_horizon_color.sample(time))
With this code in place we are ready to update the new variables in the Inspector window. The sky_top_color gradient will look like the following:

Remember that you can use the Raw Data drop down to set the gradient with more precision. We also need to create a gradient for the sky_horizon_color:

As you can see, this gradient is very similar, however there are some additional orange tints along the horizon during the sunrise and sunset. You can now press the play button to test this, and you will see the day-night cycle is complete.

Godot Day Night Cycle Wrap-Up
And with that, we conclude this Godot 3D tutorial! We now have a fully working player character that can navigate, jump, and interact with the 3D world in a platformer game! This is just the start though. By adding more mechanics, refining your levels, and implementing graphics and audio, you can turn this base into your own fully-fledged 3D game.
We hope you’ve enjoyed this Godot 3D tutorial and found it informative. Remember, with game development, the best way to learn is by doing. Don’t be afraid to experiment, tinker, and make mistakes – that’s all part of the process.
Good luck with your game development journey and stay tuned for more useful tutorials from Zenva!
Get industry-ready with the DEVELOP A 3D PLATFORMER WITH GODOT 4! Perfectly suited to any skill level, you’ll get the tools you need to succeed while building a slew of projects!
Did you come across any errors in this tutorial? Please let us know by completing this form and we’ll look into it!

FINAL DAYS: Unlock coding courses in Unity, Godot, Unreal, Python and more.