This is Part 2 of the series on creating a Unit Converter app (you can view part 1 here). In this final section, we’re going to work on the View and Controller of our Unit Converter and learn about how we can design a UI with Spinners to allow the user the convert units.
Table of contents
View
Since we have a relatively simple app, we’re going to have a relatively simple UI. We’ll limit our application to just a single screen for simplicity. We need an EditText for the user to enter values in and another, immutable one to show the result of the conversion. Instead of an EditText, we could have used a TextView since they’re meant to be immutable, but for the sake of consistency in our app, we can easily force an EditText to be immutable and use it to only display values, not enter them. A Button that will allow the user to start the conversion process. Most of our work will be done when the Button is pressed since it’s the primary action for our app. However, we need constructs to allow the user to choose a single option from a finite list of possibilities. If you’ve used a web browser, you’re probably familiar with selection boxes. Android’s method of doing this is called a Spinner.
Spinner
For our view however, we’ll need some kind of selection method to give the user a chance to choose the unit they want to start at and the one they want to end with. For this purpose, we have Spinners in Android. Given an array of elements, we can populate a Spinner with elements and, at any point in time, get the option that the user selected.
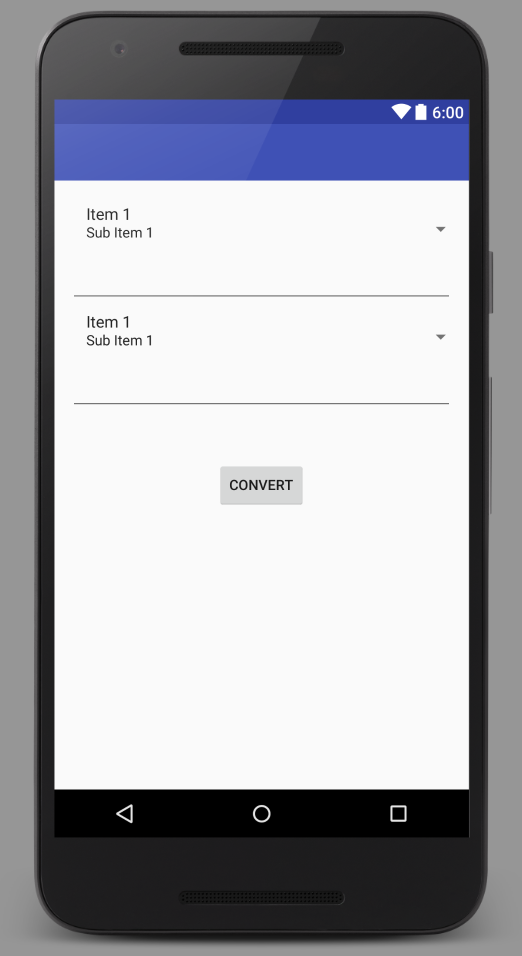
We’re going to add some Spinners and other UI components to our layout. Our final layout file (called activity_main.xml in res/layout should look something like the following.
<RelativeLayout
    android:layout_width="match_parent"
    android:layout_height="match_parent"
    android:padding="16dp">

    <Spinner
        android:layout_width="wrap_content"
        android:layout_height="wrap_content"
        android:id="@+id/spinner_from"
        android:layout_alignParentTop="true"
        android:layout_alignParentStart="true"
        android:layout_alignParentEnd="true" />

    <EditText
        android:layout_width="wrap_content"
        android:layout_height="wrap_content"
        android:inputType="numberDecimal"
        android:ems="10"
        android:id="@+id/editText_from"
        android:layout_below="@+id/spinner_from"
        android:layout_alignParentStart="true"
        android:layout_alignParentEnd="true" />

    <Spinner
        android:layout_width="wrap_content"
        android:layout_height="wrap_content"
        android:id="@+id/spinner_to"
        android:layout_below="@+id/editText_from"
        android:layout_alignParentStart="true"
        android:layout_alignParentEnd="true" />

    <EditText
        android:layout_width="wrap_content"
        android:layout_height="wrap_content"
        android:inputType="numberDecimal"
        android:clickable="false"
        android:focusable="false"
        android:focusableInTouchMode="false"
        android:cursorVisible="false"
        android:ems="10"
        android:id="@+id/editText_to"
        android:layout_below="@+id/spinner_to"
        android:layout_alignParentStart="true"
        android:layout_alignParentEnd="true" />

    <Button
        android:layout_width="wrap_content"
        android:layout_height="wrap_content"
        android:text="Convert"
        android:id="@+id/button_convert"
        android:layout_centerVertical="true"
        android:layout_centerHorizontal="true"
        android:onClick="convert" />
</RelativeLayout>
There are a few properties that we might not have seen before. For example, layout_alignParentStart and layout_alignParentEnd are similar to layout_alignParentLeft and layout_alignParentRight except they work with right-to-left layout styles of text (such as Arabic) as well. The ems property on EditTexts allows us to change the font size essentially. To prevent users from entering text in the EditText, we have a slew of properties that will only allow the EditText’s text to be changed programatically. This is done in the lines starting with android:clickable=”false” and ending with android:cursorVisible=”false”. The Spinners are the more interesting part. As we can see, they’re set up like any view, with any number of layout properties. However, they need to be populated with values.
There are several ways to populate a Spinner. The first, and preferred, method is to store the contents of the Spinner entries inside of the strings.xml file in a string array element. Another way we could do this is to hard-code an array, but there are downsides to this approach. For example, we won’t be able to localize the strings to a particular language. If we have it in the XML file, then we can have it translated to another language and create another strings.xml file to store the strings of that particular language and the Android system will decide at runtime which one to use, depending on the locale of the device. This is partly how the Android resource system works, but we’ll save that topic for another time.
To add a string array to the strings.xml file, we need to navigate to that file located in our res/values directory. There should be a file called strings.xml in that directory. There should already be some content inside it, but we can add a string array by typing in the following code as the last XML element in the file:
<string-array name="units">
    <item>Inch</item>
    <item>Centimeter</item>
    <item>Foot</item>
    <item>Yard</item>
    <item>Meter</item>
    <item>Mile</item>
    <item>Kilometer</item>
</string-array>
This will declare all of our valid units. Now that this is done, we can grab a reference to our Spinner and create an ArrayAdapter to get the elements from the XML array and format in a way that the Spinner can understand it. The purpose of adapters is to take text or other data and format it in a way that it can be displayed in UI elements. We use adapters for Spinners, Lists, Grids, and many other Views. This whole process only takes a few quick lines of code to do and we can use the same adapter for both of our Spinners since they both will have the same information displayed in the same fashion. We need to do this in the onCreate(Bundle) method so that right after our view is associated with this Activity, the layout’s Spinners will be populated with text. In our MainActivity’s onCreate(Bundle) method, add the following code snippet.
// An adapter to convert the String[] into something that can go in the Spinner
ArrayAdapter<CharSequence> adapter = ArrayAdapter.createFromResource(this, R.array.units, android.R.layout.simple_spinner_item);
adapter.setDropDownViewResource(android.R.layout.simple_spinner_dropdown_item);

fromSpinner = (Spinner) findViewById(R.id.spinner_from);
toSpinner = (Spinner) findViewById(R.id.spinner_to);

fromSpinner.setAdapter(adapter);
toSpinner.setAdapter(adapter);
In the above code, we have an ArrayAdapter of CharSequence, but since String implements CharSequence, we can use it. The ArrayAdapter.createFromResource(Context, int, int) method takes a Context object, which is, in almost all cases, the current Activity. The two integers are the reference to the array we created in the strings.xml file and the second is the layout we want to use. We could create our own custom layout in the layout folder, but we can use Android’s spinner layout instead since it’s just a single TextView displaying our items. The next line sets the view that will be shown when a user taps on a Spinner and the dropdown appears with all of the options. We can use Android’s default spinner dropdown layout as well. The next two lines grab a reference to the Spinners. The final two lines set the Spinner’s adapter to be the adapter we created. This is all it takes to configure our adapter! When we run the app, the Spinner will be populated with the values of our adapter and will display them in the layout we specified.
Wiring Up the Button
Now that we’ve set up our View, we can configure the Button to do something when it is clicked. If you remember from the previous part, we used the onClick property of our Button and the name of our method is convert(View) . Let’s break down what we need to do. We first need a reference to the Spinners and the EditTexts. Then we need to extract the text from the Spinner item and map it to a Unit. This will be easy since it’s one of the core functionality of our model. Then we can instantiate a new Converter object, given the to and from units, and perform the conversion. The final step is setting the output EditText’s text to be the converted value. In Java source code, this looks like the following.
public void convert(View view) {
    Spinner fromSpinner, toSpinner;
    EditText fromEditText, toEditText;

    fromSpinner = (Spinner) findViewById(R.id.spinner_from);
    toSpinner = (Spinner) findViewById(R.id.spinner_to);
    fromEditText = (EditText) findViewById(R.id.editText_from);
    toEditText = (EditText) findViewById(R.id.editText_to);

    // Get the string from the Spinners and number from the EditText
    String fromString = (String) fromSpinner.getSelectedItem();
    String toString = (String) toSpinner.getSelectedItem();
    double input = Double.valueOf(fromEditText.getText().toString());

    // Convert the strings to something in our Unit enu,
    Converter.Unit fromUnit = Converter.Unit.fromString(fromString);
    Converter.Unit toUnit = Converter.Unit.fromString(toString);

    // Create a converter object and convert!
    Converter converter = new Converter(fromUnit, toUnit);
    double result = converter.convert(input);
    toEditText.setText(String.valueOf(result));
}
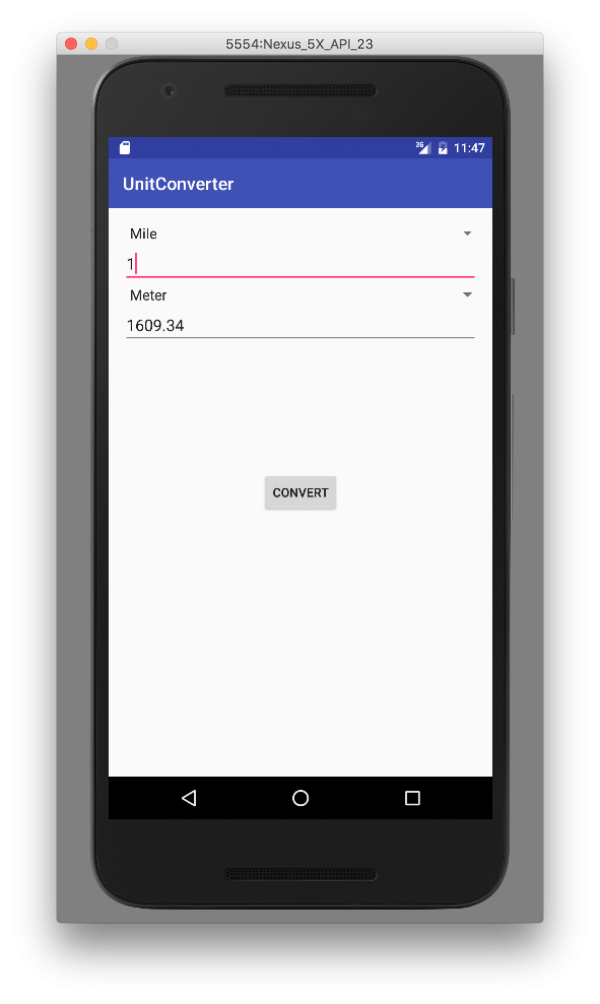
There may be points of improvement that we can make for performance or efficiency. For example, instead of reinitializing the views, we could just declare them as private member variable and only call findViewById(int) once in onCreate(Bundle) . This is because calls to findViewById(int) are expensive operations so calling them the least amount of times possible is definitely a good thing! Now we can click the green button and run our app! We should get something like the following screenshot in our emulator!
Conclusion
Throughout the course of the previous two posts, we’ve successfully created a unit converter application. Along the way, we learned about the Model-View-Controller (MVC) pattern, which allows the Controller to interact as the mediator between the Model and View. We also learned about Java enums, which group related constants together. We created our Converter class model and moved on to the View. We learned about Spinners and adapters as well as how to use them effectively in Android. Finally, we implemented the Controller to convert the input value from one unit to another.


