In this post, we’re going to build a small app that will present a music library and allow us to query the data using a pre-existing database. We’ll learn about the SQLite database in particular and how to perform different kinds of queries on it. The first part of this post will be a very quick introduction to databases and SQLite in general. Then we’ll move on to building our music library.
Download the source code for this post here.
Did you come across any errors in this tutorial? Please let us know by completing this form and we’ll look into it!

FINAL DAYS: Unlock coding courses in Unity, Godot, Unreal, Python and more.
A database is an organized and structured collection of related data. Databases allow us to define a structure and relationships between structures for performing various operations at a high level. They are becoming more and more prevalent as the size of datasets grows. Most of the apps and web services that we use daily make use of databases under-the-hood.
Databases hold structured data in tables. Think of a table as a very simple, property-only Swift class. Tables can have any number of attributes which correspond to Swift properties. An attribute has a type like INTEGER (like Int), REAL (like Double), and VARCHAR (like String).
We also have a primary key attribute on each table which allows us to uniquely identify rows. Suppose we had a table of people. It is entirely possible that we could have two people with the same first and last name! But when we insert them into the database, they would have a different value for their primary key attribute so we can differentiate them!
We can also have relationships between tables using foreign keys. For example, consider a song. Songs are usually published on an album. We can have two separate tables for songs and albums and create a relationship between the two. Since songs belong to an album, we can have an attribute in the songs table that refers to the unique id of the album, in other words, album’s primary key. This allows us to effectively link the two using the unique primary key value. Like the person table, we use the primary key attribute because we could have two albums with the same name!
We store data in rows in a table. Each row in a table must have a value for each attribute (or a NULL value). Rows correspond to creating an instance in Swift. We can have many rows in a particular database and can perform complicated queries very fast. This is the major advantage that databases hold over plaintext files: fast querying!
Think of a query like a question: “what is the length of this song?”, “who wrote this song?”, “what is the genre of this song?”. We can have more complicated questions that involve multiple tables like “given this current song, what other songs has this artist performed?”. Using a database, we can answer these questions very quickly and easily!
We’re going to be using a pre-built database called the Chinook database. That database is in the starter project here. Inside of the Chinook Music Library folder, we’ll see a file called chinook.sqlite. This is our database file! SQLite was installed when we installed Xcode and we can use it in the Terminal app to look at our database.
Copy the chinook.sqlite file to your Desktop. Open up Terminal and navigate to your Desktop like this.
cd ~/Desktop/
sqlite3 chinook.sqlite
Notice that our prompt changes to sqlite>. This means that we’re using the SQLite prompt! We can run the following command to get a list of tables.
sqlite> .tables
Album          Employee       InvoiceLine    PlaylistTrack
Artist         Genre          MediaType      Track
Customer       Invoice        Playlist
We’ll be interacting with only a few of these tables, particularly the Track, Album, and Artist. Now we can use SQL to access the rows stored in these tables. For example, let’s get a list of all of the track names. (If we run .schema , we can get a list of the attributes that each table has).
SELECT Name FROM Track;
Each SQL statement ends in a semicolon, and this one will retrieve all of the values in the Name attribute from the Track table. We could add an additional WHERE clause to apply constraints on the results. For example, suppose we wanted to retrieve all of the attributes about the Overture from Carmen. We can use an asterisk * to retrieve all attributes and a WHERE clause to specify the name of the song.
sqlite> SELECT * FROM Track WHERE Name = 'Carmen: Overture';
3447|Carmen: Overture|313|2|24|Georges Bizet|132932|2189002|0.99
We get all of the information about that particular song. We can generalize the SELECT statement syntax as the following.
SELECT <attribute names>
FROM <table names>
WHERE <conditions>;
We can also perform aggregate functions like counting.
SELECT COUNT(*) FROM Track;
This will give us the count of all of the tracks! Aggregate functions are quite advanced topics in SQLite so we don’t go into more detail than what is required to make our music library.
That’s enough SQL and databases for now! If you haven’t already, download the starter project here. To open it, OPEN THE .xcworkspace FILE, NOT THE .xcodeproj FILE!
If we look at the storyboard, we have 2 UITableViewControllers wrapped in a navigation controller. The first UITableViewController represents the albums and the second represents the tracks or songs.
 For the AlbumViewController, we want to display the album name and the number of tracks in that album. We first have to get the file path to the database and connect to it. To access a file in our Xcode project, we use Bundle.main.path(forResource:ofType:). Then we can use a Connection object to do this. We have to put it in a do-catch block however. We can write all of this code in the viewDidLoad method.
override func viewDidLoad() {
    super.viewDidLoad()
    let path = Bundle.main.path(forResource: "chinook", ofType: "sqlite")!
    do {
        let db = try Connection(path, readonly: true)

    } catch {
        print("Cannot connect to database!")
    }
}
Try running this code. We shouldn’t have any errors! Now we can start formulating the query. We have to use two separate queries: one to retrieve all of the album titles and another to retrieve the count of all of the tracks on that album.
We have to do some setup with SQLite.swift by declaring all of our tables and attributes ahead of time.
override func viewDidLoad() {
    super.viewDidLoad()
    let albumId = Expression<Int>("AlbumId")
    let title = Expression<String>("Title")

    let albumsTable = Table("Album")
    let tracksTable = Table("Track")

    let path = Bundle.main.path(forResource: "chinook", ofType: "sqlite")!
    ...
}
Now that we’ve setup our variables, we can actually run the query. We want to iterate over each item in the albums table and count all of the tracks whose AlbumId is the AlbumId of the current album we’re at. We also want to iterate in alphabetical order.
for row in try db.prepare(albumsTable.order(title)) {
    let count = try db.scalar(tracksTable.filter(albumId == row[albumId]).count)
    albums.append((x[albumId], x[title], count))
}
where albums is defined as a property var albums = [(albumId: Int, albumTitle: String, numberOfTracks: Int)]() . We need to store the albumId for that album as well because we’re re-ordering all of the entries! We can’t rely on the UITableView’s ordering to be in order of the album IDs.
The AlbumId attribute of the Track table is the same as the AlbumId attribute of the Album table because it is a foreign key in the Track table referring to the Album table. This means we can use it for comparisons. Since we’re using this as a readonly database, the database will guarantee that the value of each AlbumId attribute of each row in the Track table maps to a valid row in the Album table.
Now that we have our items, we can easily implement the UITableView methods!
override func tableView(_ tableView: UITableView, numberOfRowsInSection section: Int) -> Int {
    return albums.count
}

override func tableView(_ tableView: UITableView, cellForRowAt indexPath: IndexPath) -> UITableViewCell {
    let cell = tableView.dequeueReusableCell(withIdentifier: "albumReuseIdentifier", for: indexPath)
    let (_ title, count) = albums[indexPath.row]
    cell.textLabel?.text = title
    if count == 1 {
        cell.detailTextLabel?.text = "\(count) song"
    } else {
        cell.detailTextLabel?.text = "\(count) songs"
    }
    return cell
}
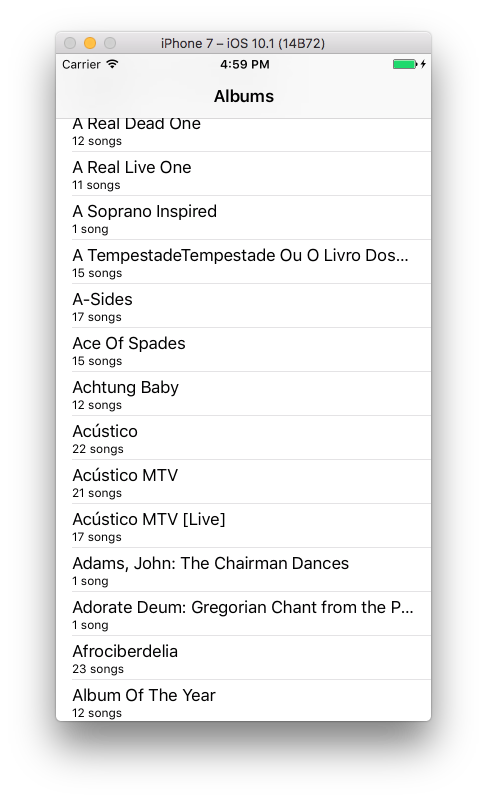
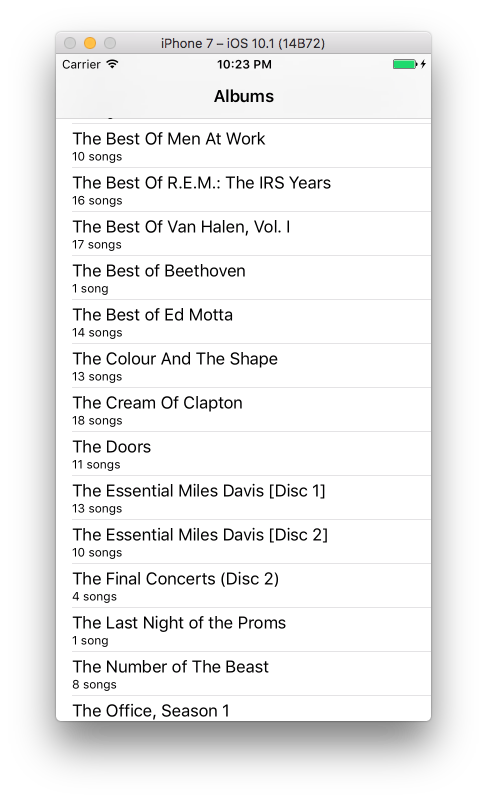
We report the number of items in the albums array and decompose the tuple to set to the title and detail text. Now let’s run our app! We see all of the album names along with the number of songs!
The next and final step is to display the tracks given the ID of the album. We’ve already executed a similar query that we can reuse! When we retrieved the count of all of the tracks on one album, we were returning all of the tracks on that album, but we took a sum. This time, we’ll do the same query, but won’t take the sum!
Let’s jump over to the TrackViewController. Add a member variable called tracksAlbumId at the top so we can set it during the segue to this view controller. We also need another array of tuples to hold track information. Additionally, we get the name of the album so we can display it in the navigation item’s title.
var tracksAlbumId = -1
var albumTitle = ""
var tracks = [(String, String)]()
In the same viewDidLoad method, we’re going to setup our variables and connect to our database. We do not need as many variables since we only want the name, albumId for reference, and the length of the track. We also only need the Track table since it has the AlbumId foreign key we are going to use.
override func viewDidLoad() {
    super.viewDidLoad()
    self.navigationItem.title = albumTitle
    let albumId = Expression<Int>("AlbumId")
    let name = Expression<String>("Name")
    let time = Expression<Int>("Milliseconds")

    let tracksTable = Table("Track")

    let path = Bundle.main.path(forResource: "chinook", ofType: "sqlite")!
    do {
        let db = try Connection(path, readonly: true)

    } catch {
        print("Cannot connect to database!")
    }
}
Now let’s think about the query we want to make. We want to retrieve the name and length of all tracks from the Track table whose AlbumId matches the one we were given. We also want to sort the tracks alphabetically by name as well. We can formulate this query in SQLite.swift like this.
let query = tracksTable.select([name, time]).filter(albumId == tracksAlbumId).order(name)
Now we can execute it and format the output.
override func viewDidLoad() {
    super.viewDidLoad()
    let albumId = Expression<Int>("AlbumId")
    let name = Expression<String>("Name")
    let time = Expression<Int>("Milliseconds")

    let tracksTable = Table("Track")

    let query = tracksTable.select([name, time]).filter(albumId == tracksAlbumId).order(name)

    let path = Bundle.main.path(forResource: "chinook", ofType: "sqlite")!
    do {
        let db = try Connection(path, readonly: true)
        for row in try db.prepare(query) {
            let seconds = row[time] / 1000
            tracks.append((row[name], "\(seconds / 60):\(seconds % 60)"))
        }
    } catch {
        print("Cannot connect to database!")
    }
}
For duration, we convert milliseconds into seconds first. Then we take the integer division, which truncates, to figure out how many minutes. Finally we perform a modulo to determine how many seconds are left over. Now that we have this information, filling out the UITableView methods is easy!
override func tableView(_ tableView: UITableView, numberOfRowsInSection section: Int) -> Int {
    return tracks.count
}

override func tableView(_ tableView: UITableView, cellForRowAt indexPath: IndexPath) -> UITableViewCell {
    let cell = tableView.dequeueReusableCell(withIdentifier: "trackReuseIdentifier", for: indexPath)
    let (trackName, duration) = tracks[indexPath.row]
    cell.textLabel?.text = trackName
    cell.detailTextLabel?.text = duration
    return cell
}
We’re almost finished! We need to make sure we pass the ID of the selected album in AlbumViewController. Let’s head back there and use the prepare:for segue method.
override func prepare(for segue: UIStoryboardSegue, sender: Any?) {
    let trackViewController = segue.destination as? TrackViewController
    let album = albums[tableView.indexPathForSelectedRow!.row]
    trackViewController?.tracksAlbumId = album.albumId
    trackViewController?.albumTitle = album.albumTitle
}
Here we get the destination view controller and the album information for the row that was selected. We set the tracksAlbumId of the destination view controller to be the albumId of the selected row.
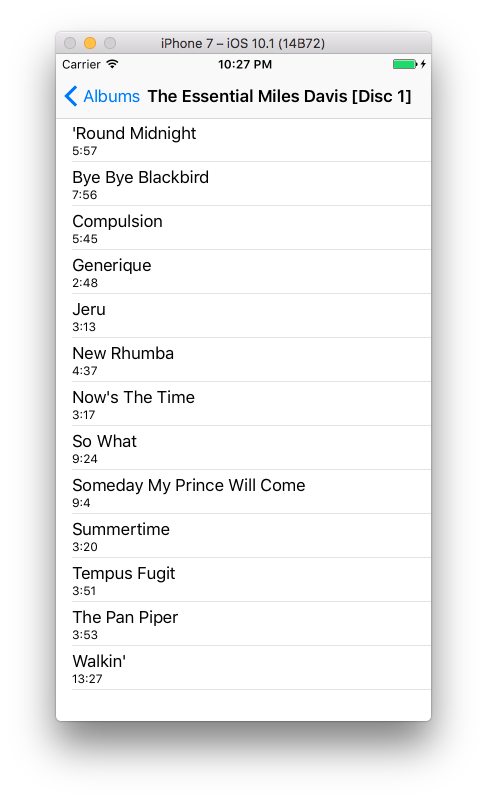
Now let’s run our app! We can see our list of albums! When we press on an album, we get the tracks that are on that album and their durations!


