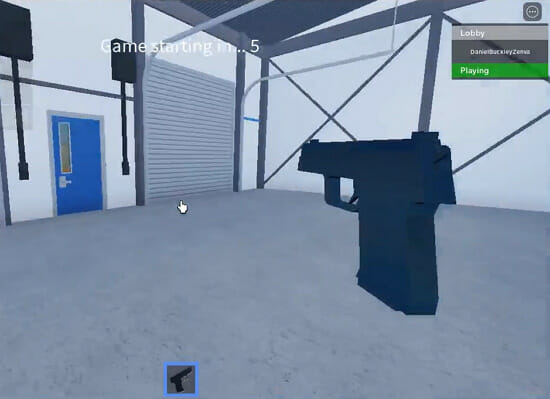
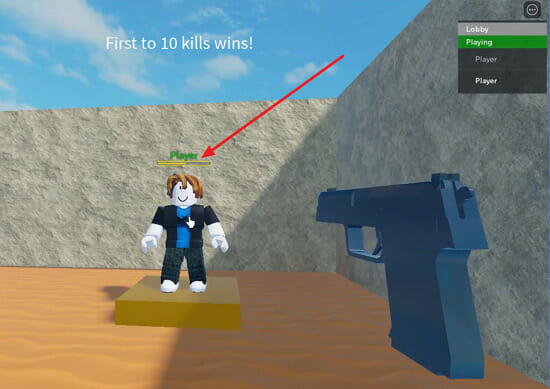
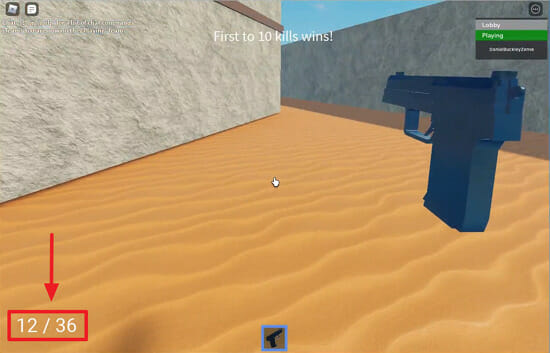
In this comprehensive guide, we will delve into the topic of creating player shooting mechanics in a first-person game using Roblox Studio. The tutorial will be split into three parts. In the first part, we will set up the first-person perspective and create the player’s gun. In the second part, we will implement the shooting functionality, and finally, in the third part, we will work on the reload mechanism. You are expected to be familiar with the following concepts:
- Basic knowledge of Roblox Studio
- Fundamentals of Lua scripting
Table of contents
Project Files
While you will be creating your own Roblox project, we have included a full copy of the scripts used in this tutorial. The download link is given below for your reference.
Download Project Files Here
Player Shooting – Part 1
In this lesson, we’re going to set up our players.
We want our players to have a first-person view.
To do this, select the StarterPlayer folder in the Explorer window. Now, in the Properties window, change the CameraMode attribute from ‘Classic‘ to ‘LockFirstPerson‘ and the CameraMaxZoomDistance to 0.5:

Creating the Player’s Gun
In the Toolbox, search for a handgun. Drag and drop the ‘Working Handgun‘ to the game view:

You’ll see there’s a bunch of stuff included in the handgun model in the Explorer window:

Delete all of them except the Handle one. Inside Handle, leave only the sound effects:

Setting the GunScript
Click on Handgun and create a new LocalScript called ‘GunScript‘.
Let’s define the variables we’re going to need:
-- Parts
local Weapon = script.Parent
local Camera = workspace.CurrentCamera

-- Sound Effects
local ShootSFX = Weapon.Handle.FireSound
local ReloadSFX = Weapon.Handle.Reload

-- Replicated Storage
local ReplicatedStorage = game.ReplicatedStorage
local DamagePlayerEvent = ReplicatedStorage:WaitForChild("DamagePlayer")
We have our weapon (the handgun itself) and the camera which in our case is the target (as the player is shooting at whatever is in the spot they are hovering their mouse over). Regarding sound effects, we have both shooting and reloading sounds.
Now, we need to add a damage player event.
Create a RemoteEvent under ReplicatedStorage called ‘DamagePlayer‘. A remote event allows the server to communicate with the client. In our game, the players will inform the server of who they shot and how much damage was dealt to that player.
Next, we’ll specify the damage of each shot, the current and reserved ammo, and whether the player can shoot (false when reloading the gun):
-- Damage
local Damage = 25

-- Ammo
local CurMagAmmo = 12
local MagSize = 12
local ReserveAmmo = 48

local CanShoot = true
Following, when the player equips the weapon, we’re going to call an event:
local function Shoot (mouse)

end

local function Reload ()

end

Weapon.Equipped:Connect(function(mouse)

    mouse.Button1Down:Connect(function()

        if CanShoot == true then
            if CurMagAmmo > 0 then
                Shoot(mouse)
            elseif ReserveAmmo > 0 then
                Reload()
            end
        end

    end)

end)
In this event, we’re listening to when the player shoots. If they have enough ammo, the shot is accounted for. Otherwise, we reload the gun.
In the next lesson, we’ll be working on our Shoot function so we’re able to deal damage to players.
Player Shooting – Part 2
In this lesson, we’re going to continue implementing our GunScript by setting up the functionality for the player to shoot.
Our Shoot function is called whenever the left mouse button is clicked.
The first thing we’re going to do is play the sound effect of the shot, then update the current amount of bullets in the magazine. After that, we get the target object of our shot to verify if it’s one of the other players (thus, the humanoid child of our target):
local function Shoot (mouse)

    -- play the SFX
    ShootSFX:Play()

    CurMagAmmo -= 1

    local target = mouse.Target
    local humanoid = nil

    -- get the target humanoid
    if target.Parent:FindFirstChild("Humanoid") then
        humanoid = target.Parent:FindFirstChild("Humanoid")
    elseif target.Parent.Parent:FindFirstChild("Humanoid") then
        humanoid = target.Parent.Parent:FindFirstChild("Humanoid")
    end

end
If our bullet catches the other player in their hair or other accessories then we need to access the Parent of the Parent of our target instead to be able to get hold of the actual humanoid object.
Now that we got our target humanoid, we need to tell the server that we’ve hit them:
local function Shoot (mouse)

    -- play the SFX
    ShootSFX:Play()

    CurMagAmmo -= 1

    local target = mouse.Target
    local humanoid = nil

    -- get the target humanoid
    if target.Parent:FindFirstChild("Humanoid") then
        humanoid = target.Parent:FindFirstChild("Humanoid")
    elseif target.Parent.Parent:FindFirstChild("Humanoid") then
        humanoid = target.Parent.Parent:FindFirstChild("Humanoid")
    end

    if humanoid then
        local hitPlayer = game.Players:GetPlayerFromCharacter(humanoid.Parent)
        DamagePlayerEvent:FireServer(hitPlayer, Damage)
    end

    UpdateAmmoText()

end
Note that the humanoid or character is the physical player in our game world while the player we’re accessing here is the data associated with that humanoid.
We then store the player information in the hitPlayer variable and we fire our DamagePlayerEvent sending the hitPlayer alongside the damage dealt as parameters.
Setting up the DamagePlayerEvent
Create a new script under ServerScriptService in the Explorer window and call it ‘PlayerDamageManager‘.
We’re basically only going to listen to the DamagePlayerEvent:
local DamagePlayerEvent = game.ReplicatedStorage.DamagePlayer

DamagePlayerEvent.OnServerEvent:Connect(function(attacker, hitPlayer, damage)
  hitPlayer.Character.Humanoid:TakeDamage(damage)
end)
Here, we need to add in as the first parameter the attacker (namely the player that is calling this event) as it is automatically passed on when we call FireServer in the client.
Testing our Shooting Function
Let’s move our Handgun object from the Workspace to the StarterPack folder so every player will start the game with a gun inside their inventory:


By pressing 1 we equip it and we can shoot until we’re out of bullets.
Let’s test our game with multiple players now.
Go to the Test tab and select 2 players:

We see that we’re able to deal damage to the other player as expected:

Later on, we’ll add a scoreboard to our game so the players can keep track of their kills, deaths, and how many times they’ve won.
Did you come across any errors in this tutorial? Please let us know by completing this form and we’ll look into it!

FINAL DAYS: Unlock coding courses in Unity, Godot, Unreal, Python and more.
Player Shooting – Part 3
In this lesson, we’ll implement the reloading of the gun in our game.
The Reload function is called when we’re out of ammo but we have some reserve ammo left.
local function Reload ()

    CanShoot = false

    ReloadSFX:Play()
    wait(ReloadSFX.TimeLength)

    CanShoot = true

    CurMagAmmo = MagSize
    ReserveAmmo -= MagSize

end
We start by setting CanShoot to false, we play the sound effect and put the function on wait until the reload sound finishes. We then set CanShoot to true again, refill the player’s magazine and subtract from their reserve ammo.
Now, we need to create a new ScreenGui under the StartGui folder to show us how much ammo we currently have:

Name it ‘AmmoGui‘.
Next, create a TextLabel under AmmoGui called ‘AmmoText‘. Set its BackgroundTransparency property to 1. We can increase the TextSize to ‘50‘ and the TextColor3 to white. Change its TextAlignment to ‘Left‘ as well.
We can also set the Text to say something like “12/100” for now:

Let us actually move our AmmoGui to the ReplicatedStorage service, instead of leaving it in the StarterGui:

We’re doing that because we’ll be creating and destroying this Gui whenever we equip and unequip our gun.
Go back to the GunScript and create a local player GUI:
-- GUI
local PlayerGui = game.Players.LocalPlayer:WaitForChild("PlayerGui")
local AmmoText = nil
Let’s set our AmmoText in the Weapon.Equipped event:
Weapon.Equipped:Connect(function(mouse)

    local guiClone = game.ReplicatedStorage.AmmoGui:Clone()
    guiClone.Parent = PlayerGui
    AmmoText = guiClone.AmmoText

    UpdateAmmoText()

    mouse.Button1Down:Connect(function()

        if CanShoot == true then
            if CurMagAmmo > 0 then
                Shoot(mouse)
            elseif ReserveAmmo > 0 then
                Reload()
            end
        end

    end)

end)
Our UpdateAmmoText function concatenates the current ammo in the magazine to the reserve ammo into a string that is set to our AmmoText as follows:
local function UpdateAmmoText ()

    if AmmoText ~= nil then
        AmmoText.Text = CurMagAmmo .. " / " .. ReserveAmmo
    end

end
With the UpdateAmmoText function implemented, add an UpdateAmmoText() call at the end of both Shoot and Reload functions.
Finally, we need to destroy our ammoGui when unequipping the gun:
Weapon.Unequipped:Connect(function()
    PlayerGui.AmmoGui:Destroy()
end)
By testing it, we see that the text is correctly updating the number of bullets we have left:

Conclusion
Congratulations! You have now successfully created a first-person shooter mechanic in a Roblox game. Through this tutorial, you have learned how to create a basic shooting mechanism, introduce ammunition concepts, and even include a reloading feature. You’ve taken a big step towards creating a more immersive and engaging gaming experience for your players!
The concepts, ideas, and scripting techniques that you’ve learned here can be widely applied across various projects – not just limited to shooter games. Always remember to keep experimenting and refining your code. By doing so, you can achieve the exact gameplay that you envision. We hope that this tutorial has been insightful and fun.
We look forward to seeing what incredible games you will create using Roblox Studio!
Want to learn more? Try our complete MAKE A FIRST-PERSON SHOOTER WITH ROBLOX course.


