You can access the full course here: Shader Graph for Beginners
Table of contents
Creating the Project
When creating a new Unity project, there’s two things we need to keep in mind.
- Set the Unity Version to 2019 (the more recent the better)
- Set the Template to Lightweight RP
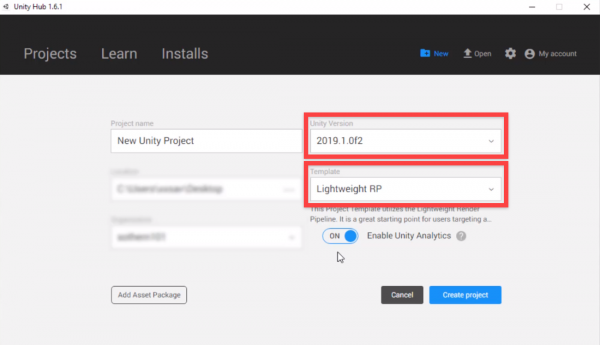
Project Setup
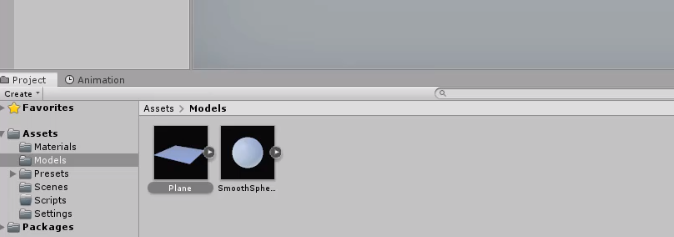
When you get into Unity, delete the Example Assets as we’ll be creating our own. Then, create a new folder called Models and drag in the two custom models we have (included in the Course Files).
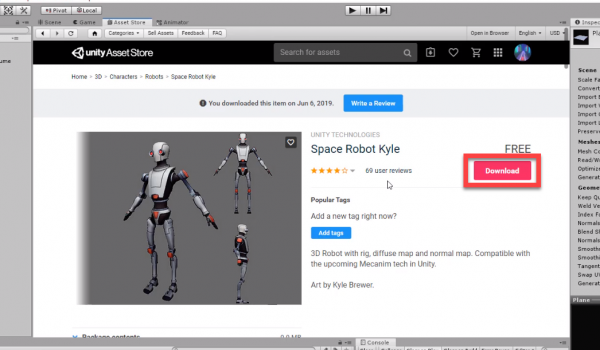
To show off most of our shaders, we’ll be using a model from the Asset Store. Open up the Asset Store window (Window > Asset Store) and search for Space Robot Kyle. Download and import it into Unity.
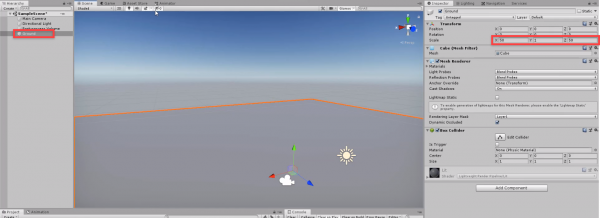
Let’s now build a basic scene. Create a new cube object called Ground.
- Set the Scale to 50, 1, 50
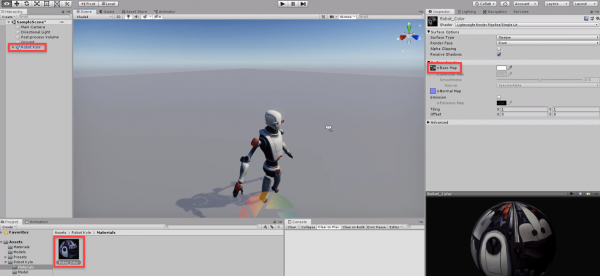
Then, drag in the Robot Kyle model. We need to change the material since it may be bright pink for you.
- Select the Robot_Color material
- Set the Shader to Lightweight Render Pipeline/Simple Lit
- Set the Base Map to the robot texture
In the next lesson, we’ll begin to look at the Shader Graph.
Transcript
Hey everyone, and welcome to the first lesson of the course. In this lesson, we’re going to go over how to set up ShaderGraph, and import all the assets we need for this course.
So, first of all, I’m here in the Unity Hub, and what I want to do is create a new project, by clicking on the new button up here. When we’re here, what we want to do is make sure our Unity version is 2018, or 2019. The higher the version the better, but ShaderGraph is not supported on many of the much earlier versions. So, I’m going to select 2019.1.
And what we also want to do is make sure that the template down here is either the lightweight render pipeline, or the high-definition render pipeline. So, I’m going to select lightweight render pipeline here, and that’s just because the ShaderGraph isn’t supported across every thing with Unity at the moment. So, I’m going to select lightweight render pipeline, here. I’m going to rename our project to ShaderGraph Course, and then I’m going to click on the “Create New Project” button.
All right, here we are inside of Unity, and you should see a scene, something like this. This is the default lightweight render pipeline, basic sample scene, which just shows off the graphics for that pipeline. So, what we’re going to do now is actually delete the example assets here, as we won’t be needing them, we’ll be creating our own assets and our own materials for the shaders that we then, later on, create. So, we’ll delete the example assets down there.
And while we’re at it, to make our file size a bit smaller, we can also delete the example assets folder down here, which just contains all of the models, materials and shaders for this example scene, so we can just delete that folder right there. We can also go into the materials folder, we need to keep the sky box, as this is a pretty good sky box, so we’ll keep this one. We can keep pre-sets. We can also then delete the simple camera control script inside of our scripts folder, here. And, we can delete tutorial info, here. We can delete tutorial info, here. And we can delete the “read me” asset, right here, so just delete that as well.
And that is our project files pretty much set up and ready to go. The first thing we need to do is import some of the models that we are going to be using with our shaders. So, I’m going to create a new folder here, and I’m going to call this one our models. And inside of here, I’m going to be dragging in two custom-made models, and one pre-made model that is on the asset store.
So, first of all, we have the smooth sphere. And this is just a sphere that is fairly smooth, and has quite a lot of vertices on it. That is going to be useful for when we create the warping sphere, our shader, so it can show much better how the sphere warps, without having to worry about it looking too blocky, okay? So, this is also included inside of the project files for the course, so you can download them.
And we are then going to drag in the plane, which is another asset, it’s basically a grid with a bunch of miniature faces on this. And that is it for the custom models. Now, we also need to download another model, and this is actually on the assets store. And really for this, you can actually download whatever model you have. If you already have models that you want to use, with these shaders, then feel free to use it on those. But, for us, just as an example to show off the various different shaders, we are going to import a model from the asset store.
So, let’s go on there. And there are many free models on the assets store, but we are going to use Unity’s Robot Kyle, which is a part of their Unity Technology’s publisher page. So, we’ll go up here, and what we want to search for is going to just be Robot Kyle. Here we go, Space Robot Kyle, we can download that, into our project. And then we should be good to go. Yup, we want all of these things here, so click on import. And it shouldn’t take too long, and then we should have our… Inside our assets folder, we should have the Robot Kyle model right here.
All right, so, before we go off, we are going to actually set up our basic scene. We’re going to set out a floor, and then we’ll also bring in the robot model, ready to have shaders applied to it. So, I’m going to just right click here in the hierarchy, go 3D object, cube, and this is just going to be our ground. I’m going to increase the scale to 50 by 1 by 50, so it’s a pretty large area, here.
To also view the sky box in the scene view, we can actually click on this button right here, and it will toggle all the various effects. Fog, sky box, and yeah, you can also, if you click on this little arrow here next to it, you can toggle, on and off, the individual options as well. But we want all of them on, to get the best visual appearance, because we are working with shaders. And yeah, we will have it like that.
Now what we can do is bring in our models, so I’m going to go to the Robot Kyle model folder here. Go into the model folder and just drag in the model, like so. There’s no material applied to it right now, so that’s why it is pink. So, we can go to the Robot Kyle material folder, and I’m actually just going to drag on the robot color, which actually doesn’t work because there’s no texture on it, so…
And to fix this, we can select the material, go up to the inspector here where we can select the shader, and I am going to open this up here, and select lightweight render pipeline, simple lit, and this should open it up, like so. And we should then be able to go onto base map, here, click on the little circle there, and select our robot_colormaterial. We can then change the actual color here to white. And if we look here in the scene, we now have our robot model with the basic texture.
We’re, of course, not going to have this material applied to the model, we’re going to have our own custom model applied later on, but this is just to set-up the model, set-up everything we need, and that is about it.
So, in the next lesson, we are going to go over the basics of ShaderGraph, how to get it open, how to create a new shader, and just a basic overview of the structure of the tool, how to use it, how to connect things together, and how to then create a material with that shader. So, I’ll see y’all in the next lesson.
Interested in continuing? Check out the full Shader Graph for Beginners course, which is part of our Unity Game Development Mini-Degree.
