A quick way to make games feel more personal is to let players make their characters. In his Unity avatar guide, we’ll find out how easy that is to do with UMA.
You can access the full course here: Game Character Customization with UMA
Table of contents
Creating our First Unity Avatar with UMA
Let’s start creating our Unity avatar – with the first step being getting the Unity Multipurpose Avatar System (UMA) into our project.
Important Note Before Starting
Since the release of this video, the UMA package has been updated, and the version from the Asset Store may not work correctly with the current Unity version. In this course, you will learn how to setup a character creation scene where you will be able to customize characters that we can then use in games. In order to do this we will be using a free asset that you can download from the Unity Asset Store. This free asset is called the Unity Multipurpose Avatar System or UMA for short.
You can download the newest version here: https://github.com/umasteeringgroup/UMA/releases/tag/2.8rc2
What is UMA?
Let’s first establish what UMA is – as it is a third-party package for Unity.
- Unity Multipurpose Avatar System.
- Makes it easy to customize player models.
- Recipes, DNA, Wardrobe.
- Very Poweful.
- And it’s free!
In other words, UMA games make character creation a breeze for adding customization to your Unity avatars.
What we are Doing
So, what can we do with UMA games? We’ll be looking at the following:
- Customizing DNA attributes.
- Changing race and gender.
- Changing slots like hair.
- Changing skin color.
- And everything in between!


First Steps for Making Unity Avatars with UMA
Let’s get started with our Unity avatar customization. This will take the following steps:
- Download and import UMA.
- Create a base UMA character.
- Check out included wardrobes.
- Rotate character with mouse.
So let’s first start with our UMA game Unity project.
Create a new Unity project, you can name this project “Character Customizer” the template can be left at 3D, and you will not need Unity Analytics enabled for this project:

Make sure you are using the Default Unity layout if you want your Unity editor to look the same as the one being used in this guide:

Head to the Asset Store and do a search for “UMA 2″, add the package to your assets, and then Import the asset to your project:

When the Import Unity Package window pops up make sure you have All the files checked for Import:

This import may take a while, as it’s a large asset.
Once you have the asset imported create a 3D plane for the character we are going to be creating to stand on. After all, we probably don’t want our Unity avatar just floating in space:

Rename the Plane to “Ground.” Adjust the size of the Ground to be 10 on the X and Z axes:

We have a plane for our Unity avatar to stand on, so let’s start working with UMA itself.
Navigate to the UMA folder>Getting Started folder. This is where you can go if you want to just get a quick start, and this is exactly what we want to do here (though for your future UMA games, you’ll want to become familiar with the other folders in UMA for file structure reasons):

Select and drag out the UMA DCS prefab object (DCS stands for Dynamic Character System) this will give us the libraries, all the things our UMA character is going to need to work. Just drag the prefab into the Scene. Anytime that you have a UMA character you are going to want and need this in your Scene. Drag out the UMA Dynamic Character Avatar prefab into the Scene as well, this will allow us to actually build out our character.

Set the rotation on the Y axis to be 0. We have a placeholder model in our Scene view, but in the game view there will be nothing there, this is because our characters are going to be built at run time. There is a Dynamic Character Avatar script that is attached to the UMA Avatar in the Scene. We have the Active Race set to HumanMale in the Inspector:

If we hit the Play button in the editor you will see a naked male character standing out on the ground:

Making some adjustments to the Main Camera according to the screenshot below, so that we are looking at the Unity avatar from the direction that we want to see him from:

Now if you navigate to the WardrobeRecipes folder located in the HumanMale folder you will see some recipes that come by default with UMA:

You can select the Hood and drag and drop it onto the Wardrobe field in the Inspector:

You can just drag and drop these recipes onto the field in the Inspector and clothe your character:

If you decide you do not want one of the clothing recipes you have chosen you can just click the X icon next to the item in the list:

Just give the Unity avatar character some default clothes and feel free to choose whatever you want. We will be using the HumanMaleDCS Active Race:

Set the ActiveRace to the HumanFemaleDCS and add some clothes that will work with a female. You can navigate to the HumanFemale folder>Recipes>WardrobeRecipes>HumanFemale:

You can just add a shirt and some pants:

If you hit the Play button you will see that the female character is now clothed:

The character has no hair currently, but we can give her some default hair. The hairstyles work the same way the clothing did for our Unity avatar, you just select one and drag and drop it into the wardrobe field in the Inspector window:

Now if we hit the Play button you will see her hair now:

And if we change back to the HumanMaleDCS for the Active Race we will see our bald guy that is ready to go to the beach:

He is currently bald so what we will do is give him a beard and some hair:

These will be our base UMA characters we will be working with throughout this Unity avatar tutorial in making our UMA game setup.
Creating the UI
In this section of our Unity avatar tutorial, we will begin setting up the UI that will eventually interact with the DNA of the characters.
Setting Up the UI
- Add sliders for controlling DNA attributes.
- Add buttons for changing slots.
- Add a create/save button.
Set up the Unity editor so that you have a split view like in the screenshot below:

We want to have the character stand off a bit to the left, so that we can have the menu off to the right of the character:

We can now begin creating the UI elements. First we need to create a UI>Panel. Hit the “F” key or double click on the Panel in the Hierarchy to focus on it, and set the view to 2D mode:

And we just want the panel to be off to the right of where the character will be in the game view. Adjust the panel Alpha so its no longer transparent by adjusting the Alpha setting on the color picker to be 255. Set the color of the panel to be a dark gray:

Rename the Panel to “Customizer” and inside this we are going to section it off to make customizing our Unity avatar easier. At the top we will have a title that is going to be for the sliders, we will have a section for hair, and a few options for skin color. We will be using TextMeshPro for the text on the UI elements, so with the Customizer selected in the Hierarchy>Right Click>TextMeshPro-Text. You will need to import the TMP Essentials:

Position the text to be in the top left corner of the panel, Adjust the font size to be 24. The text input field can be “Character Settings.”

Now if you hit the Play button you should see something very similar to this:

Add a vertical layout group component to the Customizer. This will allow us to cascade our elements down the panel. We will have padding of 10 units all the way around. The spacing will be 10. Add a UI>TextMeshPro-Text to the Customizer, and it should snap into place like so:

Change the text to say “Height.” We will create a height slider for this, and change the font size to 20.

Create an empty game object inside the Customizer. This is going to act as the parent for our individual slider and labels, so what we can do is take the Height text and fit it inside the empty game object:

With the empty game object selected in the Hierarchy create a UI>Slider, position it inside the empty game object like so:

We can start the slider Value at 0.5:

Duplicate the empty game object so we have a total of 3 sliders now, and we will change the text on them. On the vertical layout group that is a component of the Customizer change it so that the Height isn’t controlled:

Now we can set the Height to 50 on each one of the Individual game objects:

The second slider text can be changed from Height to “Muscle.” The third slider text can be changed from Height to “Weight.” Set the Spacing value on the Customizer vertical layout group to be 5. The next thing will be buttons for our hair selections. That way we can just click on the buttons to change the hair.
Create a UI>Panel inside the Customizer. Add a horizontal layout group to the Panel we just created. Create two buttons inside the Panel. Set the Height Width for Child Controls Size and Child Force Expand:

Set the padding on the Panel to be 5 all the way around. Add one more button to the panel as well:

We now need to set the text for the three buttons, the three buttons are listed below (of course, you can expand your Unity avatar selections later):
- “Hair A”
- “Hair B”
- “Hair C”
Duplicate the Hair Panel and position it below the Hair Panel. This will be for Skin Color. Add a fourth button to the Skin Color panel. Change the text on the Skin color buttons to be 1, 2, 3, and 4. Now we need to add a label to the Skin Color Panel; select the Customizer object in the Hierarchy and add a TextMeshPro-Text element to it.
Place the text above the Skin Color Panel. The font size will be 20, and the text will say “Skin Color.”

The next thing we need to do is add a UI>Button to the Canvas. Position this button to be near where the center of the Player will be, anchor it to the bottom center:

Set the text on the button so it says “Save Character” and the color of the button should be a blue color, the actual text on the button needs to be set to white. We now need to make some more adjustments to the Main Camera:

And that’s our UI setup, prepared to work with UMA in making a custom Unity avatar. Of course, this is just the surface level of making a character customizer. You can make it as powerful or as simple as you want – it all depends on how much Unity you know, and what your overall game design is.
Transcript Part 1
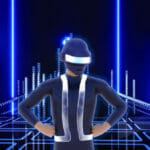
Hey guys. My name is Austin Gregory, and in this Unity avatar course, I’m going to teach you how to create a cool little custom character creator like you see here based on the UMA tool on the Asset Store, the Unity Multipurpose Avatar tool. It’s completely free on the Asset Store and it allows us to build and define specific character changes and settings to customize and build our very own player characters for our games.
Now I picked a few of the attributes to change in this course, but you can do so much with this in terms of Unity avatars. You can change nose shape, eye shape, the size of the head, the shape of the head, hand size, foot size, colors of everything, outfits, whatever armor they’re wearing, if they’re wearing gloves or boots or anything like that, and you can also extend it with all your very own models and gear and equipment, whatever you may have.
So if we look here, what I decided to go with is height, muscle, weight, hair, skin color, and then our sex. We can change from male to female. It can also be based on a race. Maybe you have orcs. Maybe you have goblins, that kind of thing. It all works just fine here. So let’s just make a little guy. I’ll make a guy. I’ll make him a little buff, thin him down a bit, give him some hair, and we’ll make him green like the Hulk.
And if I were to save this character/Unity avatar out, then I can use him whenever I’d like. We’re gonna learn how to use him in a different world. So we can load the data in. Or I can also make a female, and I can just do the same things here, define the same stuff, change her hair up, change her skin color, and I can save that character out.
Now if I were to jump over into my other scene where I’m loading in this data simply by looking at some text that we are saving, I’ll load that data in and you’ll see my character is ready to go in my game. And we can run around and just have a good time as this pink lady.
We’ll be learning a lot in this course for Unity avatars, guys. My name is Austin Gregory and I will see you there.
Transcript Part 2
Hey guys, my name is Austin Gregory, and in this Unity avatar course I am going to teach you how to set up a character creation scene where we’re going to be able to customize characters that we can then use in our games.
To do this we’re gonna be using a free asset on the Asset Store called the Unity Multipurpose Avatar system or U-M-A or UMA for short. This is going to allow us to customize lots of things about these Unity avatars from DNA which is going to allow us to control facial features like the pointiness of the nose, the angle of the ears, the sharpness of the jaw.
We’re going to be able to control the height and the muscle build, the fat, the weight, skin color, foot size, all kinds of things like that. And there’s a lot of details there that we’re not going to control ourselves, but once you understand how to manipulate the height of the character, you can manipulate any of those details. Once you understand how to manipulate the weight of the character, you can manipulate any of those details as they’re all done in the exact same way. UMA allows us to do this very easily.
It also allows us to define a wardrobe for our characters/Unity avatars and the handles, equipping and matching that very easily for us. Now for all of these we’re going to be using the built-in Wardrobe Recipes that’s going to allow us to get up and go in pretty fast using the clothes they provide for us. But if you are an artist or if you just like to learn this kind of stuff, you can definitely build your own based on the UMA model to allow you to add any kind of equipment or outfits or clothing that you would like for your UMA, and it will work with the system that we’re developing here.
As long as you build it in accordance with the UMA system itself, you’ll be able to stretch out the muscles and change the height and so on, and your outfits will match and will conform to the models. This as I said is free and it’s very very powerful. And we’re not gonna touch on a fraction of what it can do, but we’re going to use the stuff that we need to be able to create a simple little customizer like you see right here that I built.
It’s a very simple tool, and these sliders here, you could change any data you would like about the Unity avatar. I chose height and muscle and weight for my example. That’s what we’re gonna be doing for this.
The height just controls the height of the character there. The muscle is separated into two parts, you have upper muscle and lower muscle. I have just combined them into one setting. And the weight as well, upper weight and lower weight. We’re changing the sex of the character, male and female. And we have a few hair presets that I added, depending on the sex, you’ll get different hair options.
And then we have some skin color that may be a little alien but that was easier than trying to match actual human skin. So we’re changing the hair by changing some of the slots on our UMA. And the slots are what you can see here with like these gloves, how they kinda conform to the hands of the character, or if you had some shoes on or these pants in fact are a part of the slot system, and the shirt and this robe here.
But it’s a very complex system that’s easy to use that allows you to, let’s say you created this robe, you could say once this robe is equipped, hide the torso and hide the legs, that kinda thing. It’s a very simple slot system that handles obscuring and showing certain details based on the settings that you give it. So the first steps we’ll have to do is download and import UMA, obviously we need the tool, just right off the Asset Store.
We’re gonna create a base UMA character, maybe throw on some clothes so they’re not naked, and then we’re going to set up a simple system to allow us to click on that character and rotate them kinda like you would get in a character creator if you’re familiar with an MMO or just any RPG where that has a character created and you can rotate the character around in.
And then in the next Unity avatar lesson we’re gonna set up the UI to get started building our characters. So let’s jump over to Unity here, and what I’m gonna do is I’m gonna create from the Unity Hub 1.3 here, I’m gonna create a new Unity project, and I’m gonna call it Character Customizer. It’s gonna be a 3D template. I don’t need analytics enabled for this because I don’t care. And I’m gonna click Create project.
So here we are in the default Unity layout. If you want to get to this point, go up to Layout and go to Default so we have the exact same setup here. And the first thing I wanna do is go to the Asset Store, and let me connect here, I’m simply gonna search for UMA or U-M-A, Unity Multipurpose Avatar.
It’s gonna be UMA, and there’s a bunch of options that pop up here but these are not what we want for this. There’s a bunch of tools on the Asset Store that are built and developed to work specifically with UMA, this tool right here. There’s a bunch of characters, there’s a bunch of equipment and models that you can get that work directly with UMA.
And there’s even character controller integrations and all kinds of stuff because UMA is a very big tool. It is the best tool really on the market for what we’re trying to do with Unity avatars, and it’s free and open source, which we can’t go wrong with that. So I’m just gonna go here and I am going to just, if you don’t have it downloaded, make sure you download it, and then import it just like that. Now it’s gonna ask us what we want to import from all of these files and folders. We want everything in the UMA directory to be imported into our project.
And this may take a while as there’s a bunch of stuff that you are importing. Once we have UMA imported, we wanna keep it very simple first of all, so we can just get started by having a character that is controlled and owned by the UMA Character System.
So to do that, I’m just gonna go over to Scene here, and the first thing I wanna do is I wanna create a plane that our character is simply going to stand on. We need something to allow our player to stand in our game world. So we’ll just have a plane here, and I wanna call it Ground. And we’ll just make it a bit larger, maybe 10 on the x and z there. And in the Game view we just have a big white plane.
So what I wanna do now is I wanna place defaults-based UMA character. So we’re gonna go into the UMA folder, and I am gonna go to the Getting Started folder. This is where you can go whenever you just wanna get a quick start, and that’s exactly what we want to do. I need to drag out this UMA DCS prefab here, it’s Dynamic Character System. It gives us all the libraries, all the things our UMA character is going to need to work.
So we’ll just drag this into our Unity avatar scene. Anytime you have an UMA character that you’re working with, you’re gonna want this in your scene. And then I want to drag out this UMA Dynamic Character Avatar prefab that allows us to actually build our character. So I’m just gonna drag this into my scene.
Now what we get here, first of all I’m going to rotate this, zero on the y so we’re facing the correct direction there. We have a placeholder model in our Scene view, but in our Game view there’s nothing there, and that’s fine, that’s because our characters are gonna be built at runtime whenever we actually generate the character.
And the reason for that is there’s a lot of data that has to be loaded in that can only be loaded in whenever we’re actually running the game, that’s because if you make any customization changes, say, in our character creator, we wanna make sure that that’s loaded in whenever the game is loaded, so that we don’t even bother building the character before that point because all that data will be brought in at runtime.
So let’s see what this looks like now if I were to run this. If I look at my Dynamic Character Avatar Script which is on the Character Avatar that we created, we see that we have Active Race set to HumanMale. That’s fine for now, we’ll leave that. And we have a bunch of stuff here, right?
This is just a crazy amount of stuff to look at, but we’re not gonna worry about most of it especially for now. So if I just click Play, what happens. I see a naked guy standing way out there. I can see his bum from here. So let’s actually take and bring him back towards the camera. And in fact let’s bring the camera, and let’s look at him from the direction we wanna see him from here. Let me just bring the camera a little closer. There he is. And there’s our guy standing there.
So he’s naked, we don’t want him to be standing out here and getting too nippy, it looks cold out. So what I would like to do is if I were to go to my Character Avatar here, I see I have something called Default Wardrobe Recipes. Now the way UMA works with Unity avatars, we talked about this a bit, but we are building Wardrobe Recipes that act as the clothing or the equipment that will be scanned on to our character. So the way we can do this is we have some built-in Wardrobe Recipes that we can simply drag and drop up here to see how it works by default.
So to find these wardrobe recipes, we’re gonna go up to Content. We’re gonna go down to UMA_Examples. And then I’m gonna go on down here to HumanMale because we’re working with a guy. There’s also a female version for this. And I’m gonna go to Wardrobe Recipes. And we see all of these options in here.
These are just recipes that come by default with UMA, and again you can create your own, and there’s a ton of videos on how to create your own. It is a bit more in-depth than this is going to be as we’re just wanting to get a simple customizer in our game that you can then extend, right?
So we’re going to get the base in place here that allows you to build your characters, and then when you wanna go crazy and create your own clothing and your own equipment, there’s resources out there for you. But in this case what I wanna do is just give him some clothing, so I’m just gonna drag, we have a robe here, I can just drag this robe, drop it on the Wardrobe Recipes drop box there. That’s the hood. We can add the shoes. And then we can add the actual robe itself. There we go, we have some clothing.
Now what you’re seeing what’s happening here is I’m just adding it to a list that is under Default Wardrobe Recipes. If I don’t want the male robe, I could just hit the X and take it off, right? Pretty simple stuff. I can also say we’ll just give him some underwear maybe, just so he is covered up a bit there, or maybe just give him some shorts, take off that underwear. There we go, we have some shorts on him. And we also have a shirt here. These are just the built-in clothes.
You can actually do this at runtime, you can do this in our Character Creator that we’re gonna create for our Unity avatar. But we’re just gonna give them some default clothes so that they have some decency.
So what I wanna do now, notice when I stopped playing the game, that goes away, and that’s just because that’s how Unity works. We all know that that anything you do at runtime typically is not going to be saved. So what I wanna do is just give him some shorts and a shirt. They don’t match but that’s fine, at least he’s not naked. Now this is on the HumanMale. We also have HumanMaleDCS which is what we’re going to be using. It’s the Human Male Dynamic Character System.
So if I select that, my wardrobe is still there because it’s still HumanMale. And you’ll see male shorts works for HumanMale and HumanMaleDCS, but if I were to change my Active Race, which is a weird name, for the sex of the character, but it’s because you can create races for everything, maybe you wanna have an Orc race and you’ll have a male and female Orc, you maybe wanna have a unicorn race, you can have a male and female unicorn. I’m not sure what that would be.
But HumanFemaleDCS, now it says HumanMale and HumanMaleDCS wardrobe is still on her, but if we were to click Play, we will see, we see her standing faraway again, because we did all that in runtime, and she’s not wearing any clothes. So before we get up and close with her, what I wanna do is for the Female DCS, while these are already attached as the Default Wardrobe Recipes, I wanna add some clothes that work with a female.
So I’ll go to HumanFemale, and I’ll go to Recipes, Wardrobe Recipes, and I want HumanFemale. There’s a girl version too but we’re gonna go with this for our Unity avatar. Let’s give her some, we can put her in an underwear, or maybe we’ll just put her in a shirt and some pants. So now we have HumanFemaleDCS and HumanMaleDCS clothes on. So depending on which race that we have selected, you’ll choose which one can go on in that race. So we’ll click Play now as the female, and you’ll see that she’s wearing some clothes.
Now while we are here, let’s drag this back closer to the camera, and we’ll just rotate around again. Now we’ll change this whenever we actually do our simple little movement system a couple lessons from now, but for now we’ll just get up and closer to camera so we could see what’s going on. There she is, looking good.
She has no hair though. We can give her some default hair. We have FemaleHair1, 2 and 3 that come with this. These work just the same as the clothing as they count as perhaps a hat. You would have a hat, you have a hat of hair. We’ll give her the second option there.
And if I click Play, we will see that she has some hair on. But if we were to change this over to a HumanMaleDCS, Dynamic Character System here, we will see that he still is wearing whatever we gave him, he’s ready to go to the beach, but he’s bald. So I don’t mind him being bald, but what I would like to do is give him perhaps a beard of some sort and then we’ll give him some hair just like that.
So now he’s got a five o’clock shadow, and, well, he still has very little hair. Let’s give him, we’ll give him, he’ll be bald on top here. There we go. It looks pretty good. And if we get any closer, we can see what’s going on with this. Doing this at runtime so it won’t stick but it’s fine. There he is looking pretty good.
So that is going to be our base UMA model. These are the clothing that he’s gonna wear by default, and then we’re gonna create an editor that allows us to change his muscle definition, his height, his weight, maybe you wanna change things about his face, all that information is available to us.
And we’re gonna be doing that by adjusting DNA values. Look at all the stuff in here for Unity avatars. These are the stuff you get by default with the Default UMAs. If you’re creating your own characters and your own rigs and you follow a similar bone structure, you’ll be able to do the same stuff, or create your own.
Perhaps you have the unicorn, you wanna control the length of the horn. I don’t know why you’d wanna do that. But if you look in here, we can see, we can make, let’s just do, increase his arm length, increase the arm width, make him really really really bulky. We can change his ears, raise them up a bit, rotate them out, and increase the size of them. Make his, let’s see, make his head really small.
It’s fun to play around with this stuff. He has a little, he has a big thick neck. And he is not very muscular but he’s bulky and he has a little belly and he’s tall. These are the kind of stuff we can do in the editor and it’s all the same stuff. So if we were to edit this value right here, you would know how to edit any of the other values. So that’s what we’re gonna do in the next lesson guys.
We’re gonna set up the UI so we can start interacting directly with the DNA that we have for our character. My name is Austin and I will see you there.
Transcript Part 3
Hey guys, welcome back. In this Unity avatar lesson, we’re going to set up the UI that’s going to interact with the DNA eventually.
It’s going to be the next lesson in fact when we start interacting with the data. But in this lesson we’re gonna lay out the UI. So we’re gonna add some sliders that we saw in that the first presentation that’s going to allow us to control some of those DNA attributes that we were just messing with in the last lesson.
We’re going to add some buttons that allow us to change our hairstyle, to change our skin color, and just show you how you can do different things with different types of inputs. And with a couple different slots, and with some different data.
Then we’re going to create a button that will eventually represent the create character or the save character button that will allow us to actually generate the data that we can then load into another scene later on.
So we can have our character/Unity avatar in our game based on the character that we created. It’s gonna be pretty cool. So in Oom now what I want to do is first of all, let’s just do a split view here so we can see the game, and the actual scene view here. And I see where my character’s gonna be standing. And I want him to be standing a bit off to the left so we can have the menu on the right. I’ll just drag the camera to the right a bit. Probably something simple, you know, just like that.
If we make this into like a 16 by nine, we can see what it’s gonna look like on a wide screen, which most things would be. We’ll go off to the right a bit more, and we’ll come in a bit closer maybe. Maybe cut off a bit and do a little angle down. Just a wee bit. Even a little closer I think. And then just raise it up a bit. And you could put some work into this, to get it how you would like. But this looks pretty good to me. So with that, what I want to do now start creating some UI elements.
Now I’m going to first create a simple panel that’s going to allow me to position all my elements where I want them on the canvas. So I’ll create a new panel here. And I’m going to hit F or double click on the panel to center it in my frame. In fact, we’ll go into 2D mode so we can do that a bit easier.
And what I want to do is just create a panel that’s going to be off to the right of our character here. Just kind of floating out here. You know the kind of character creation screen that we’re going to be creating. The one that you see in most RPGs. Something very similar. And I don’t want this to be transparent. In fact, I just want it to be a darker color maybe. Up to you entirely how you want to do this.
That looks pretty good. And I’m just going to call this customizer. And Inside of this we’re going to kind of section it off. At the top we’re going to have a title that’s going to be for the sliders that we’re going to have here for our Unity avatar.
Then we’re going to have like a hair section that’s going to have a few options for hair. And then we’re going to have a few options for skin color. Which in my case I’m just going to have buttons, but in your case you could have images that would show you the color that you’re going to have if you’re going to click on that button or maybe just you know, have colored buttons to show you the kind of skin color that you would have.
So I’m going to create a UI text element or we could use TextMesh Pro here. In fact let’s use TextMesh Pro because it is a lot better and more efficient than the built in Unity Text. And it comes by default with Unity now. So all you have to do is actually select that, and you’ll get this window that says you have to import the essentials for TextMesh Pro to work. So we’ll go ahead and do that. It’ll just allow us to have crisper, more scalable text in our customizer here. We’re going to set this to be…
First of all, I don’t need the game view up for this. We’re just losing space there. We’re going to set this to be… Let’s make the panel not scale, I’m just going to anchor it to the right here. Because we want it to be a certain size, and not cause any issues here. And I’m going to grab this text element and we’re just going to drag it to the top left corner, make it about 20 in size, something like that. Maybe 24. And we’re just going to drag this up just like that. And I’m going to call this Character Settings.
That’s going to be the title for this panel. Look in the game view, that’s what you’ve got. Pretty cool and a decent start for our Unity avatar UI.
Now if I were to click play, we can kind of see where we stand here. There we go. So we have a guy standing here, then we’re going to have the options for the guy over here. Very cool. So the first thing I want to do in fact, is I want to make sure that we can organize this nicely, so we don’t just have elements flying all over the place.
So I’m going to add a vertical layout group. It’s going to allow us to just kind of cascade our elements down this panel. So we don’t have to worry about positioning each individual one. We’re gonna have padding of maybe 10 units all around the panel. And then we’re going to have spacing between individual elements at about 10 as well. I might change that as we go.
So now I want to take and add… If I were to go to UI, I can add text. And if I were to move it it’ll snap into the position that it should be in. Now I don’t like that kind of thing, where it’s going to be split among the total height of our panel. But the more elements we add, the better it’ll be spaced out. So we’ll just go with that for now – we can always come back and polish this for our Unity avatar later.
In fact, we don’t want to use regular text, we want to use TextMesh Pro text. And this is going to be height, because we’re going to create a height slider for this. And we’re going to set this to be about 20 in size.
Now what I would like to do here, is I would like to create an empty object inside of this that’s going to act as the parent for our individual slider and labels, because this is going to be a label pretty much for a slider. So if I were to take this text, add it to that game object, take that text then and make sure that it’s positioned inside of that, in a position that I like. And then take the game object here, and just make it fit inside of our element.
The reason we’re doing this is because we’re going to have a slider and a label together, and we don’t want it to look weird whenever we start having it fill out the panel using the vertical layout group.
And just show you how this would work, if I were to create inside of this new empty object a slider, I could position it where I want it inside of this object, but then this object itself will be positioned in the panel according to the layout. Which is exactly what we would want. So I can just resize this to make sense, and then just drag the slider down.
And I would in fact like to start this at .5, just to be in the middle. So we can see that it does work.
Now what I would do is I can just duplicate this, and there we go. That’s how you would do it, right. So the more I add, the more that’d fit in there.e Now if you don’t like that, what you can do… If you were to come in here and say that we wanted it not to control the size of the height of the elements, what I could do is each individual object that we now have, we could set a height of like 50 units on it and just snap it into place. And each one would have the same height.
And we’ll just have a nice little list of objects. Pretty cool. Maybe that’s too large. Not too sure, it’s probably fine.
So the second slider we’ll use it for the muscle of our Unity avatar. It’ll define our muscle attributes. Then our next slider we will use for weight. In fact, I think we should get rid of some of the spacing here. Make it like five. The next thing I want is a list of options for our hair. Just gonna be a couple buttons, maybe three buttons that allows us to click on them and change the hair that we’re using. Just all basic UI stuff that we’re doing here. Nothing specific to UMA at all.
So I’m going to create a UI panel inside of this panel. And you’ll see, where did we go there. We will set the height to be 50 and the width to be, well whatever the width should be if we were to actually go to customizer, child control size for the width there. Which means we’re going to get the full width of the panel no matter the size of the panel, which is what we want. Now if I were to take this I could say, maybe make it a 75 like that.
Now this is going to have it’s own layout inside of this panel. It’s going to allow us to add as many buttons as we want, and they will layout nicely in a row. So to do that we would use a horizontal layout group. Just like that. And inside of this we could create a button. Or go ahead and create a couple of buttons. And we’ll just snap them into place.
But that’s not what we want. We want them to be kind of square. So if I were to say 50 or it’s actually 75 tall isn’t it. So we’ll do 75 on the height there. Or we could go to the panel, and we could say the child controls width and height, right.
So we just have it fit the panel, no matter how many buttons that we have. And that allows us to also add some more padding so we can see the edge of the panel. And the spacing as well there. So then we could say this is hair A. And then this one is hair B. And then this one is hair C. Just like that, looks pretty good. And then we could add another panel below this one.
And notice the layout system that we have going on here makes is very easy to just add new elements, and they just fall in line. It’s pretty cool. This one is going to be skin color. We could add another button in fact. So we have four options for skin color, just to show you some difference. And I’ll say just one, two, three, and four. And I could add a label above this, so we know hey this is the skin color. And to do that, all I’d have to do is go to customized UI, TextMesh Pro text.
And in fact all these buttons are using the built-in Unity Text. I would recommend changing those to the TextMesh Pro. But since we’ve already done all this, I’m not going to worry about it (as it doesn’t affect our Unity avatar working one way or another). But you should go ahead and go through if you plan on using this in a game, making these TextMesh Pro elements inside of the buttons.
So I’ll just take this and place it above the panel. And notice the order in the hierarchy affects the order of the layout. Pretty cool. So I’ll just take and resize this. Make it 24 so it matches the character settings. Actually we’ll make it match the 20 of our individual labels. That makes more sense. So we’ll make it be 20, and then we’ll just fit it just like that. And this will say skin color. There we go. So that’s going to be our customizer.
Now these are the attributes that I decided to use. Again, there’s like a hundred built in attributes that you can individually change, and all the wardrobe changes you can make, and you can make any kind of skin colors you would like. I’m just going to choose four random colors for mine. And you can have tabs of different settings, if you think of how Skyrim does it, or how World of Warcraft would do something similar. Or maybe a more advanced MMO than World of Warcraft.
Alright it’s just a lot of possible attributes that you can change using the exact same system we have set up here for our Unity avatar. But of course we can’t go over everything, that would take us forever. So if we click play now, we can just see what it kind of looks like. Got our dude standing here, and we can control these sliders, and they can change his hair and the skin color. Except we can’t yet. We’ll do that in the next lesson.
But the last thing I want to do in this lesson is I want to add a button UI button. And I’m simply going to place this in the center of the player, at least around the center of the player. I expect him to be like right here. And I’m just going to anchor this to the bottom center. And this button is going to be save character. Or create character, whatever you’d like. And I’ll take the button and I’ll change the color of the button to be like a confirm color. So a nice blue, and then take the text color and make it white.
And in fact we’ll hold down control and shift, sorry alt and shift and drag our button out to a size that we’d like. And then increase the text size.
Again, in yours, you should probably use the TextMesh Pro here, instead of your built in text. But it is what it is for now. Click on play. And in fact, I want to move the camera over a bit, so we kind of line up a bit better with that.
So go out of 2D mode, double click on the camera until we find it here. We’ll zoom out a bit, go down a little bit, and then we’re going to go over a little bit. That looks pretty good. Maybe just a little bit more so we line up a bit better. And there we go.
So this is going to be the UI that we’re going to work with in the next lesson, whenever we start hooking up our UI elements to our DNA attributes and Unity avatar system. My name is Austin and I will see you in the next lesson.
Interested in continuing? Check out the full Game Character Customization with UMA course, which is part of our RPG Academy.